


Spot style you love, and do-it-yourself. That’s the mantra of blogger Jenni Radosevich of I SPY DIY. Once again, she’s partnered with Minwax® on a project sure to delight gardeners and DIY enthusiasts alike. Follow along as she takes you through the steps to makeover this lovely, vertical herb garden and create fun, stylish herb markers to keep track of them all.
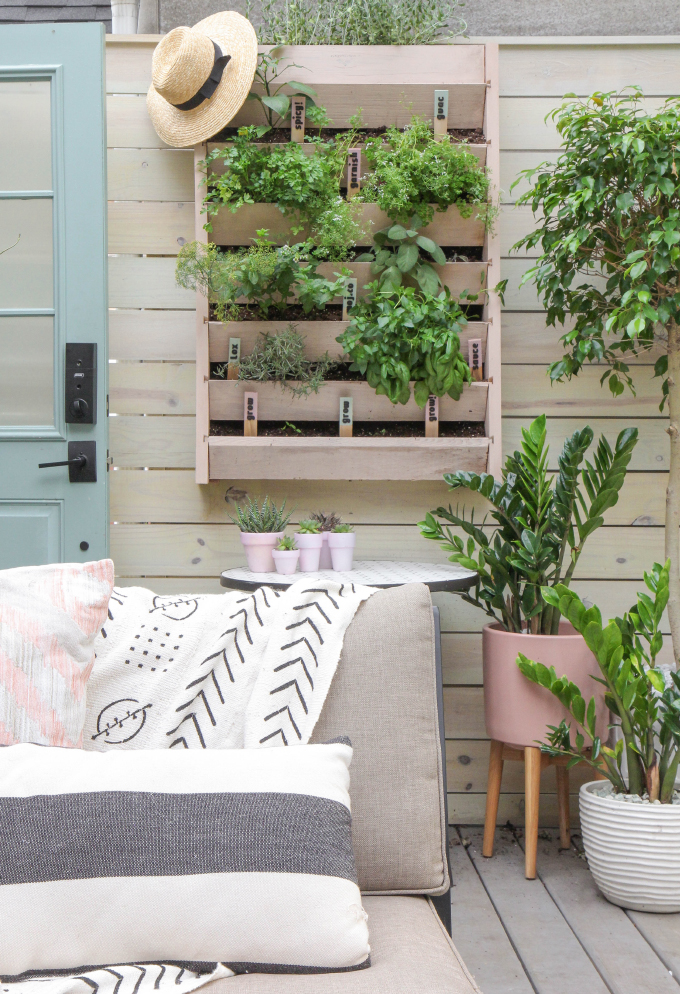
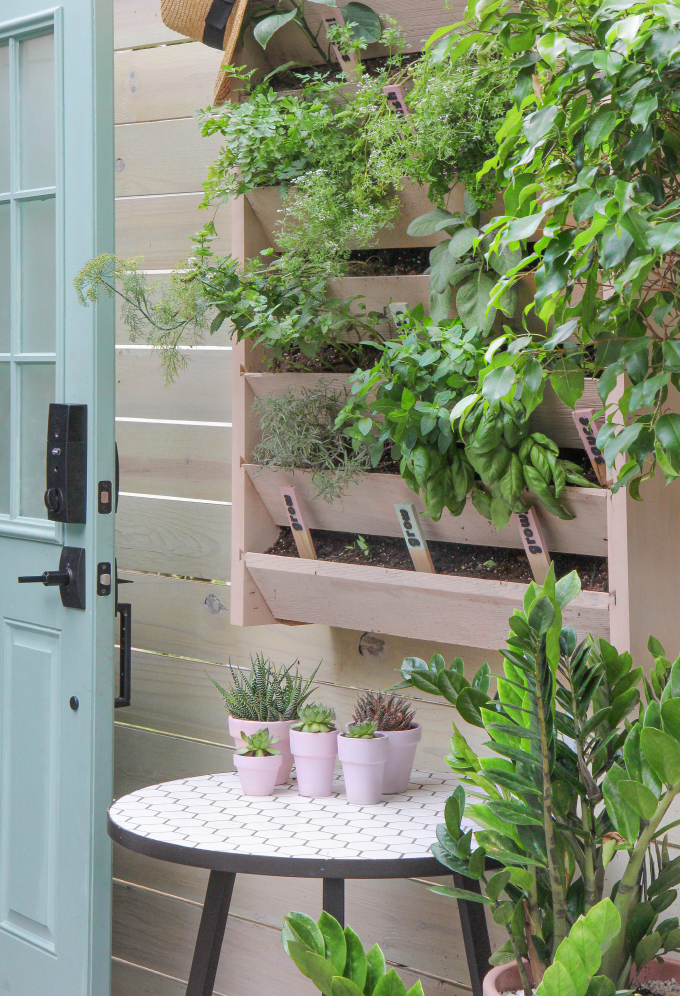
First up, thank you SO MUCH for all the love on my backyard makeover, we have been enjoying it every single day this Summer! I received a bunch of questions on the herb garden hanging on the wall, which has been one of favorite parts of the outdoor space. It’s been so fun to walk out my back door and grab the greens I need for guacamole or pasta sauce.
This vertical garden started off cedar, which did not match the grey deck and white washed fence, so I used Mixwax® Water Based Wood Stain and had the lovely people at the paint counters at Lowe’s tint it “Natural Linen.” It’s the perfect muted peach/pink that went perfectly with the color palette. Plus, the garden is pretty big, so the lighter color kept it from looking too overwhelming on the fence.

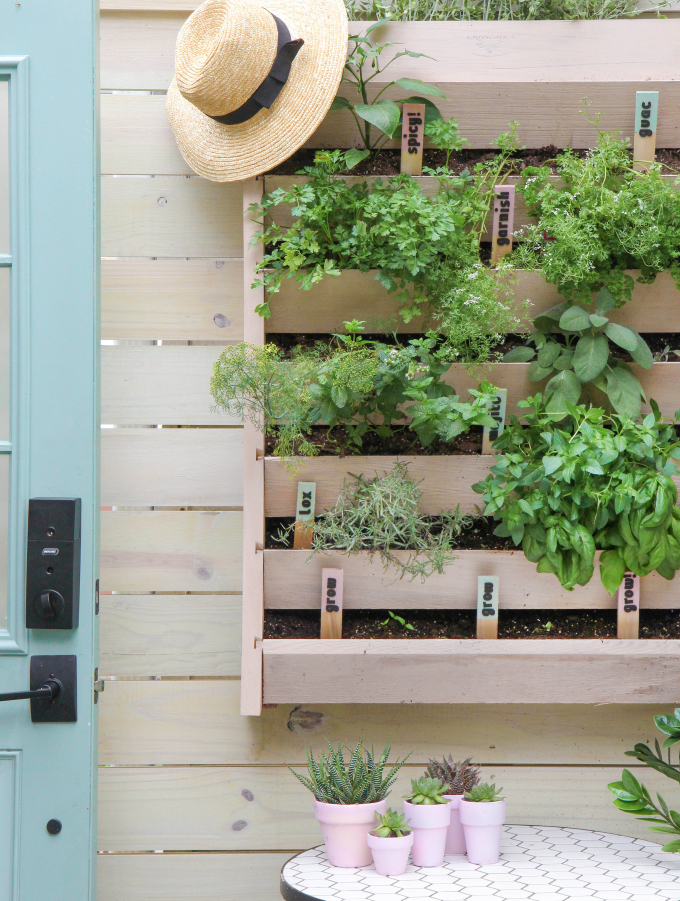
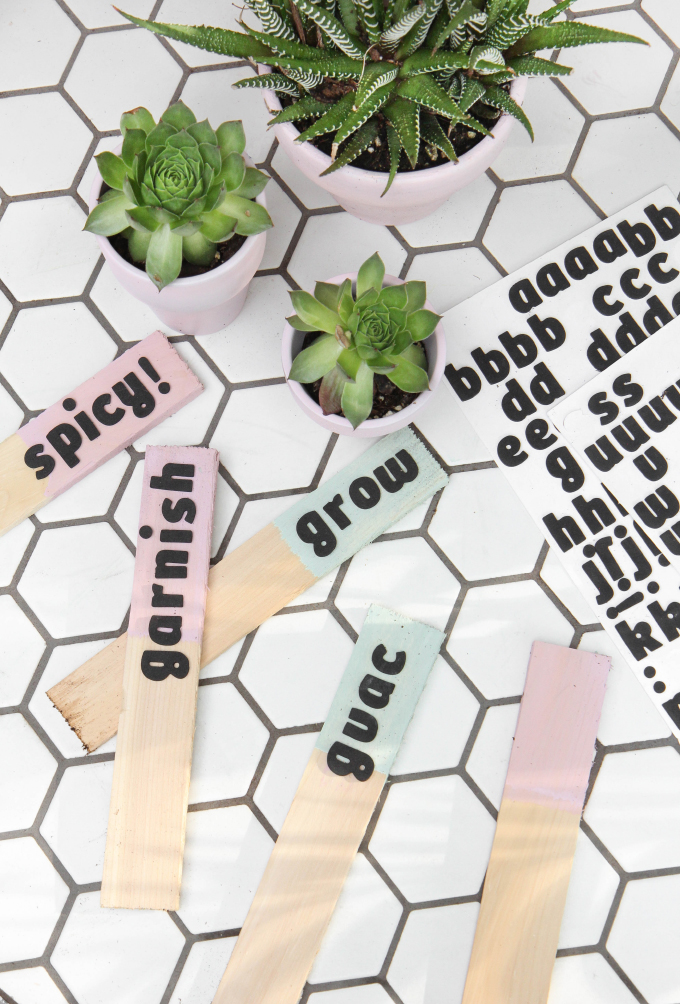
Next up, creating makers for the herbs: Instead of using their names, my family and I decided to have a little fun and brainstorm what we use each for and mark them that way, Spicy! = Jalapeños!

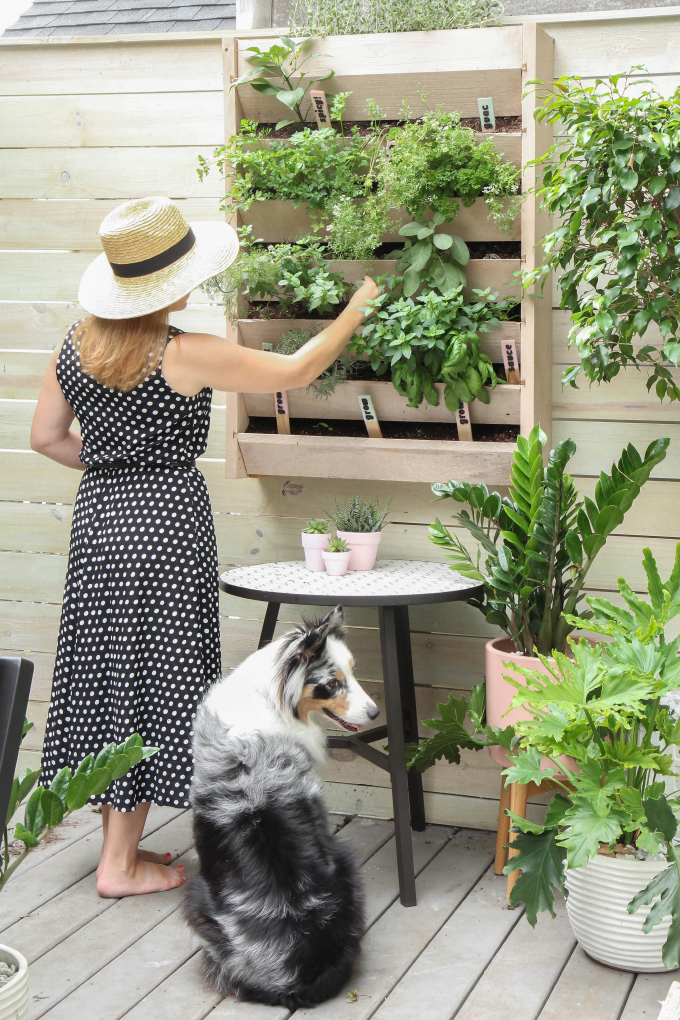
This whole backyard project has been so wonderful because my Sister and her husband moved in for the Summer and have helped me every step of the way. Now we get to sit back and enjoy it every day. The herb garden has been extra special, because my little Sister is a fantastic cook, and she had been teaching me her ways so I will keep up cooking after they move to Europe. It’s been so fun brainstorming recipes to use our fresh herbs in meals…and cocktails! #sisterbondingFTW
All the steps and supplies for the Herb garden and markers after the break!
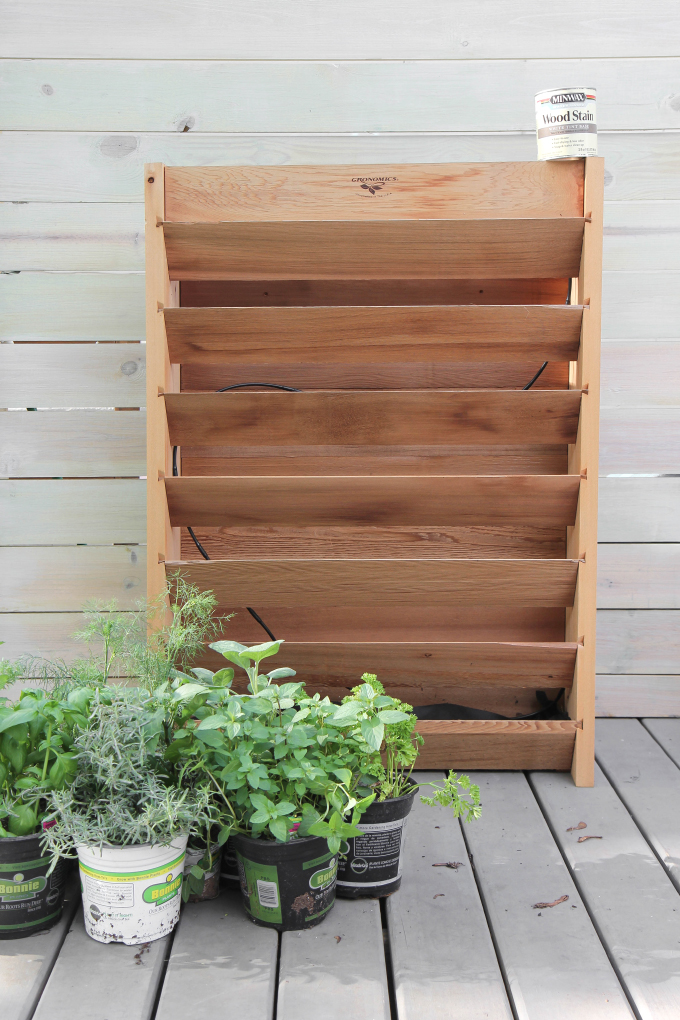
Start with this Unfinished Red Cedar Vertical Garden (Buy it here!) and apply Minwax® Water Based Pre-Stain Wood Conditioner.
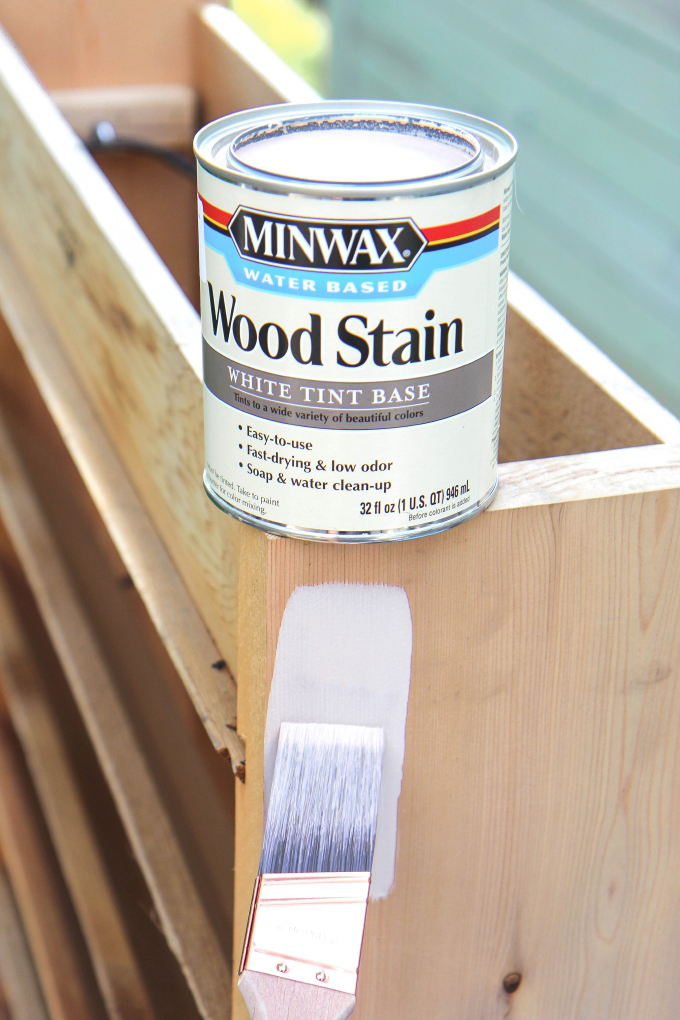
Stain with two coats of Minwax® Water Based Wood Stain in Natural Linen. Then finish with Minwax® Water Based Helmsman® Spar Urethane to protect the wood from the elements and make sure that your vertical garden stays beautiful!
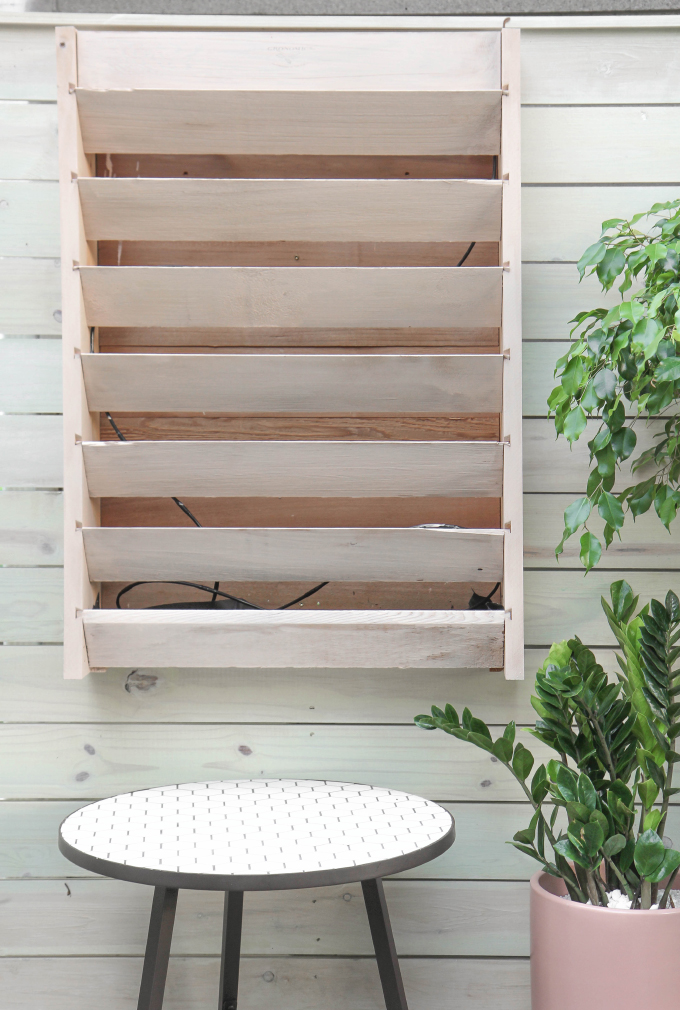
After it dried, I secure the backboards by drilling deck screws through the back into the frame, then I hung the garden by screwing the backboards into one of the supports on the fence. Make sure you are screwing into something that can support the weight of all the dirt.

Now plant the herbs! I poured potting soil into the open top, and then dug out space on each level for the herbs. Then watered once everything was planted.
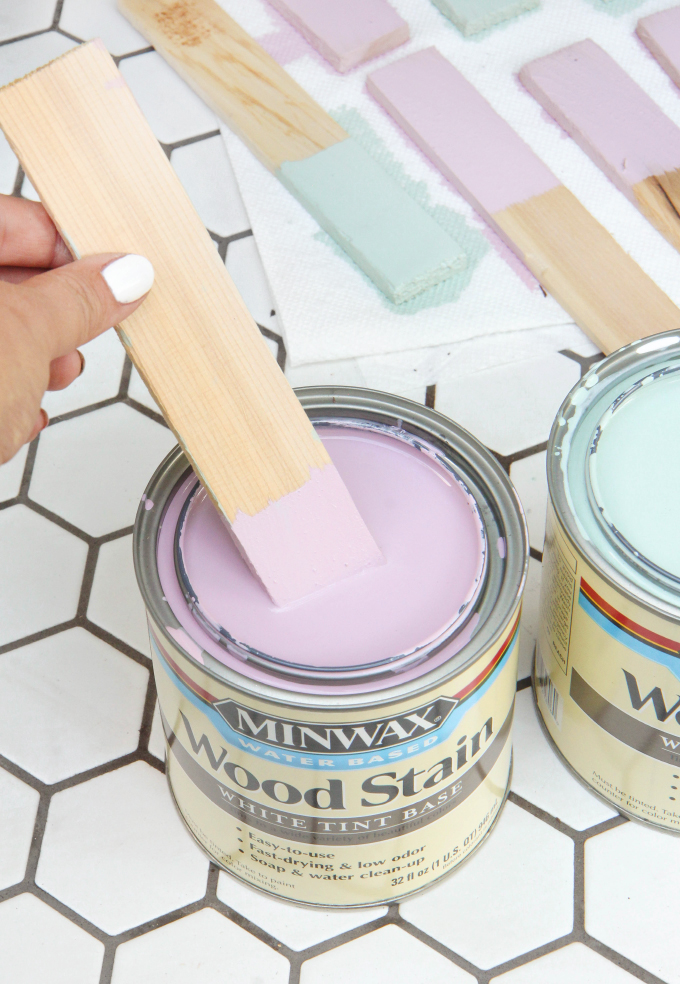
To make the markers, I bought inexpensive 8″ cedar shims and dipped them into Minwax® Water-Based Wood Stain in “Woodrose” and “Driftwood” (Prettiest colors ever!) which are made from the White Tint Base.
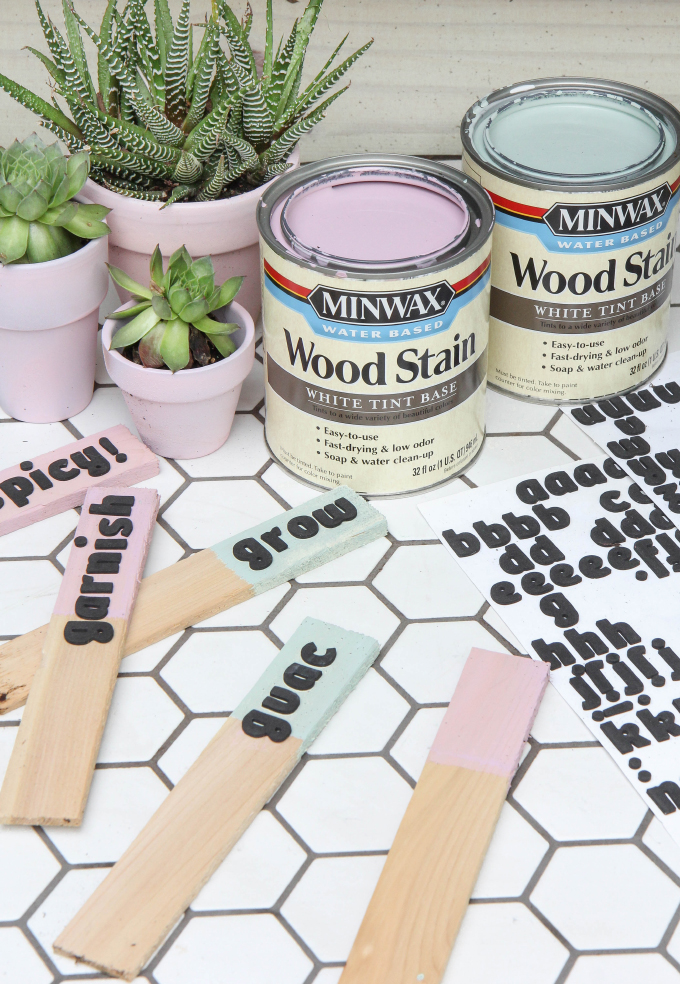
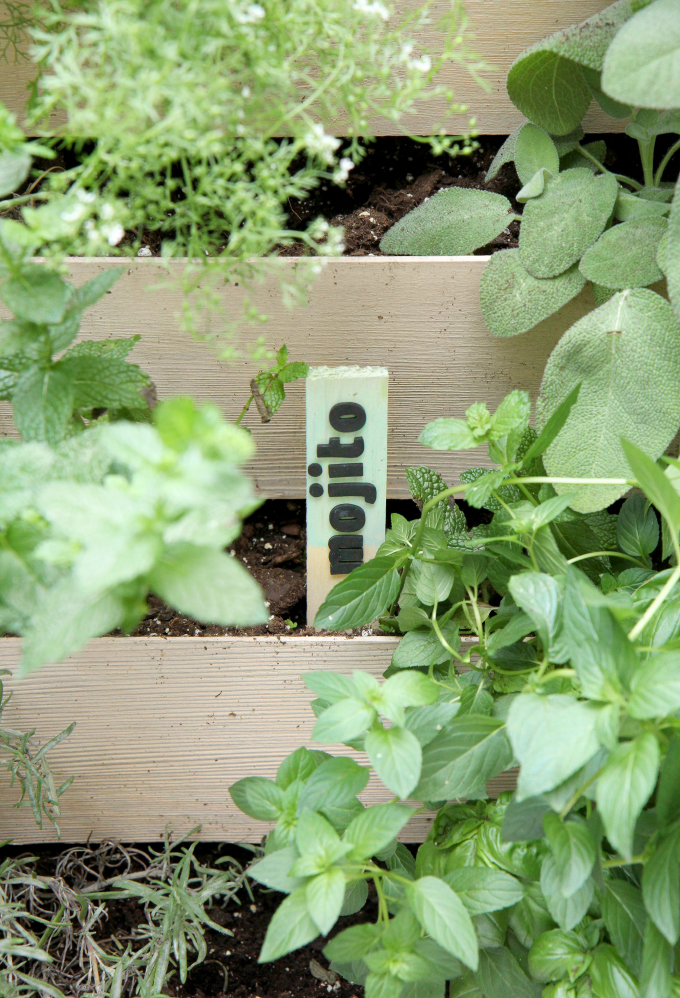
I wiped off any excess stain with a paper towel, and once they were dry I added letter stickers. Add the herb name or what you use each for!

Add your markers to the herb garden!
Thanks to my amazing sponsor, Minwax®, for partnering with me on this project!
From now through September 30th, take advantage of the Minwax® Fall Home Celebration rebate and save up to $15 on select Minwax® products that make and keep your floors beautiful. These specially formulated products enhance the natural beauty of your floors and can help protect them so they look great for years to come.
Be sure to check out Minwax’s new “Made With Love. Finished With Minwax.” campaign currently going on. The theme is ‘Find. Finish. Love.,’ celebrating the thrill of finding real wood pieces – sometimes in the least expected places – and the joy of making them into something we love.
For more of Jenni’s DIY projects. Check out her blog I SPY DIY and follow her on Facebook, Twitter, and Instagram.
