


Project Level: Intermediate
Who doesn’t love a cozy and warm bed to sleep in? With this project your furry friend can be comfortable and their bed will blend right into the aesthetic of your home. Made mostly of solid wood, it can be customized to fit your pup and the size of any pre-cut pad. Plus, it’s a great way to learn how to make table saw tongue-and-groove joints and recessed panels. You’ll also learn about biscuit journey, applying stain, and even learn how to use finishes to protect the wood while maintaining its beauty.

What Do You Need?
- Usual arsenal of tools
- Adjustable square
- Table saw
- Router table
- Band saw
- Drill with drum sander
- Orbital or finish sander
- 120-and 220-grit sandpaper
- Sanding block
- Wood glue
- Safety glasses
- Respirator
To see a full list of tools and supplies, as well as detailed instructions and plans, download the project guide.
Before You Begin
Make sure you follow the directions carefully while practicing and developing your safe working habits. Wear your safety goggles and the appropriate respirator when it is necessary.


For Your Dog Bed Project
We recommend using solid oak and hardwood veneer plywood. You can see the dog bed project guide for cutting plans and assembly steps. You can buy a dog mat or pad at most pet stores. We suggest looking at the Petco Orthopedic Dog Mat or another of your choosing at www.petco.com.
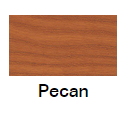
Recommended Finish: Minwax® PolyShades® (in Pecan)
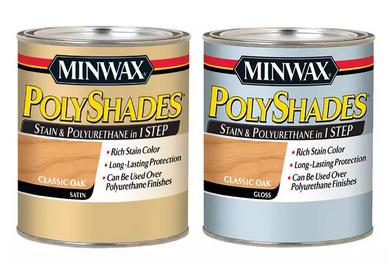
Before staining your dog bed, carefully sand all parts in the direction of the grain. Start with 120-grit paper and finish with 220-grit. Remove all the sanding dust. Make sure to apply Minwax® Pre-Stain Wood Conditioner and then you’re ready to stain and finish.
Apply Minwax® Polyshades® following the label directions. Make sure to use a good quality, natural-bristle brush suitable for use with polyurethane. Stir the can contents thoroughly before starting and periodically during your work session. Allow the first coat to dry at least 6 hours.
For the second coat, sand all surfaces lightly with very fine (000) steel wool. Remove all dust. Apply a second coat of Polyshades®, following the directions above. To achieve a deeper color, you may apply a third coat after 6 hours or longer, repeating the application directions above.
Useful Tips
- Always test the stains and finishes you have selected on a scrap of wood. On the back of the scrap, mark the stain/finish combination and the type of wood. This is important so you can make sure you like how the color will turn out before staining your frame.
- All stains and finishes should dry thoroughly between each coat. Keep in mind these drying times may vary depending on humidity, temperature and other climatic conditions.
- If you have some leftover stain or finish, wipe the can rim so that stain or finish in the rim won’t dry out and prevent the lid from forming a tight seal.
Want To Make Another?
Want to see other pet project?
Check out the dog feeding station project and the antique crate for pet toys by Bruce. Show off your finished work! Share photos of your step-by-step process or finished projects on our Facebook page.
