


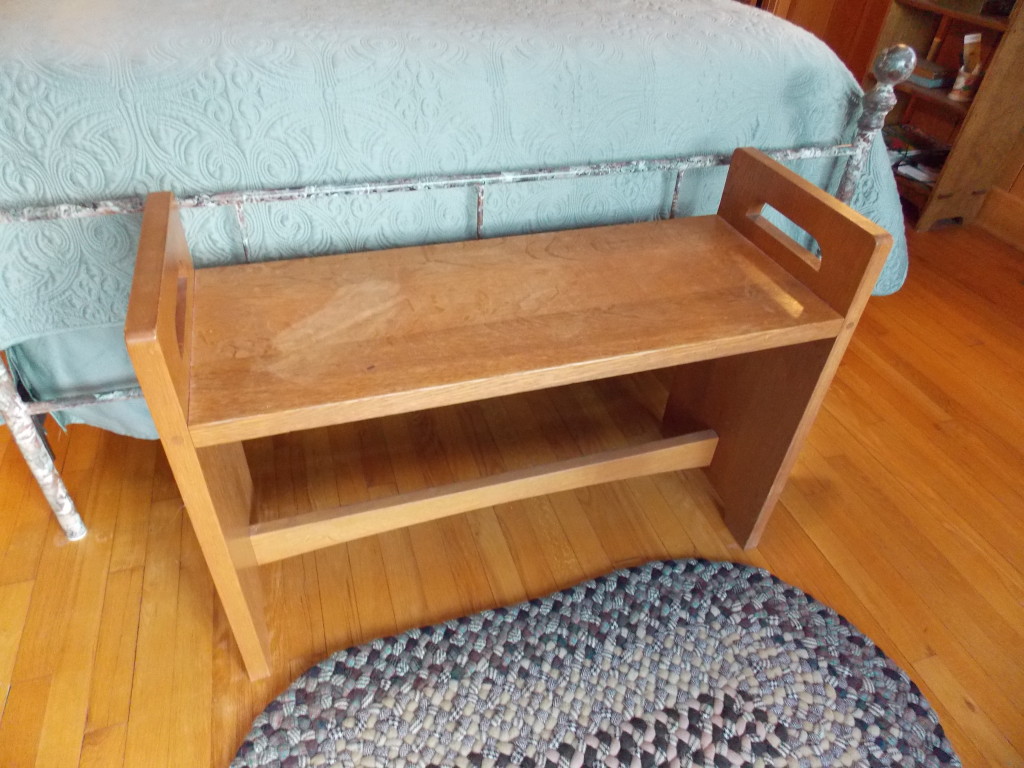
I should have known better. We live with antiques and I know that all old finishes, and, for that matter, a lot of new ones, can be marred by water. So why I left a wet towel laying on the oak bench at the foot of our bed is beyond reason — and any excuse. When I came home from work and saw where I had left the towel that morning, I knew what I was going to find under it: a large white mark.
 While I hope this never happens to you, if you want to see how I was able to restore the old finish — and make it even stronger – you can read more here.
Skill Level (1 – 5): 2
Supply List:
_____ Drop Cloth
_____ Disposable Gloves
_____ Rags
_____ #0000 Steel Wool (one piece)
_____ Minwax® Wipe-On Poly, Tung Oil, or Antique Oil

Step #1 – First, do no harm.
If you have had this happen to you, your first reaction may have been the most common: spray it with some furniture polish. Actually, this is the worst thing you can do. That white mark is moisture absorbed by the finish, which is a sure sign of a worn out finish. If you spray or coat it with a furniture wax or polish, you are trapping the moisture in the finish. Instead, do what we all love to hear: nothing. A shallow mark or ring may actually evaporate on its own over the course of a couple of dry weeks.

Step #2 – The hair dryer trick.
Once in a while the moisture will be so close to the top of the finish and so shallow that you can speed the evaporation process by carefully blowing warm air over it. But no heat guns or propane torches! Just use a hair dryer set on low heat and keep it four to six inches from the wood. You certainly don’t want to melt an old shellac finish.

Step #3 – But what about those home remedies?
I cannot say that I have tried them all, but each one has someone who swears it worked. And someone who swears it didn’t. Why the discrepancy? Because there are hundreds of different formulas for wood finishes, and each one may respond differently to a particular approach. Among those I have heard about are: kitty litter, mayonnaise, baking soda, salt & olive oil, vinegar & olive oil, fine ashes & olive oil, and non-gel toothpaste. The most aggressive I do not recommend: using a hot iron over a soft cloth, as this can actually scorch the finish.

Step #4 – Buffing out the white mark.
As you could tell by that previous list, many of the remedies rely on a buffing compound or grit to remove the mark. If the mark won’t evaporate, then I take the same approach, only with safer, easier products. I begin by pouring a liberal amount of Minwax® Wipe-On Poly, Minwax Tung Oil, or Minwax Antique Oil over the white mark.

Step # 5 – Moistening the steel wool.
Then I pour even more of the Wipe-On Poly (or one of the other oils) directly onto my pad of super-fine #0000 steel wool. It is critical to use plenty of oil, both as a lubricant to prevent scratches and to help restore the damaged finish.

Step #6 – Rubbing out the white mark.
I then gently and carefully begin buffing — always in the direction of the grain of the wood — applying very little pressure. The oil acts as a lubricant while the steel wool slowly releases the trapped moisture.
Quick Tip – If you ever begin to feel your steel wool ‘drag’ on the wood, stop and pour on more Wipe-On Poly. Otherwise the strands of steel wool may scratch the finish.

Step #7 – Getting an even sheen.
Since the Minwax® Wipe-On Poly or one of the other oils is going to leave a coat of protection and a fresh sheen on your furniture, you want to apply a thin coat of oil to the entire piece. Use a clean cloth or your pad of steel wool to rub the oil into the wood, then wipe off the excess oil. Set the piece aside and let it completely dry overnight.
Quick Tip: The safest way to dispose of any stain or finish rags is to place them in a metal can, then fill with water. Second choice: spread them out to dry in the sun. Never simply throw them in a garbage can, as a wadded rag can result in spontaneous combustion.

Finished!
Jasper claims he can still see just a faint outline of where the white mark had been, but I know that just one more light rubbing with my steel wool and Minwax® Wipe-On Poly will take care of it. Not only will the white mark be gone, but my bench will now have an even stronger, better looking finish.
While I can’t promise my wife I won’t leave a towel where it doesn’t belong, the new finish on our bench will go a long ways toward preventing any future white marks.
Good Luck!
Bruce
Final Note: Always be sure to follow the label directions when it comes to applying any wood finishing product.

Hi Bruce! I hope I will be able to meet you at SNAP this year! Thank you so much for this post! As I start to crave more natural wood finishes in my house, this most DEFINITELY is a helpful tutorial. My grandfather used your products and made his living as an antique dealer restoring furniture back to it’s original condition, and he had a real knack for making it look better than the original. This solves some of that mystery as to how he did it. Thanks again! (Pinning & spreading the word).