


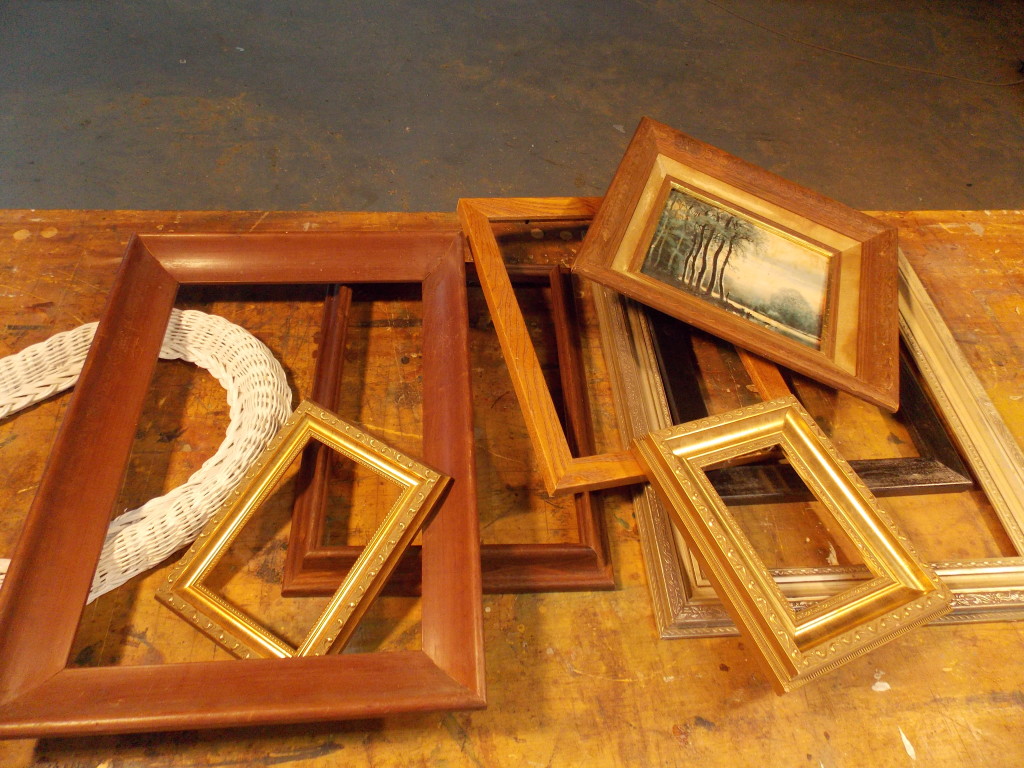
We’ve all seen them, perhaps even have a few of our own stuck away in the garage: old picture frames. Too good to throw away, but we know we’re probably not going to need them to hold our next Renoir. So, why not find a new use for them? If you want to see what I came up with for my wife, Leigh Ann, just keep reading!

If your old frame still has a print or glass in it, you will first want to turn it over and remove the small nails imbedded in the back, or gently bend back wire loops that may be holding things together.
Quick Tip: Always wear safety glasses in case one of the nails snaps off.

This frame’s finish was worn in several places, so I reached for my can of Minwax® Wipe-On Poly to bring the finish back to life. Just using a rag, I rubbed on a coat of Wipe-On Poly, then set it aside for a few hours to dry.
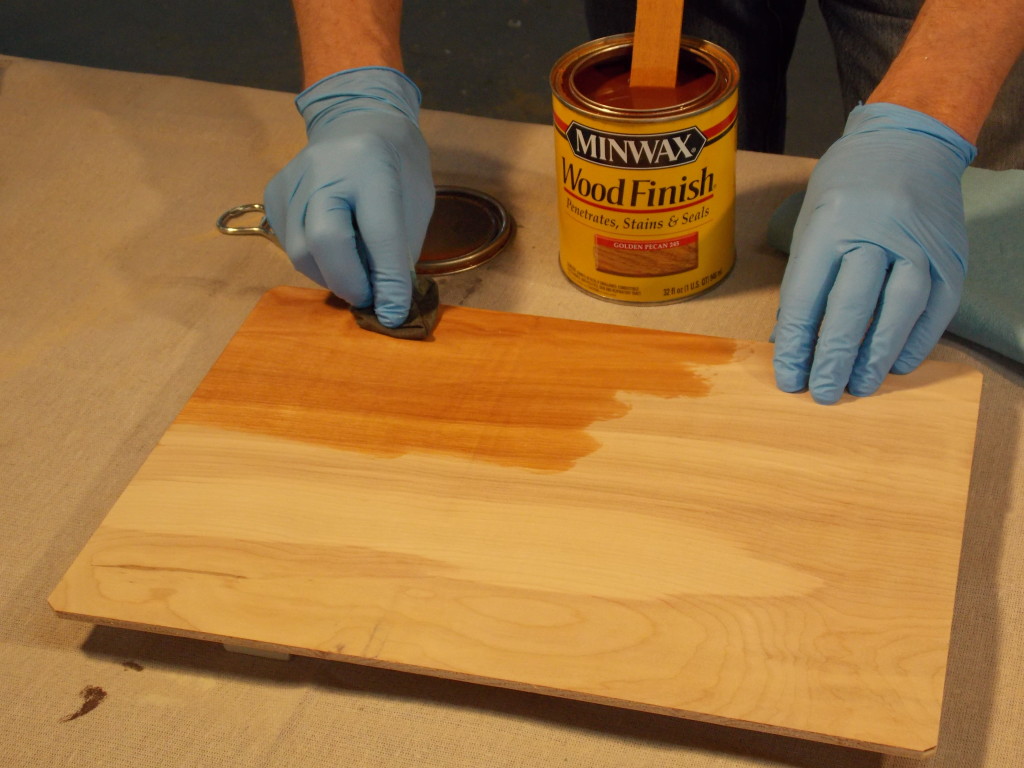
I then selected a piece of inexpensive ¼-inch birch plywood that would be both the backing and my display board. After giving it a light sanding and wiping off the dust, I applied a coat of “Golden Pecan” Minwax® Wood Finish stain to bring out the grain.
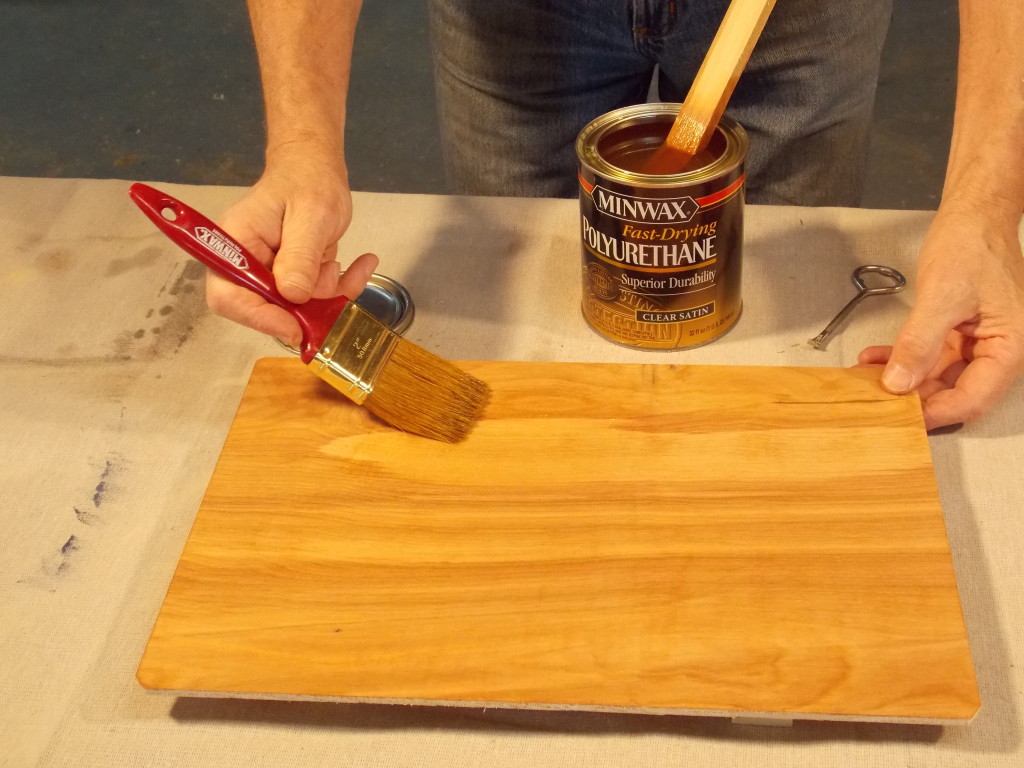
After the Wood Finish has dried (generally about 8 hours), I protected it with a coat of clear satin Minwax® Fast-Drying Polyurethane applied with a natural bristle brush. I let my first coat dry 4-6 hours, then sanded it lightly with #220-grit sandpaper, wiped off the dust, and brushed on a second coat.
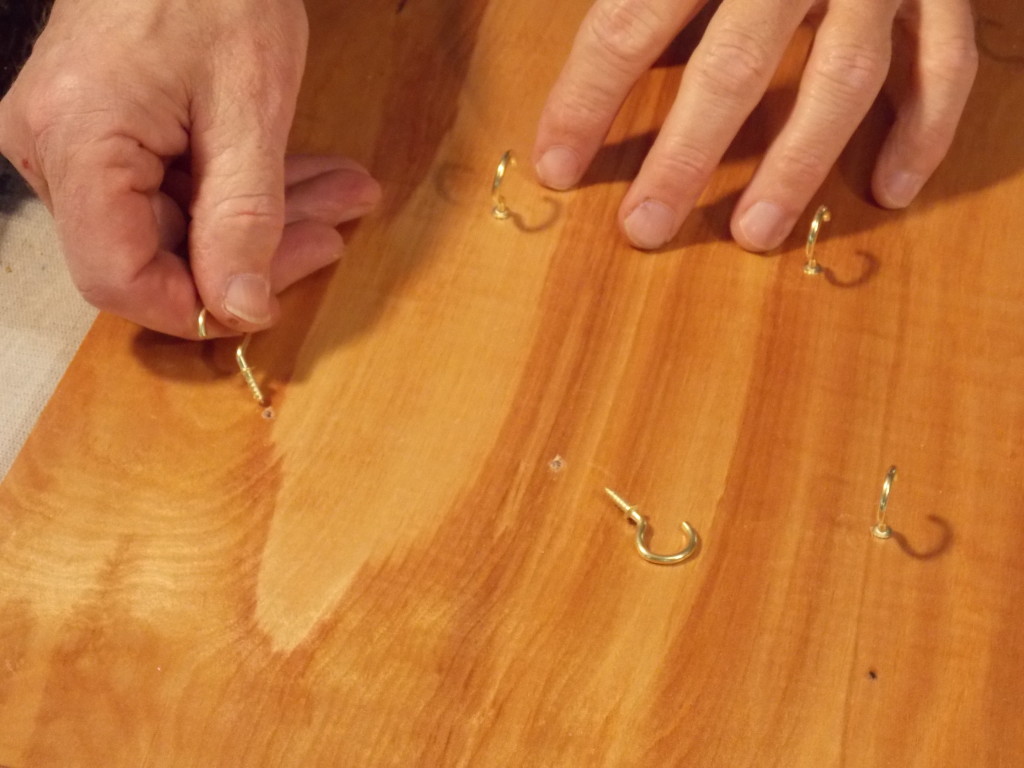
Once it had dried, I added brass cup hooks to my backing. See where this is going?
Quick Tip: Rather than a drill, just use a small nail to punch a pilot hole for your threaded hooks.
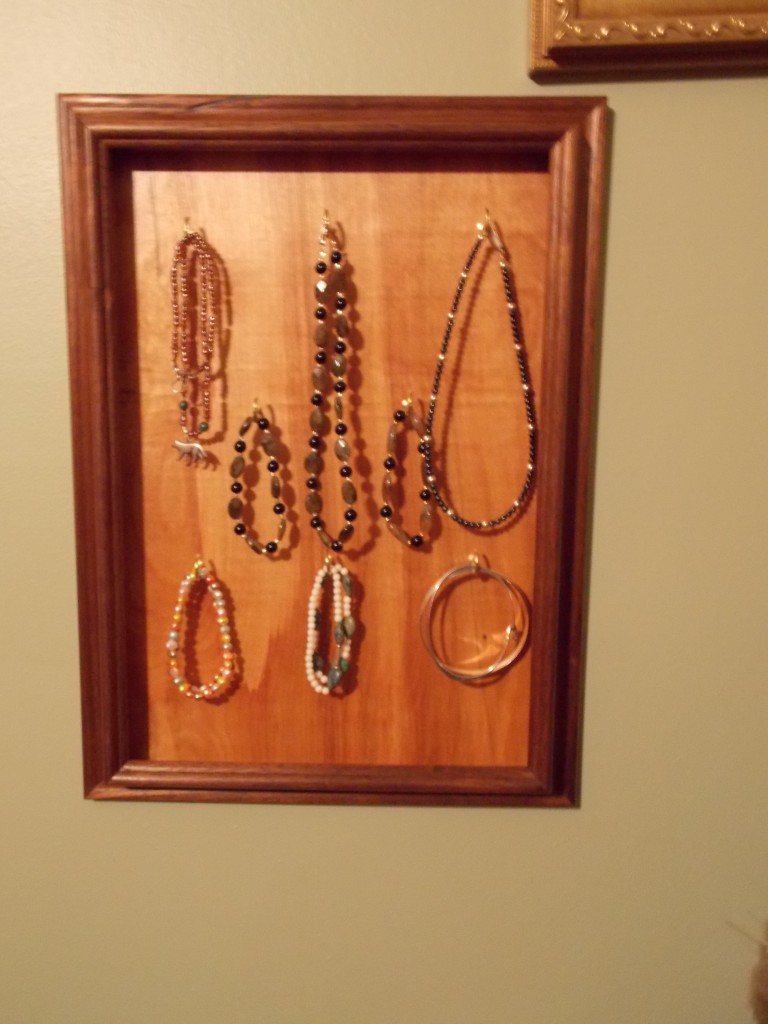
My old frame now has two new uses: helping Leigh Ann keep her necklaces organized and providing her with some wall art. I think the two different wood tone colors make a dramatic contrast, but, of course, you can select any combination of Minwax® colors you like, perhaps matching the trim in your room.
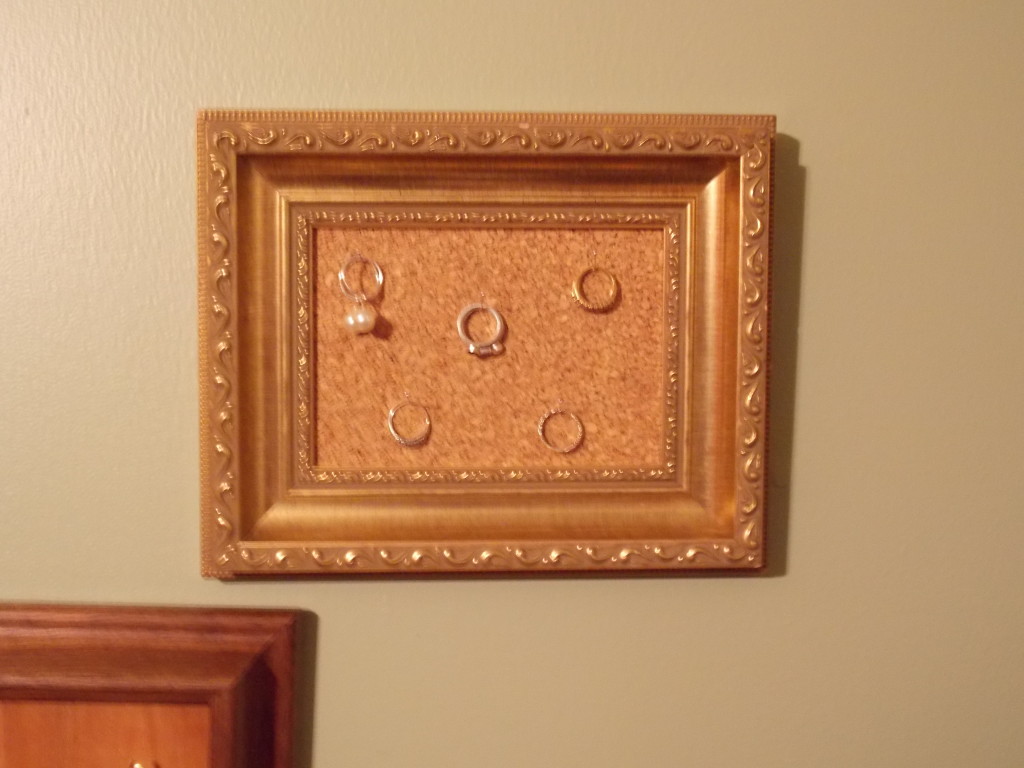 And for rings, I placed a piece of corkboard in front of my backing and used straight pins to hold them. In addition to having a unique piece of art on her wall, she doesn’t have to dig through her jewelry box looking for them anymore.
I’m sure you’ll come up with a couple of ideas of your own!
Until next time,
Thanks for stopping by!
Bruce
PS – Be sure to check out the Minwax® Facebook page for more great tips, projects, and contests.
“Parting Shots”
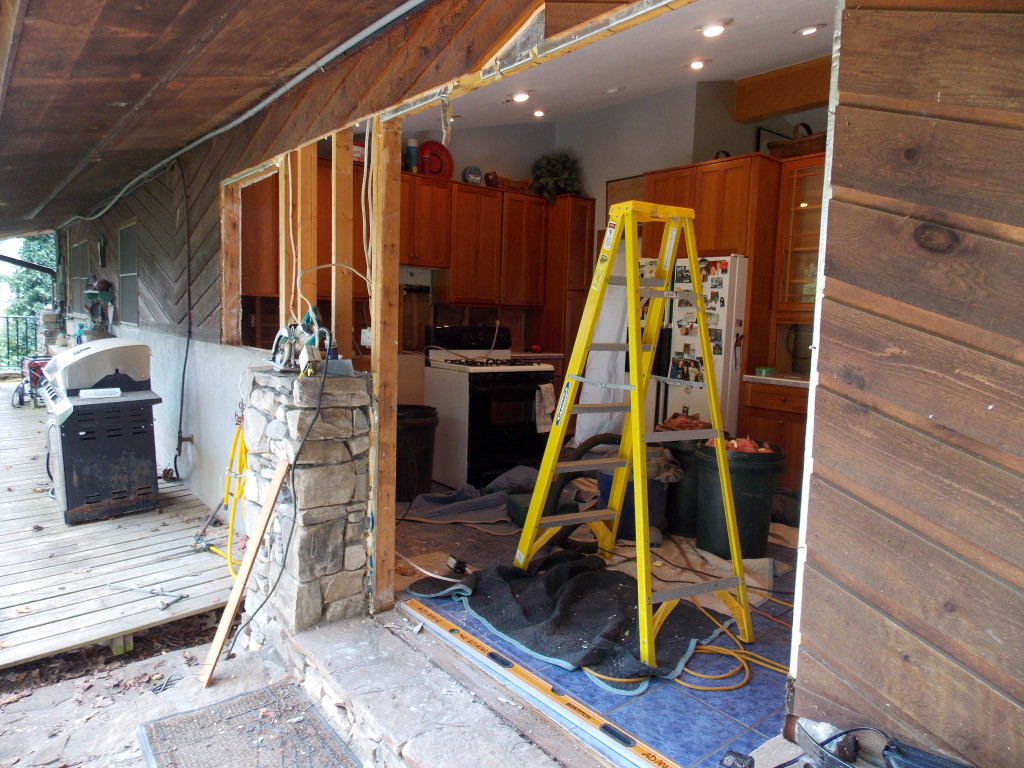
We have finally started our kitchen remodeling project, and when it is done I am planning to share the day-by-day progress with you here. Since that is still a couple of weeks away, I thought I’d give you an idea of what our kitchen looked like after the carpenters had been here one day. Stay tuned! – Thanks, Bruce
