


It never seems to fail: if you have wood in your home, you always end up with unwanted holes. Knowing the best way to fill various types and sizes of holes is critical in being able to make them less noticeable, so if you think that might be helpful, just keep on reading!
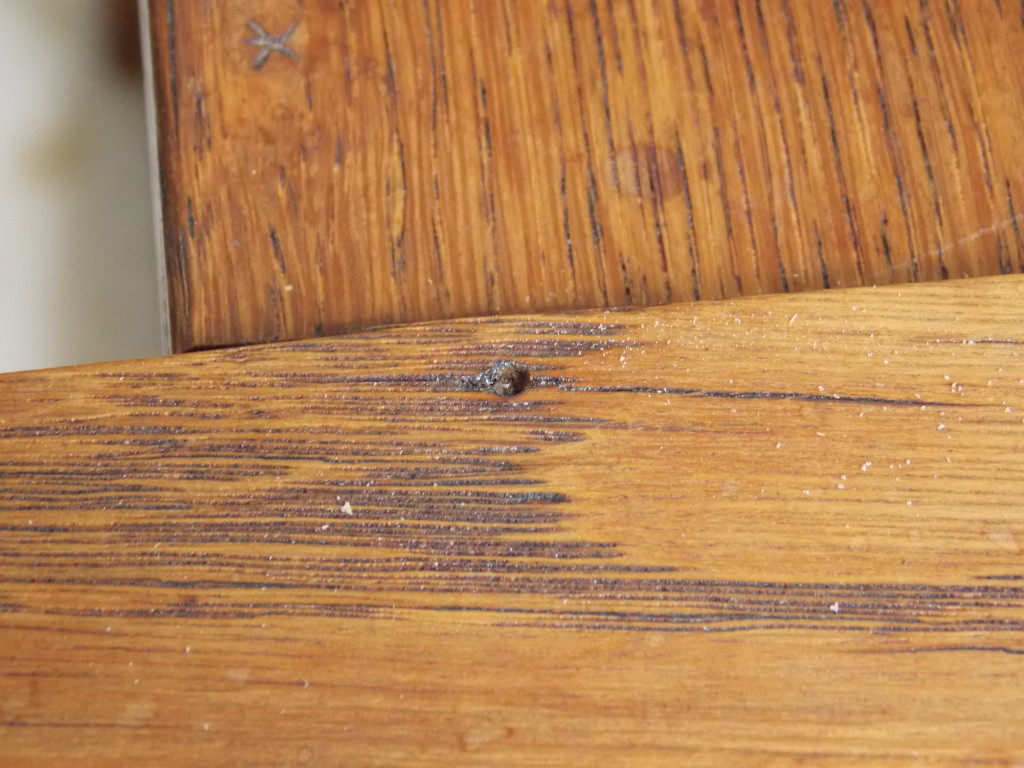 The easiest holes to repair are small, shallow nail holes, such as you might find in your woodwork or like what I found in the joint of one of my chairs.
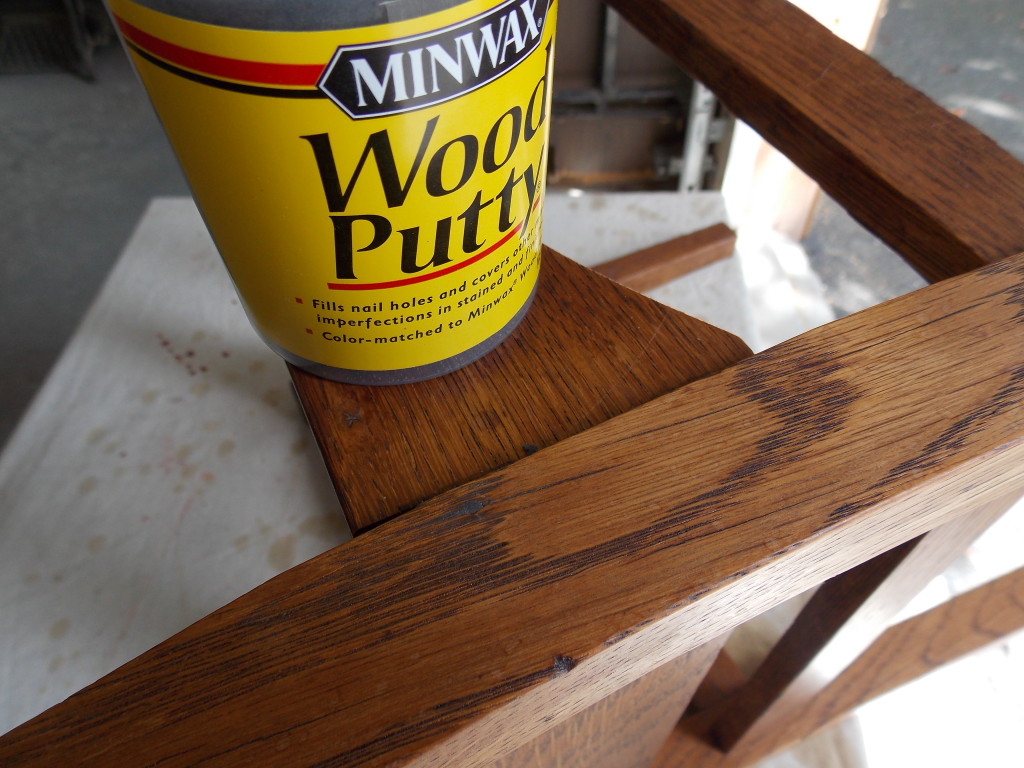
For these I reach for Minwax® Wood Putty®, a non-hardening, color matched putty available in 8 popular wood tone colors, plus white and ebony. Just press it into the hole and wipe away any excess. Since the putty does not have to be sanded, there is no danger to the finish. See how it makes the hole virtually disappear in the photo above?
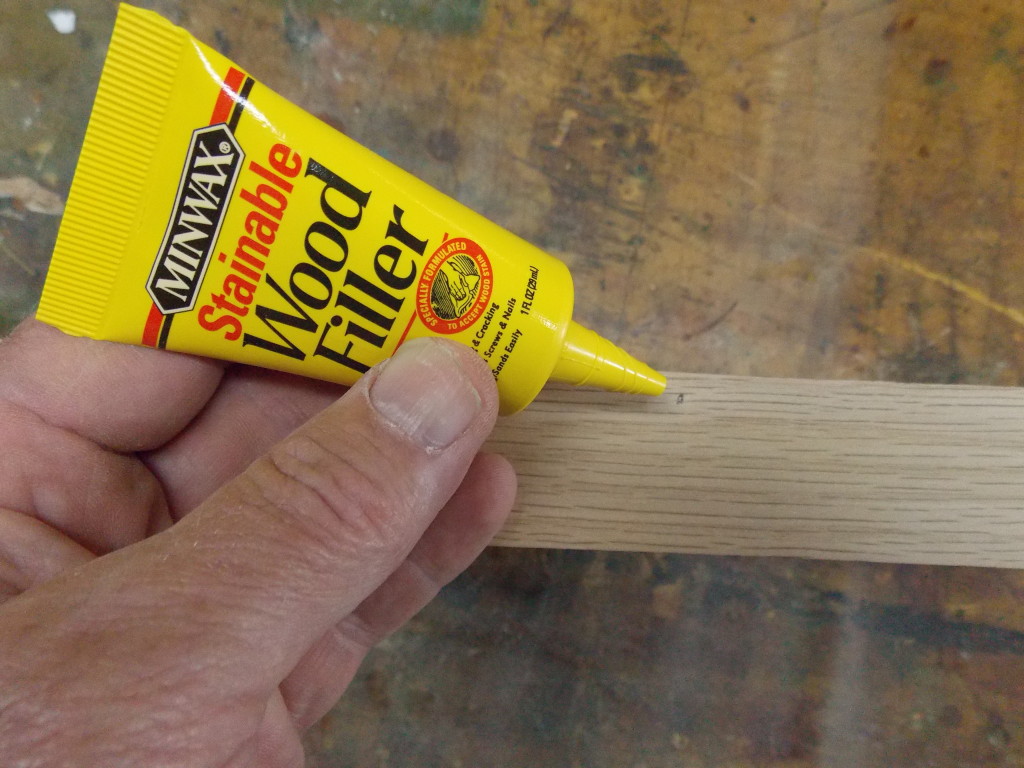
When working with raw wood, such as wood trim, unfinished furniture, or a refinishing project, small holes can be filled using Minwax® Stainable Wood Filler, a quick-drying wood filler ideal for repairing small cracks, knot holes, nail holes, and defects in the wood.
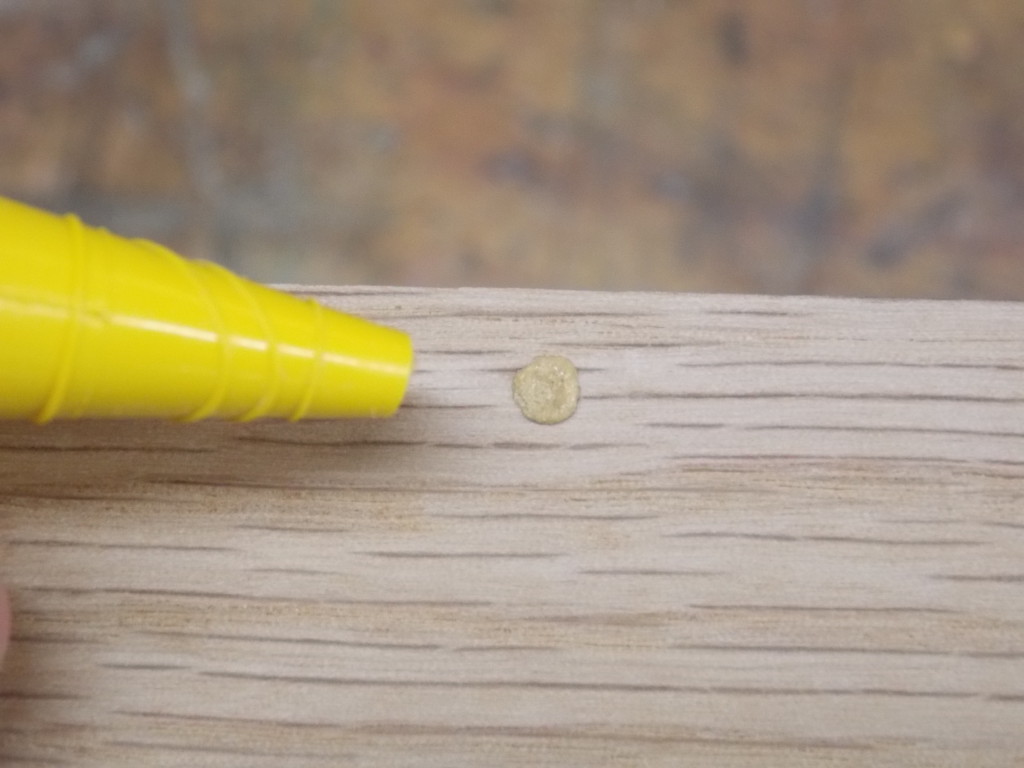 Simply squeeze the Stainable Wood Filler into the hole, then press it in firmly using the tip of a screwdriver. I prefer to mound it slightly to allow for shrinkage as it dries. Quick Tip: Neatness counts! Do not smear the filler over the wood, as that will make for extra sanding.
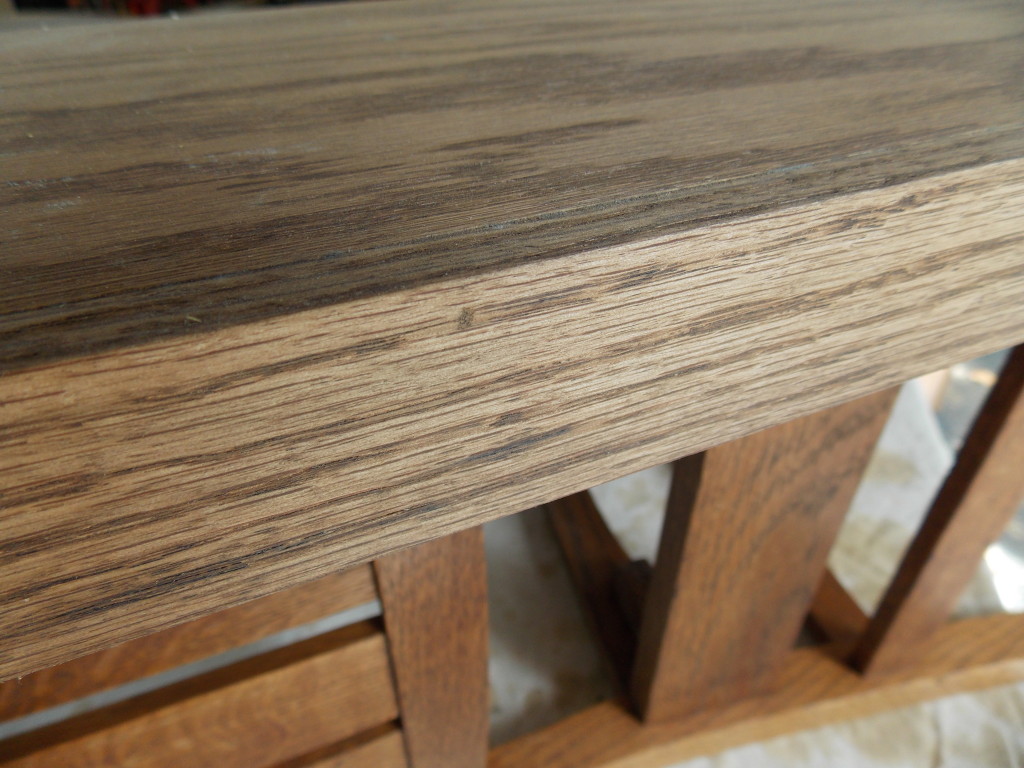
After it dried, which took about two hours, I sanded it flush with the wood using #120-grit sandpaper, then stained the entire shelf. You have to look closely to see the spot where the nail hole had been!
Quick Tip: Always sand in the direction of the grain of the wood to avoid unsightly scratches.
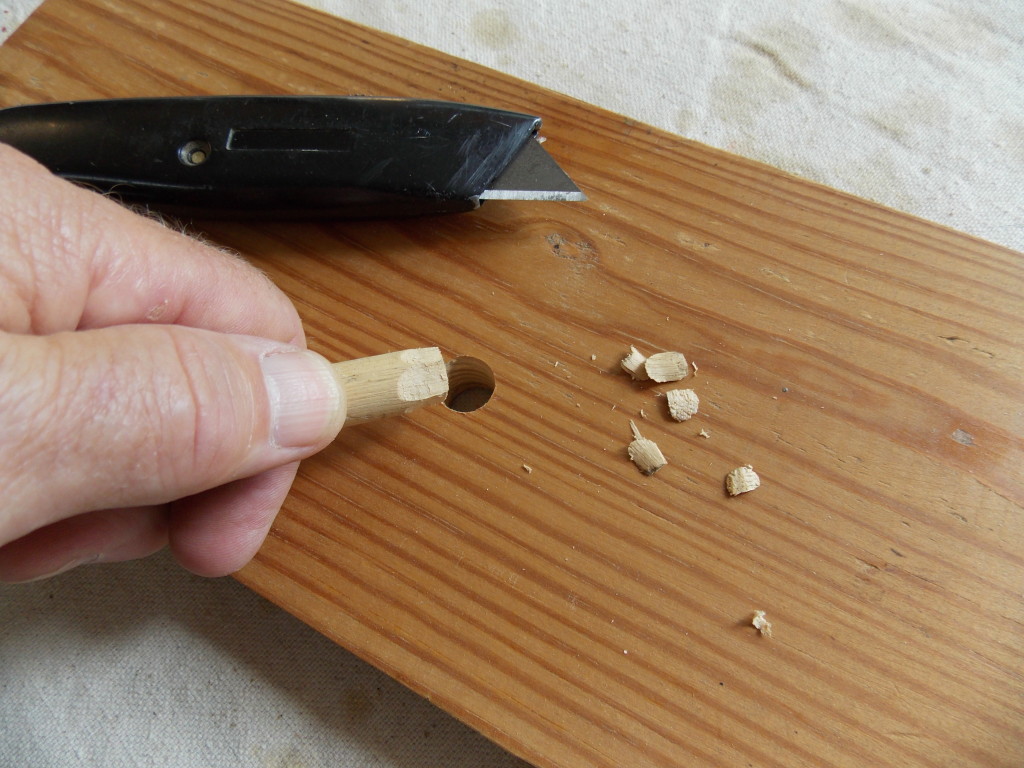
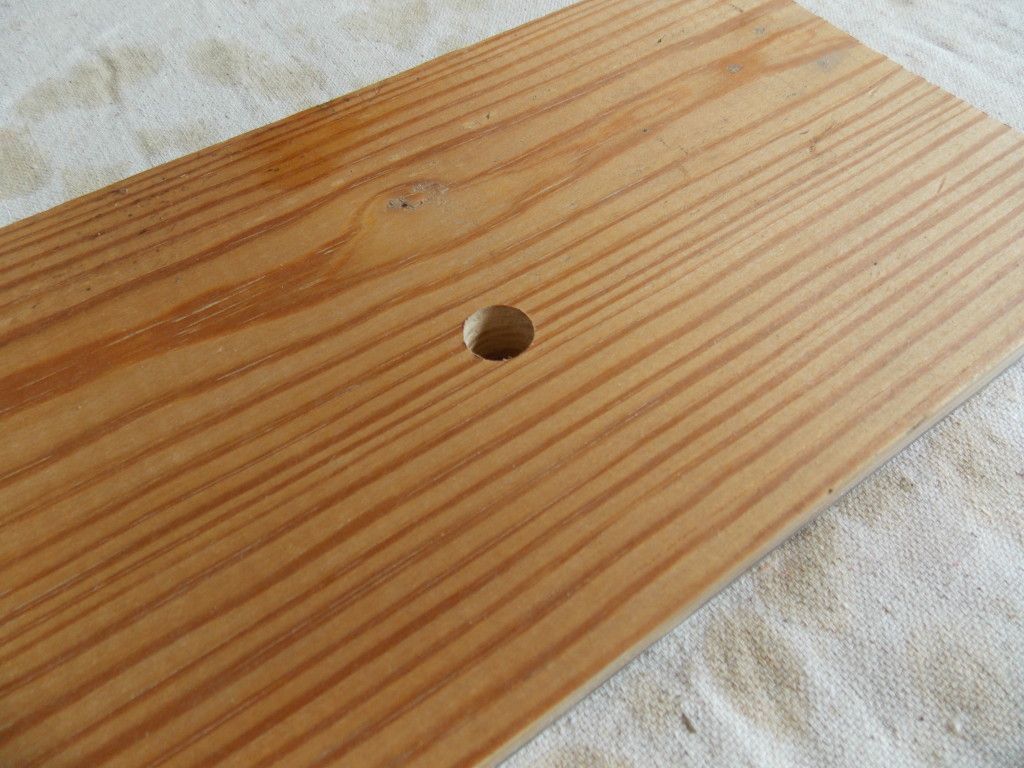
I have found that holes larger and deeper than ¼-inch should be filled with real wood, such as a dowel, glued into the hole. Quick Tip: Taper the blunt end of the wood plug slightly to make it easier to tap into the hole.
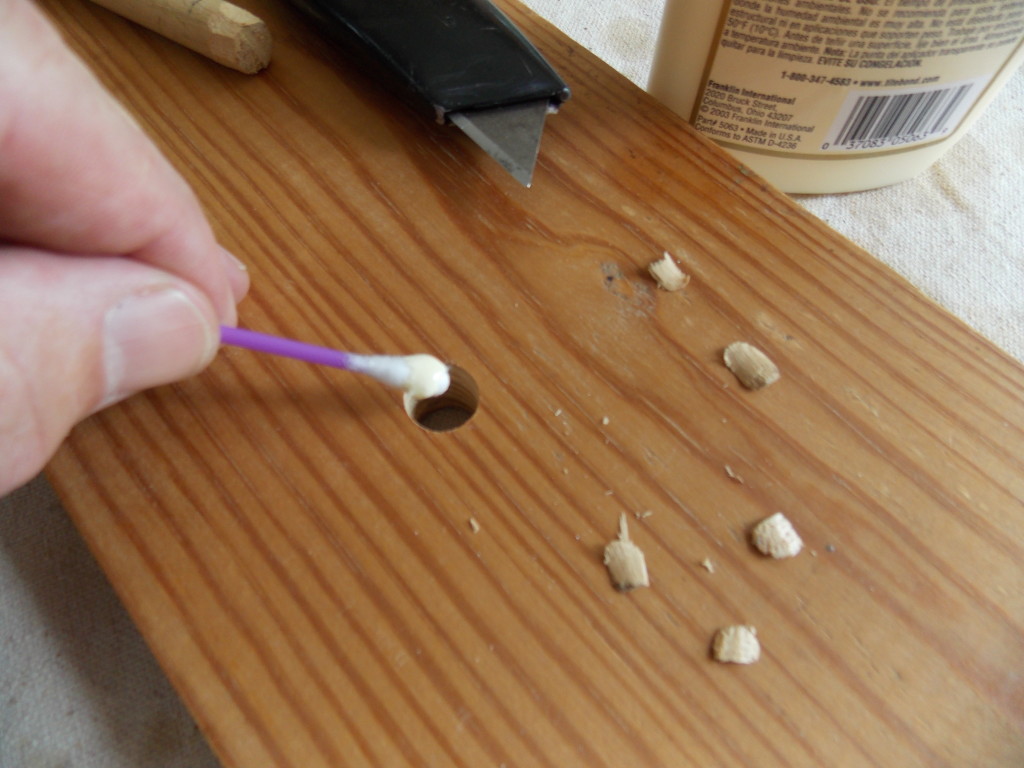
Swab the inside of the hole with woodworker’s glue before tapping in the plug. A cotton swab works great for this — and avoids smearing glue on the top of the wood!
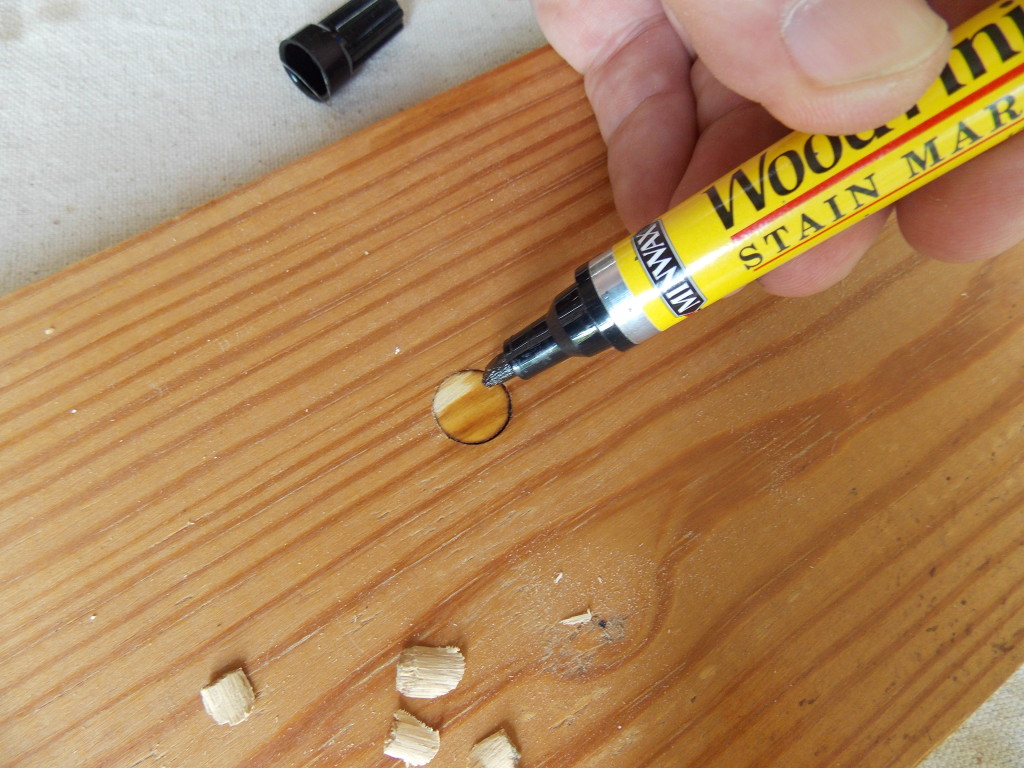
Rather than opening a can of stain, use one of the Minwax® Stain Markers — stain in a felt tipped dispenser — to match the end of your wood plug to the board.
Trust me: once you start using those Stain Markers, you’ll keep finding ways to use them!
Until next time,
Thanks for stopping by!
Bruce
PS – Don’t forget to check out the Minwax® Facebook page — lots of tips, pictures, and contests to enter!
“Parting Shots”
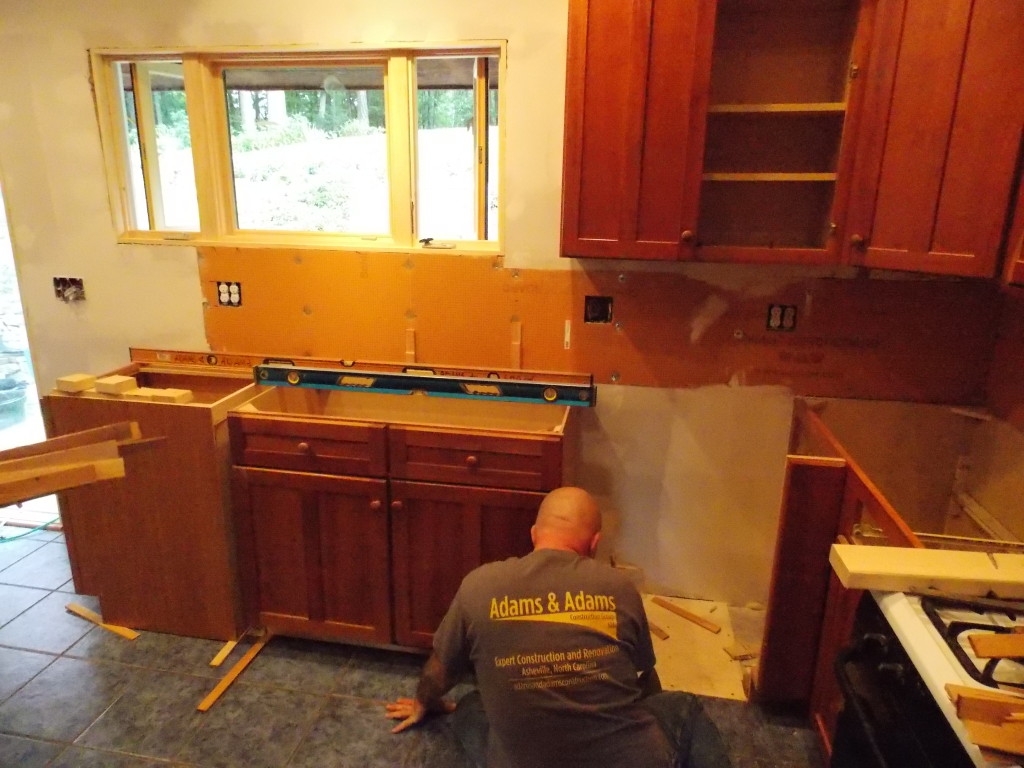
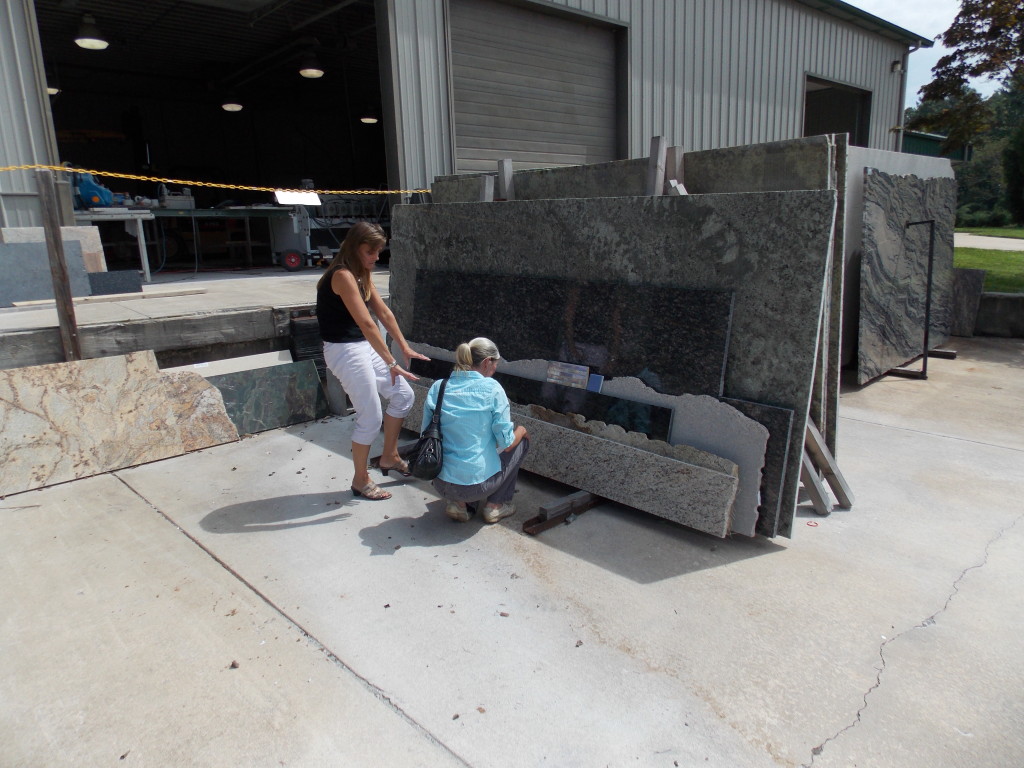
Remember our kitchen project I mentioned recently? Well, it is progressing, day-by-day. While the trim carpenters were installing the cabinets, Leigh Ann (below, kneeling) went back out to the stone yard to check on the granite we ordered for the countertops. Stayed tuned for a complete step-by-step once it’s complete! Thanks – Bruce

I work with mostly small wood working projects. I like to use Minwax Polycrylic as the finished coat. i purchase the quart size cans. The problem I have is the can tends to rust after the first use and the rust flakes into the unused portion. Why doesn’tMinwax use a can that won’t rust.
Thanks,
Morris
As far as I know, Morris, the cans are coated with a non-rusting material, so I can only assume without seeing it that somehow this coating must’ve been worn off on your can. Other than that, I’m not sure what could’ve happened. Thanks for reading, Morris.
Hi Bruce
I have about 600 metres of reclaimed Baltic Pine that I got from disassembling long (6m) shipping crates. It’s rough sawn but is gob-smacking beautiful after jointing and sanding, and after a couple of coats of Minwax Red Oak stain or Minwax Polyshades Bombay Mahogany, it’s a sight to behold. Problem is nail holes. Minwax Stainable (new word, that..) filler goes darker than the wood with the stain, and I cant get a filler that matches the polyshades. Can you clue me up on a method to really hide nail holes with the Polyshades? I’ve about given up with staining.. the filler always goes darker than the wood, and stands out unbearably.
Cheers
Ed
You’re right, Ed. It is a challenge to get a synthetic filler to accept stain the identical way that the wood does. Many times I’ve found that it means you actually have to use a different color of stain on the filler than you used on the wood. One easy way I have found is to use one of the Minwax Stain Markers to add the color needed to the filler that will match the wood.
After filling holes on solid wood table, then using Minwax red oak stain, later when dry I see residual stainable wood filler around holes that did not take the stain well.
Please tell me what we need to do to eliminate the faint thumb print look around the many holes before applying the poly coat…
Thank You for your help & guidance.
What you are seeing, Marilyn, as you have figured out is wood filler dried in the pores around the hole. Ideally, this would’ve been sanded off in the sanding phase so that you wouldn’t have this problem now. So next time do this; #1. be careful to only pack the wood filler in the hole and not over the area outside the hole, and #2. sand it thoroughly to remove any excess filler. At this point the best thing to do would be to use the point of a hobby knife to carefully re-score those pores that are now filled with the wood filler, then reapply the stain to that area. Good luck!