

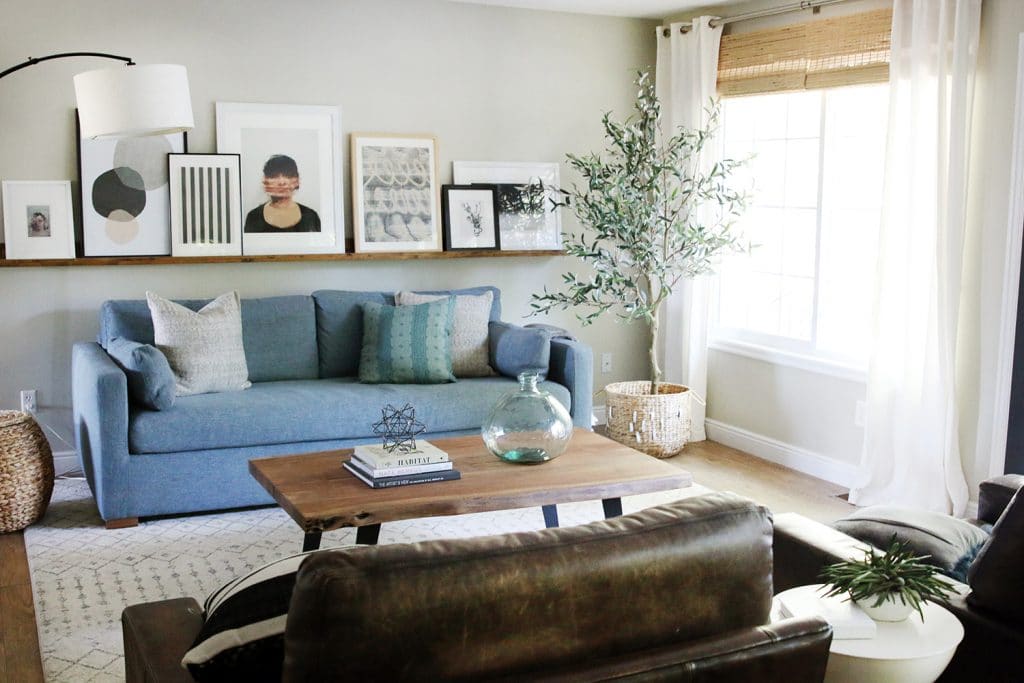
Ever since we made the art ledge in our living room four years ago, we’ve loved seeing them pop up in so many of your homes. They are such a functional way to display art, but finding one that is the perfect size for that wall in your home can be tricky (and expensive). Although it’s one of the easiest DIYs out there, we realized we never put together a proper tutorial to follow…until now! Follow this beginner-level DIY project to make your own in one day with a few simple supplies.
Materials Needed
| 1×12 pine board | 2inch wood screws | 1 1/4in wood screws |
|---|---|---|
| MINWAX® Pre-Stain Wood Conditioner | MINWAX® Wood Stain | MINWAX® Polycrylic (clear matte finish) |
| paper towels | vinyl gloves |
Tools Used
| sanding block | paint brushes | driver |
|---|---|---|
| 1/8inch drill bit | wood clamps | circular saw (optional) |
Step 1: Prep the board
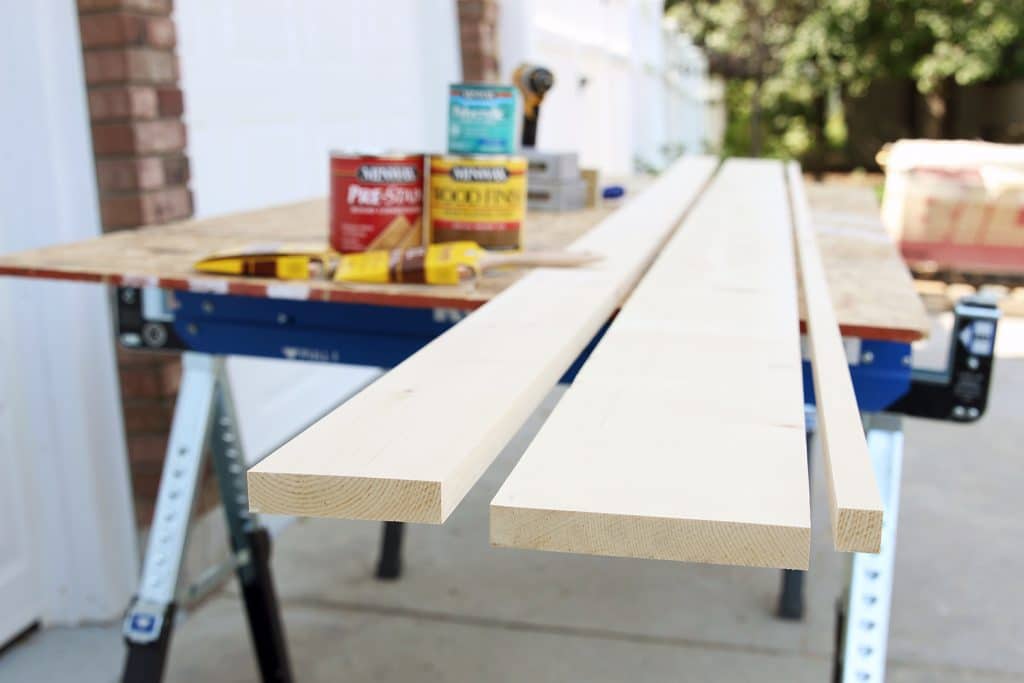
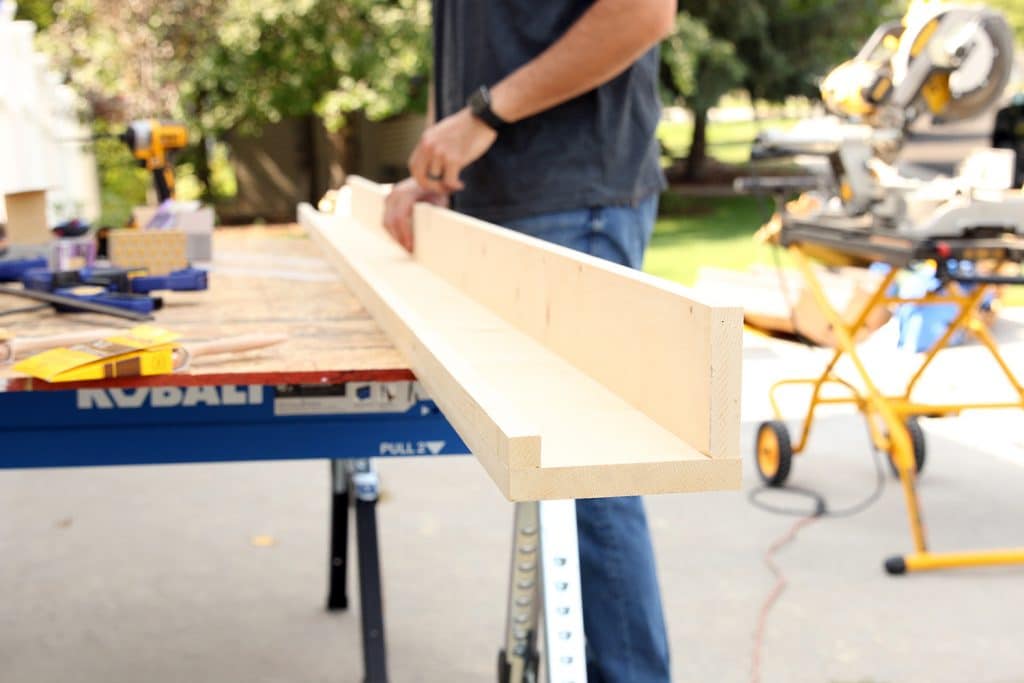
Believe it or not, you can make this entire ledge with one piece of pine wood. The pine board can be whatever length you like – ours is 10 feet. Out of this one 12in wide board we will create the three pieces for our shelf. Using your circular saw (or a table saw if you have one), rip the board into three separate pieces of these sizes:
– 5 1/2 inches
– 3 1/2 inches
– 3/4 inches
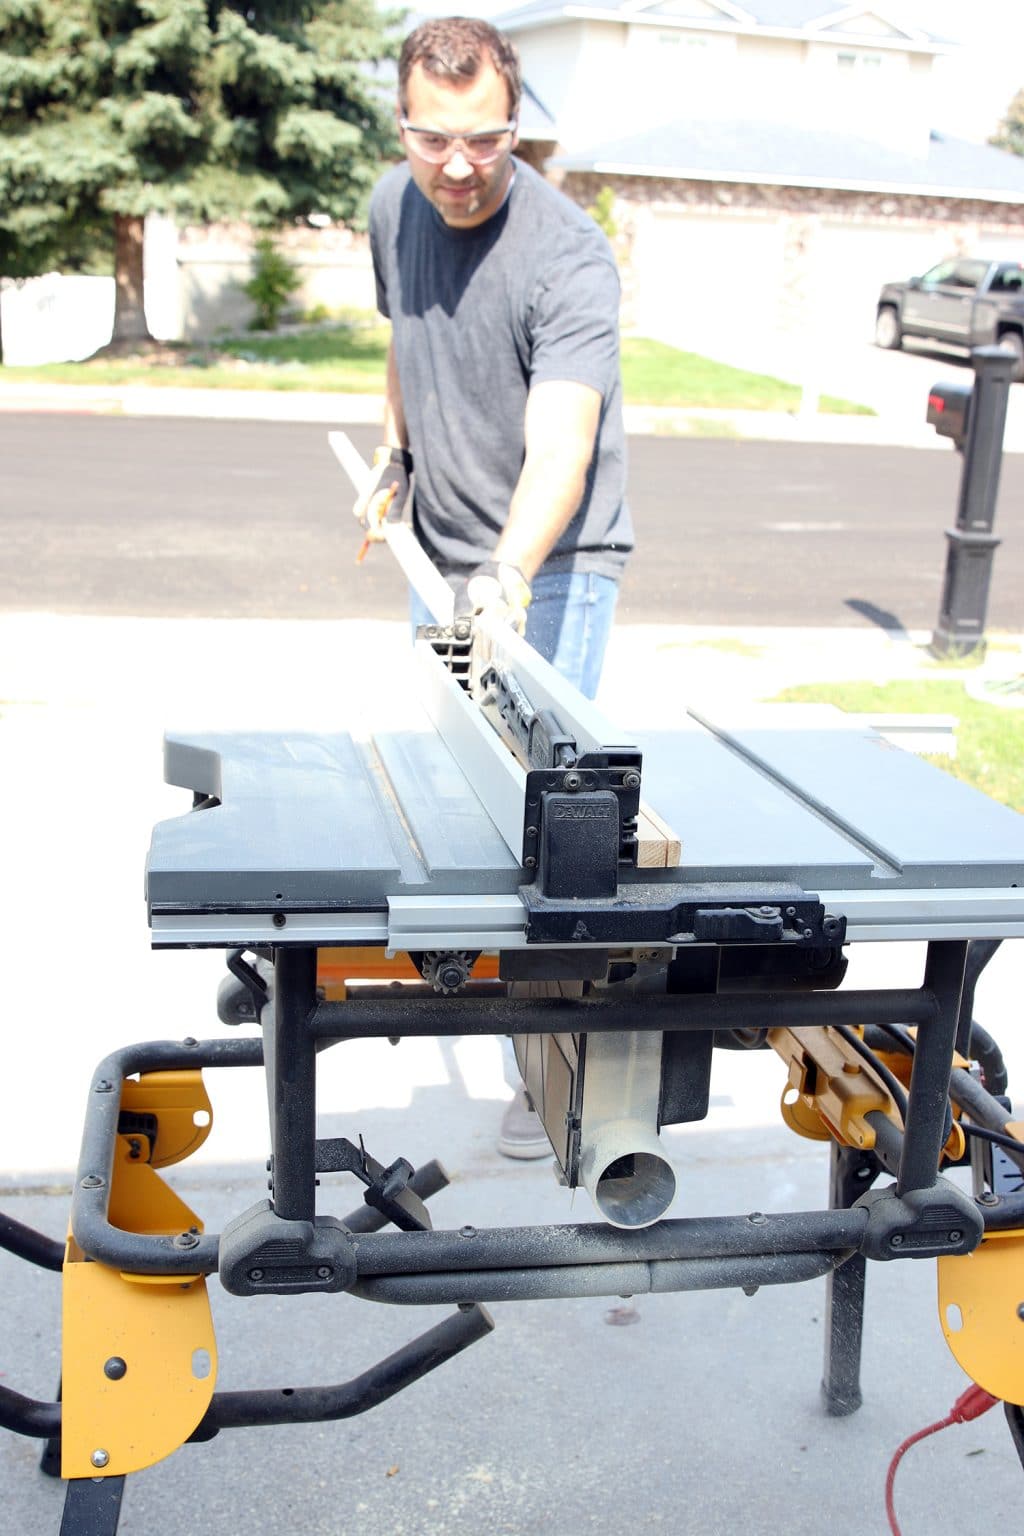
If you do not have a circular saw (or a table saw), Lowe’s can rip the board for you into these pieces. There will be a small piece left over which you can save as scrap for future projects.
Step 2. Screw the boards together
The 5 1/2in board is the base of the art ledge, the 3 1/2in board is the back and the 3/4in board is the front. Stand the back board up on top of the base, flush with the back and side edges, and clamp them together with wood clamps.
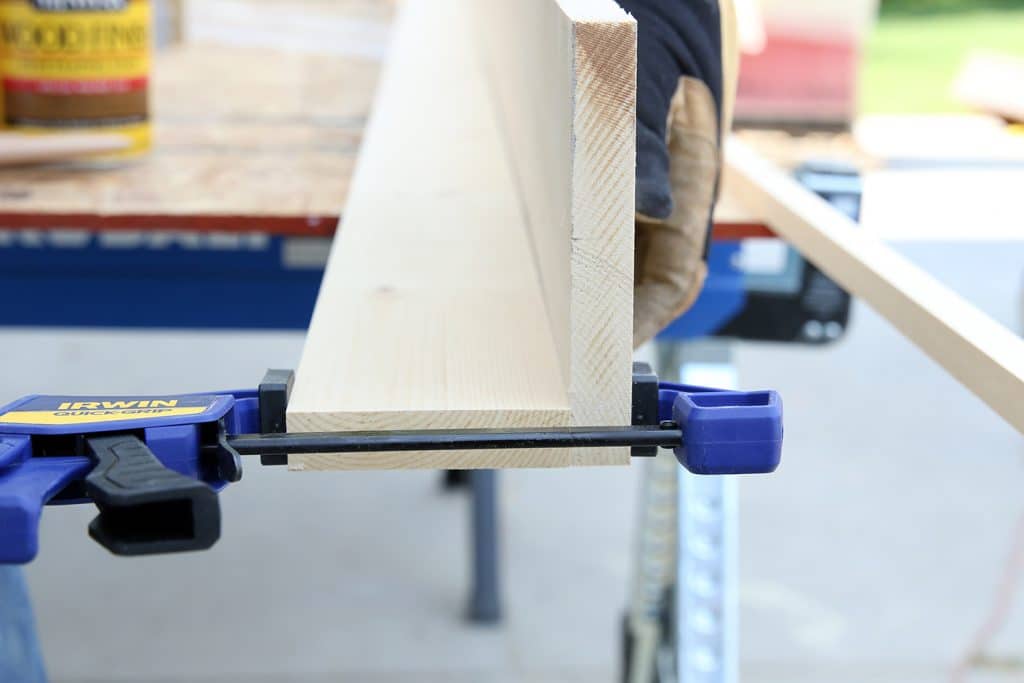
Using the 1/8in drill bit, drill pilot holes about 12-16 inches apart through the bottom of the base into the back board, being careful not to drill out the sides of the board.
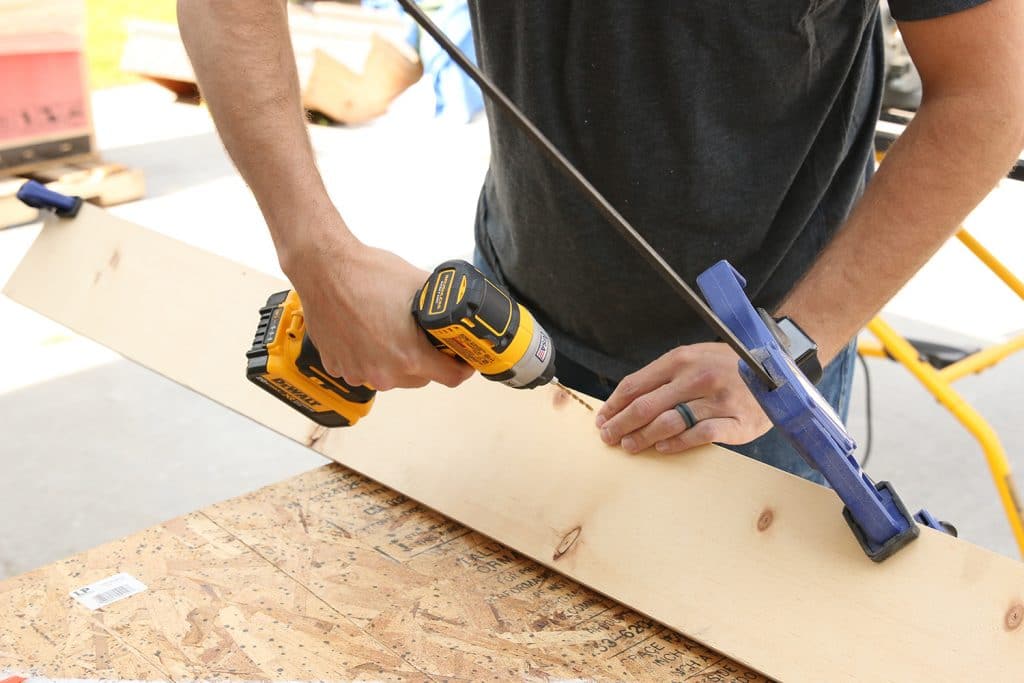
Screw one 2in wood screw into each of the pilot holes, countersinking the heads only slightly so they are flush or just below the wood surface.
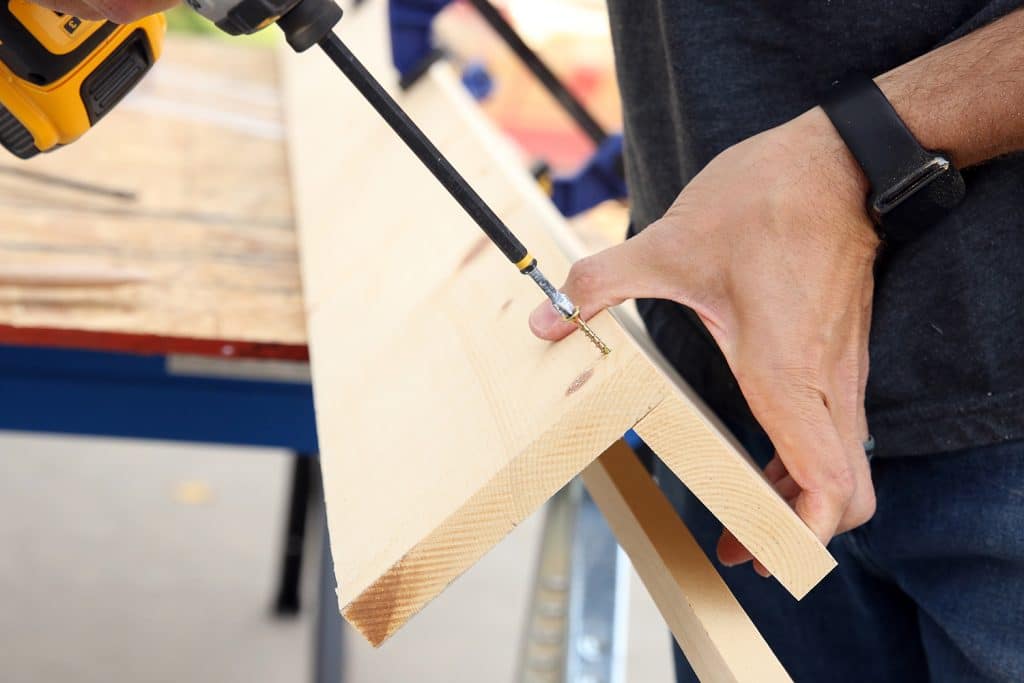
Repeat this process for the front, 3/4in board. When drilling pilot holes, only drill through the base, and not into the 3/4in piece.
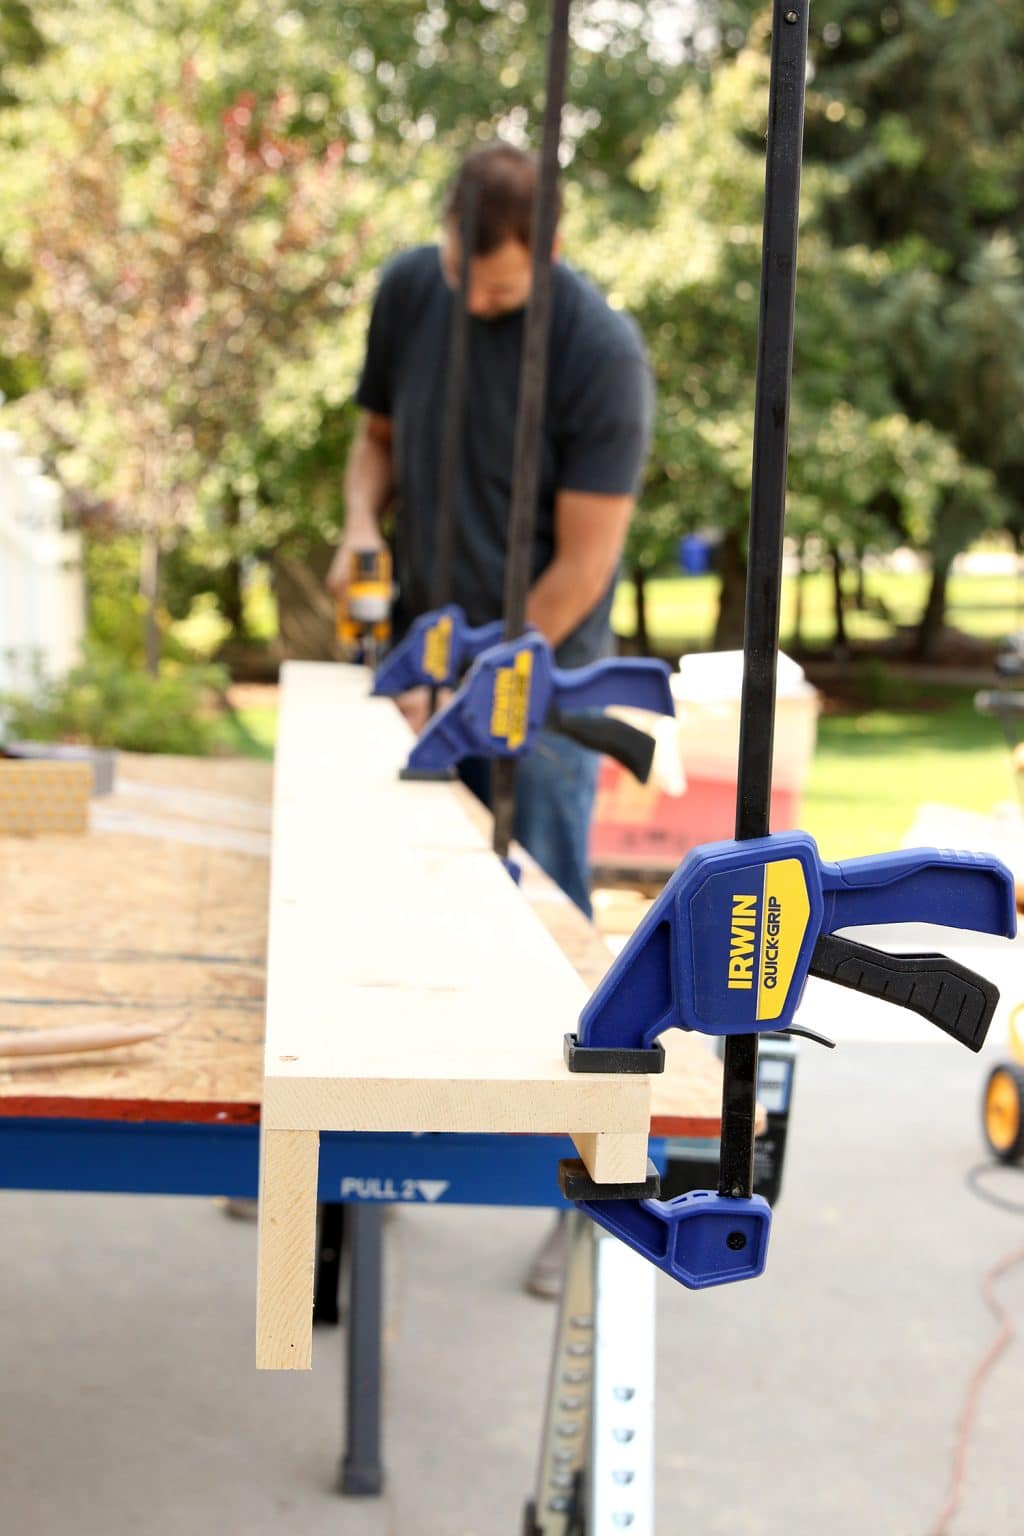
Step 3: Prep the ledge for stain
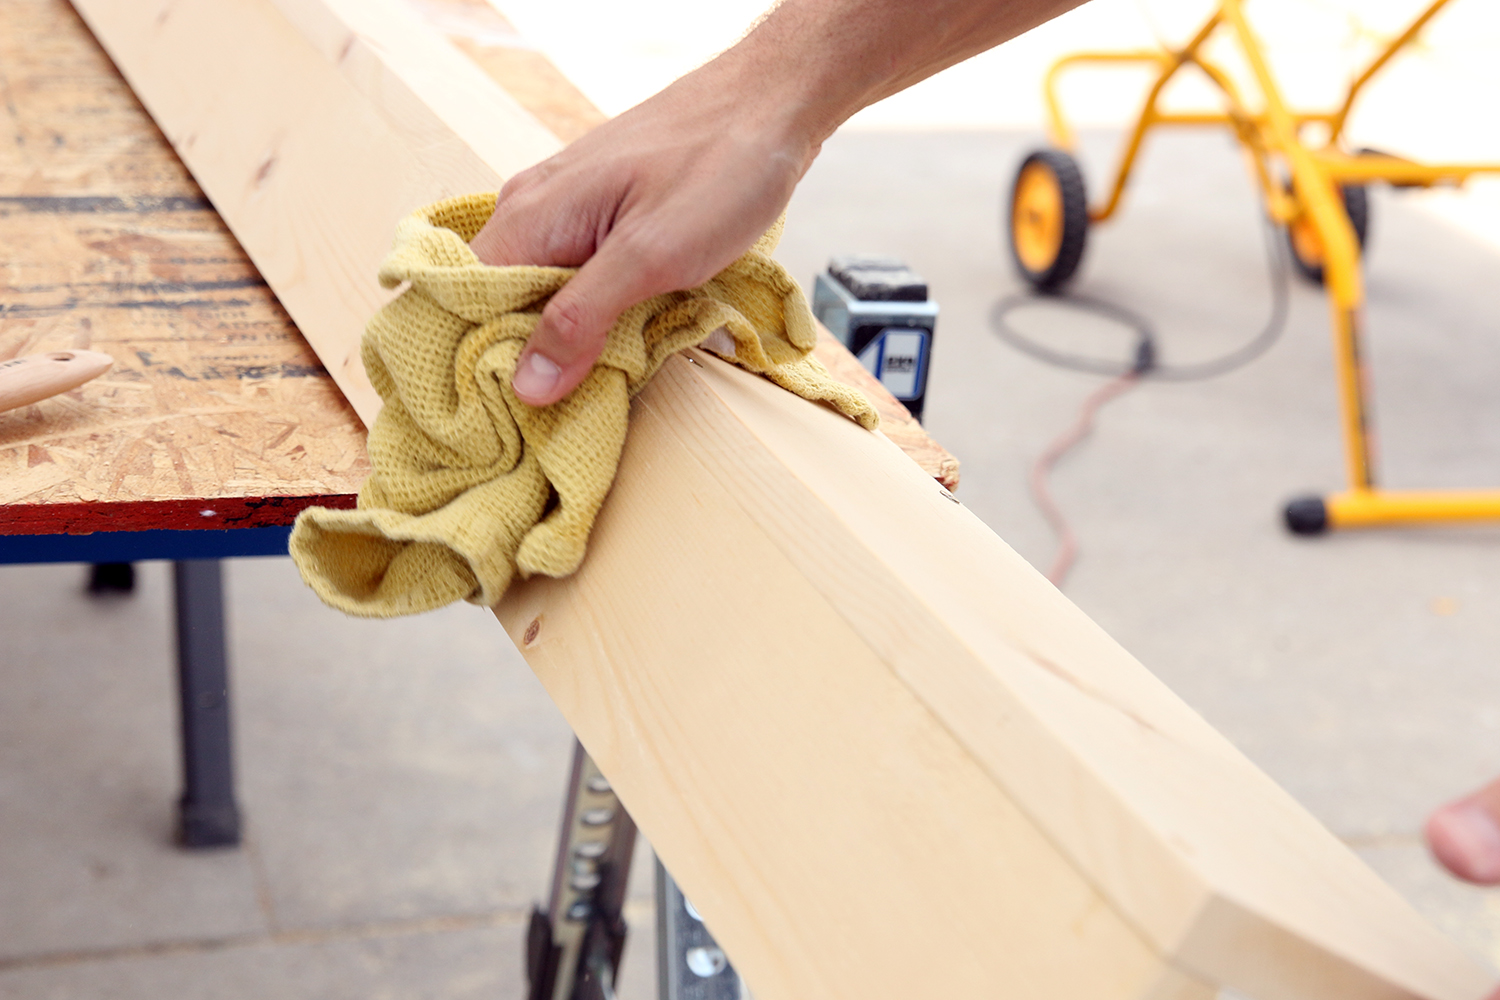
Using a fine grit sanding block (we used a 220 grit), sand all the edges of the art ledge to remove any splinters or roughness. Clean off with a dry rag or tac cloth.
Once sanded, apply a coat of MINWAX® Pre-Stain Wood Conditioner. Soft woods like pine tend to take on too much stain in some areas and not enough in others, making the finish look blotchy or uneven. Conditioner evens out the pores in the wood and helps it take the stain evenly.
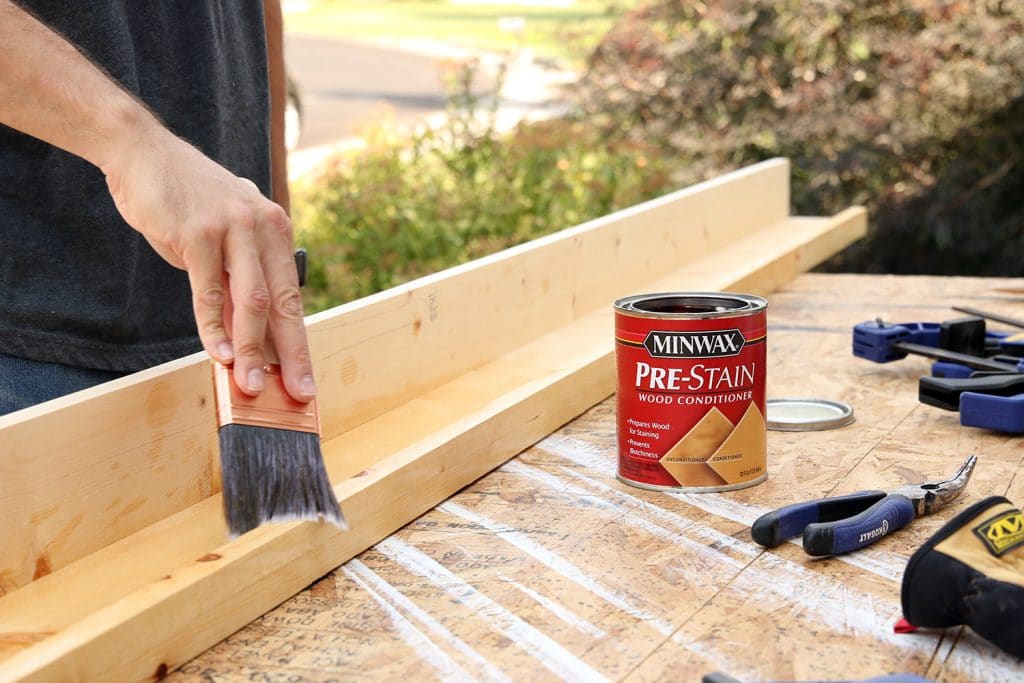
Apply one even coat over the wood, let sit for 10-15 minutes, then wipe away any excess using a paper towel and let sit another 5 minutes.
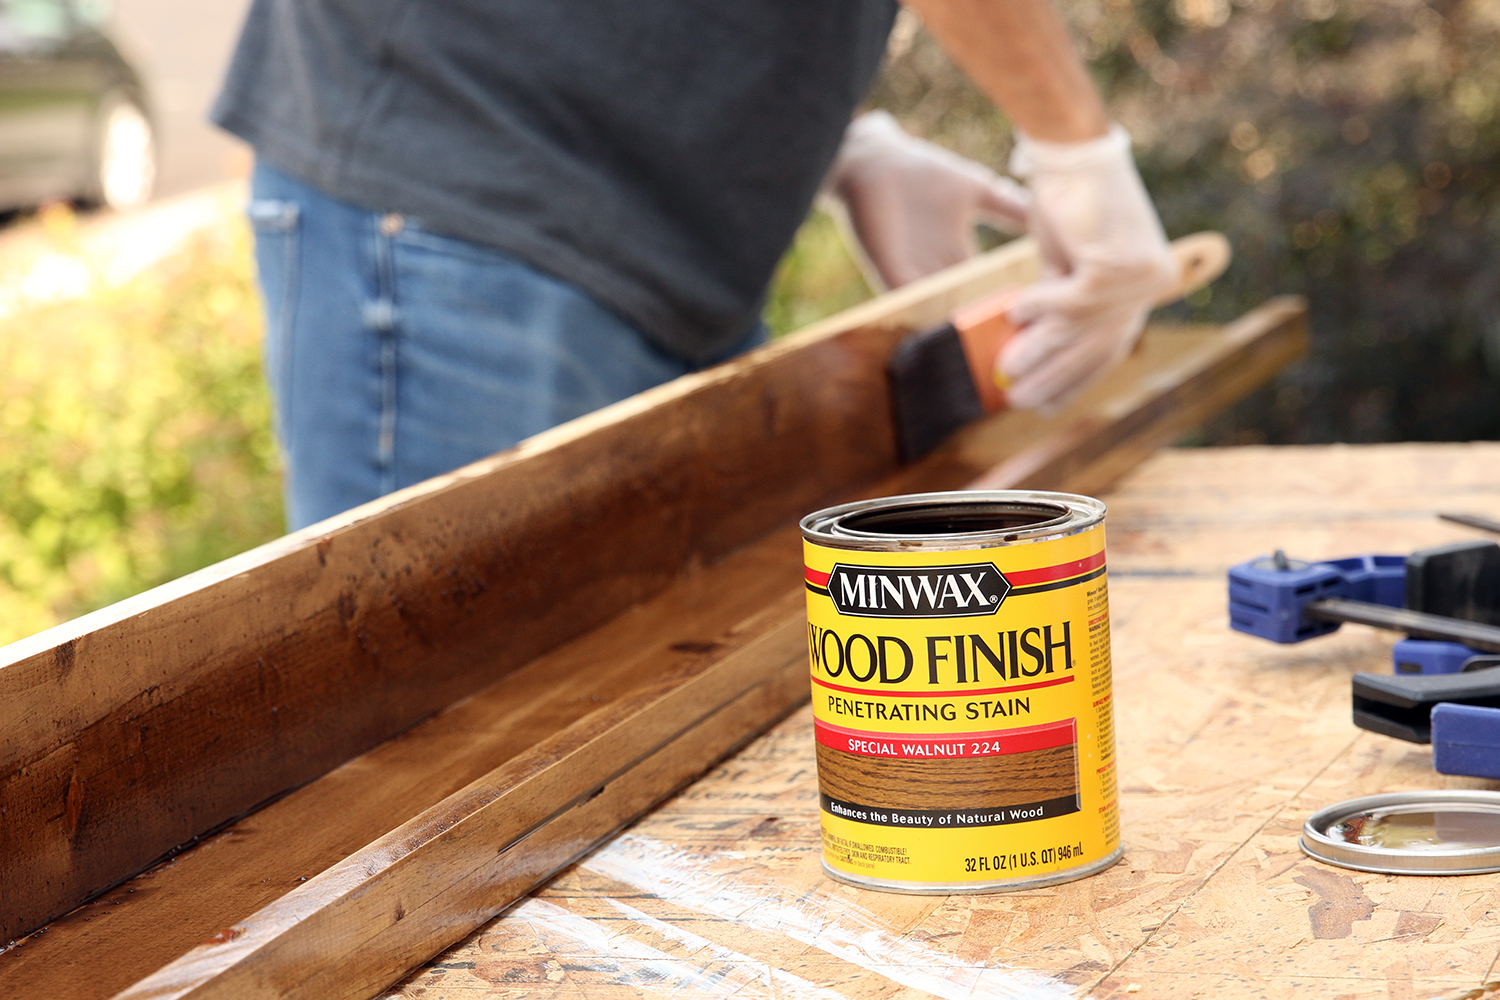
Step 4: Stain the ledge
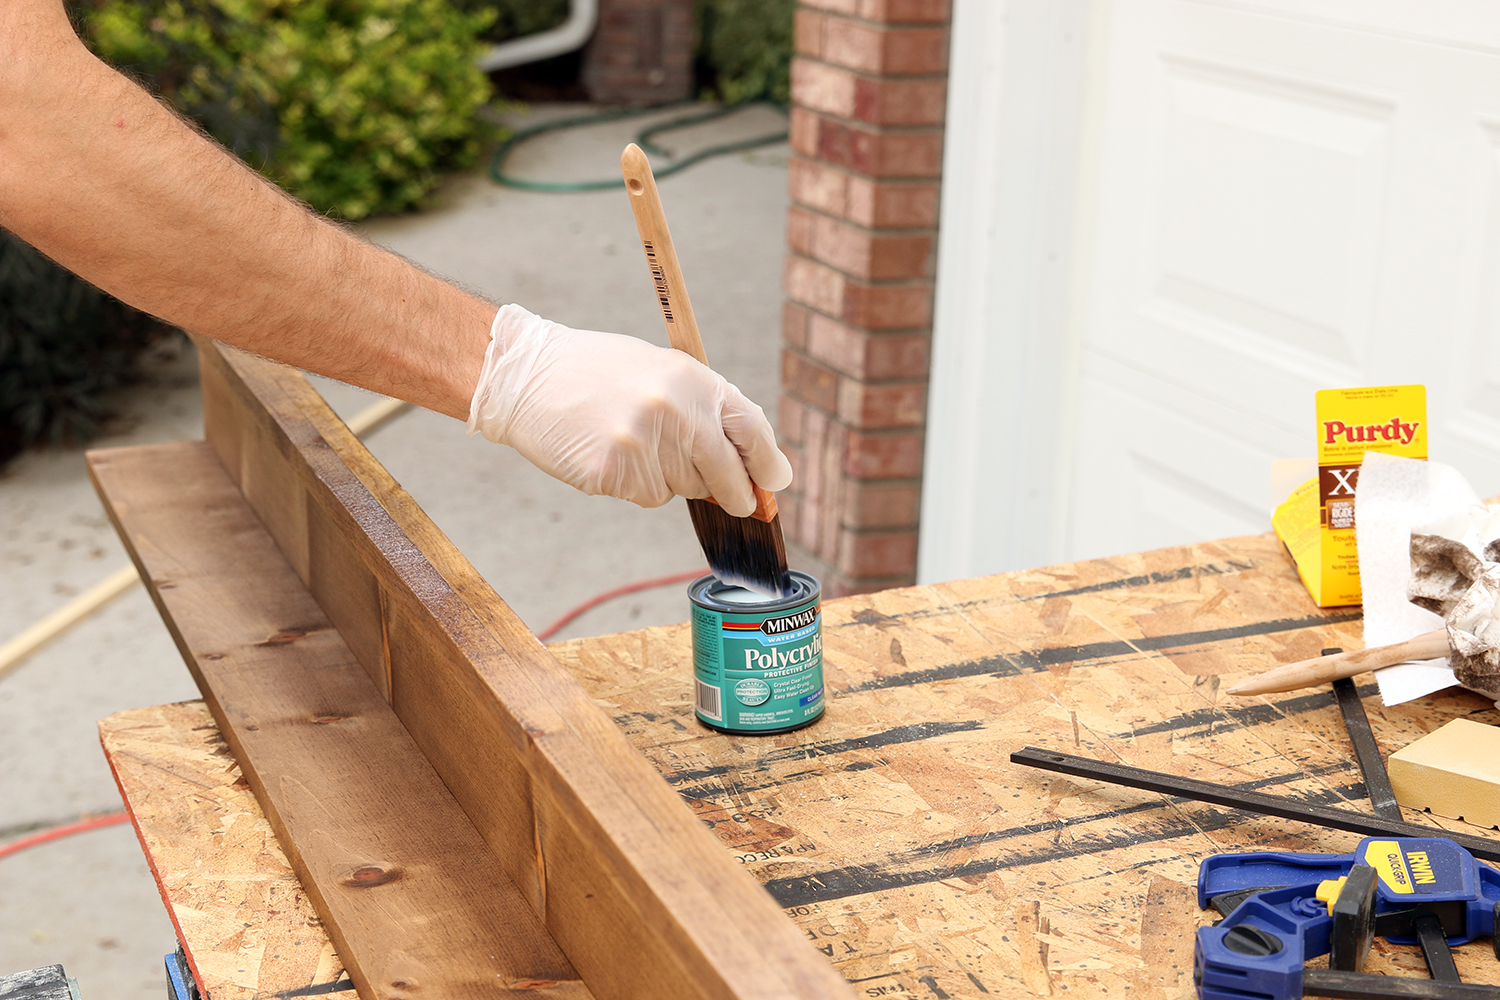
Once the wood conditioner has dried on the ledge, apply your preferred color of MINWAX® Stain. We used one coat of Special Walnut that was wiped off immediately after the entire ledge had been stained. It’s helpful to use vinyl gloves for this.
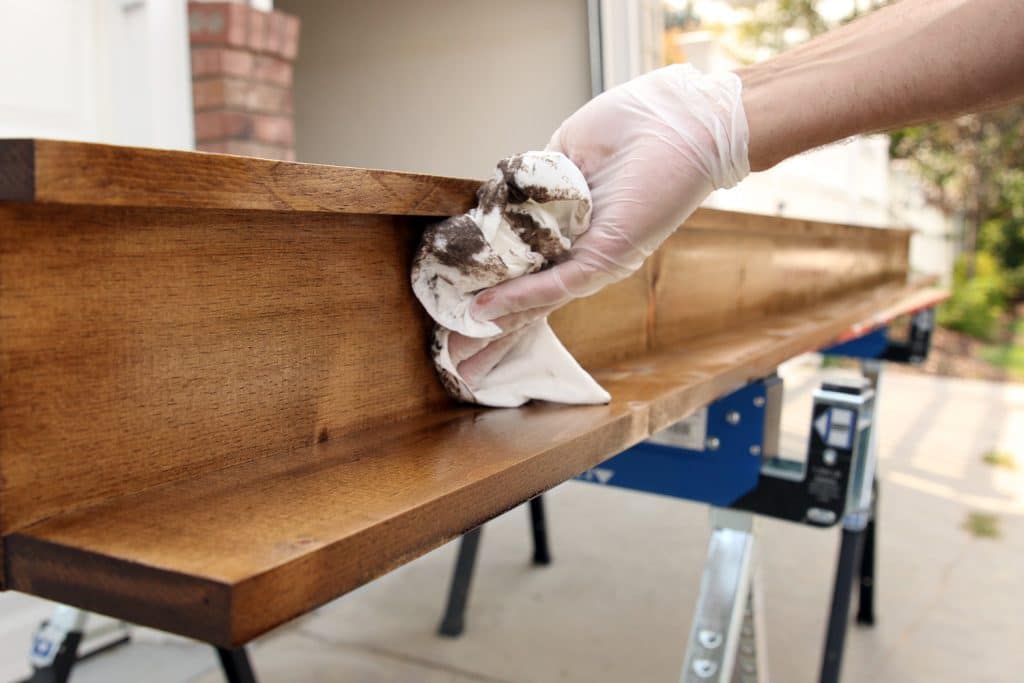
Step 5: Seal the ledge
One fear with wood projects is adding a sealant coat that will alter the look you achieve after staining. For this reason we used 3 coats of MINWAX® Polycrylic in Clear Matte finish, with 2 hours of drying time between each coat. It seals the wood without causing it to yellow, which can happen with some sealant coats. I encourage using vinyl gloves for this as well.
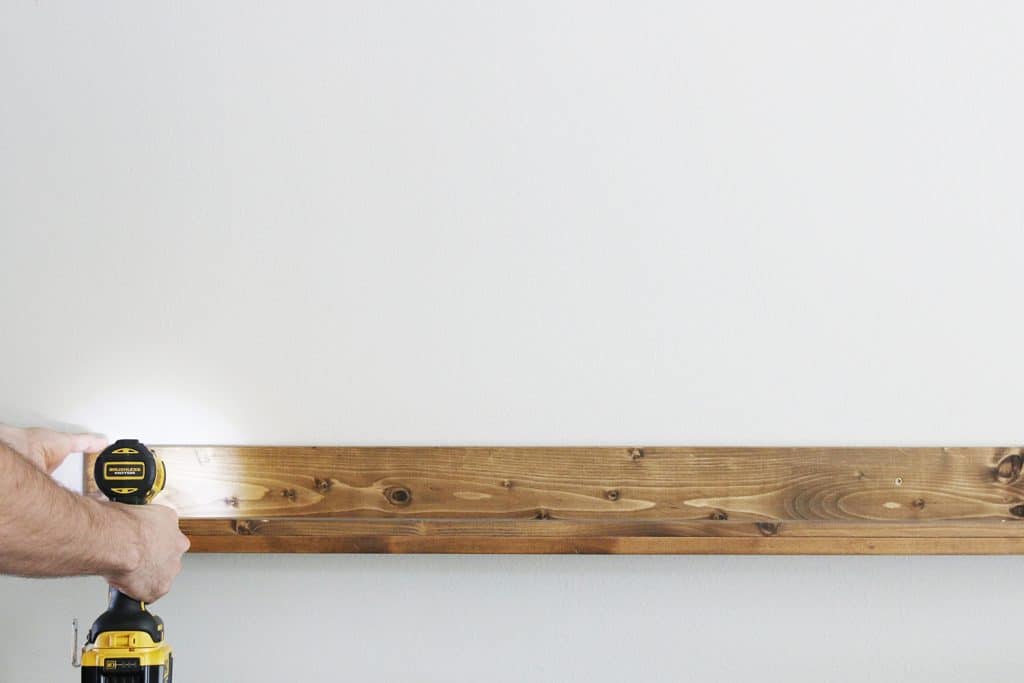
Once the Polycrylic coats have cured, simply hang the board by screwing through the back piece, directly into the wall studs, with 3in wood screws.
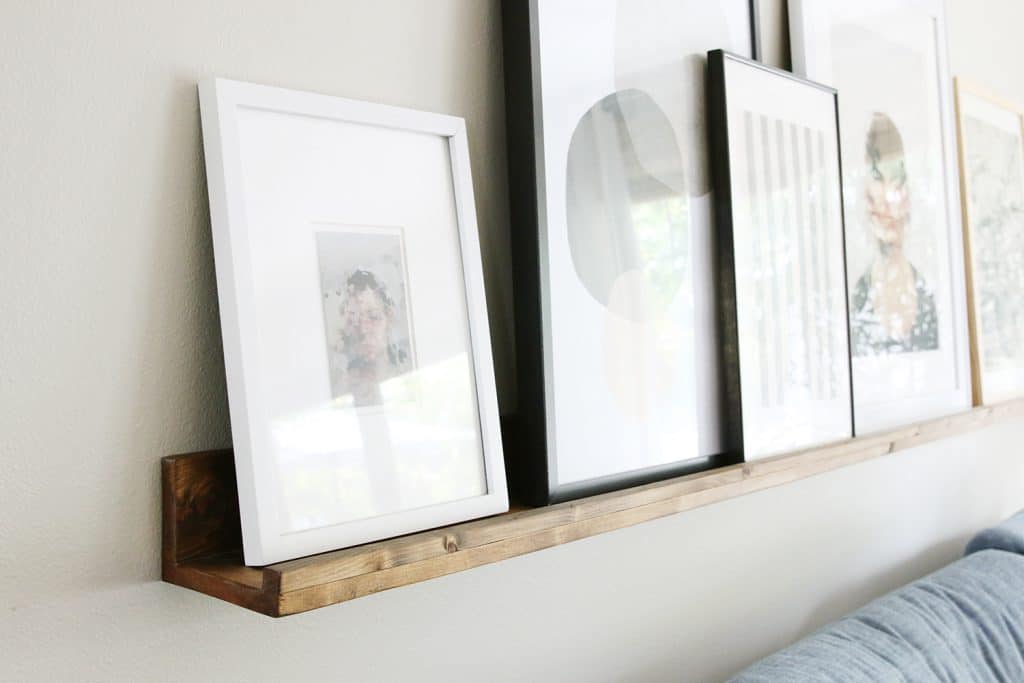

All-in-all this project took just a few hours (most of that was drying time) and only a handful of supplies. It’s a great way to display art while having the option to quickly swap pieces in and out. Hope you can use this tutorial to make the perfect one for you home!
Check out more projects from Chris Loves Julia at www.chrislovesjulia.com.
And follow them on Social Media: