


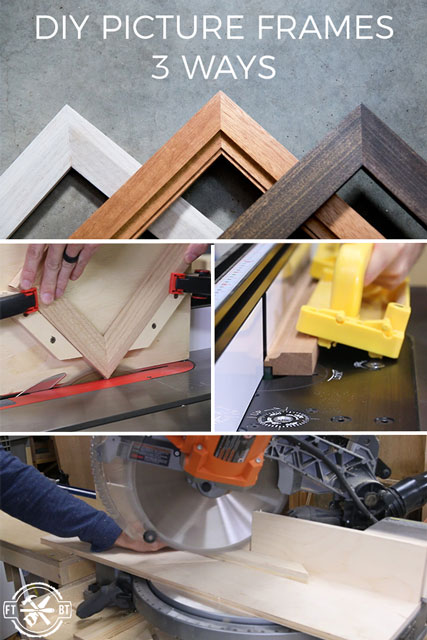
Today I’m going to show you how to make a picture frame 3 ways. I’ll go from a simple DIY picture frame to an advanced picture frame with several molding profiles. The most basic version is from pine and poplar available at the home center then I’ll move up to some oak and mahogany for the more complex versions.
Thank you to Minwax and JET for sponsoring this project!
Materials/Supplies
- Pre-Stain Conditioner- Minwax
- Espresso Stain- Minwax
- Clear Aerosol Lacquer– Minwax
- White Wash– Minwax
- Polycrylic– Minwax
- Quick & Thick Glue
- Corrugated Fasteners
- 8’ select pine 1×2
- Various 1×2 Boards
Affiliate links are used on this page. See my disclosure page for info on affiliate programs.
How to Make a Picture Frame 3 Ways
- How to Make a Picture Frame with a Miter and Handheld Router
- How to Make a Picture Frame using a Table Saw
- How to Make a Picture Frame using a Router Table
1. How to Make a Picture Frame with a Miter and Handheld Router
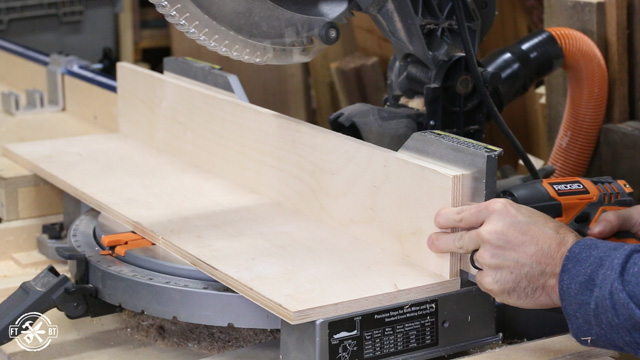
a) Build Auxiliary Fence for Miter Saw
The first frame can be made using just a miter saw and a handheld router. One thing that will make your picture frames a lot cleaner and more accurate is an auxiliary fence on your miter saw. I made a very simple one from ½” plywood screwed together at 90 degrees. Just make sure to place the screws outside the blade path.
 Most miter saws have holes in their fences to attach an additional fence. I used ½” pan head screws and secured the new fence to the saw.
Next I swung my saw 45 degrees to the left and made the initial cut in the fence. Then I made a series of test cuts to see how well it lined up. And by some woodworking miracle it was perfect. Typically you’ll need to nudge the blade left or right to get it just right.
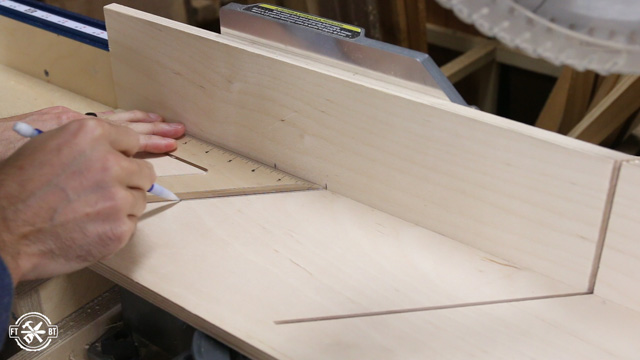
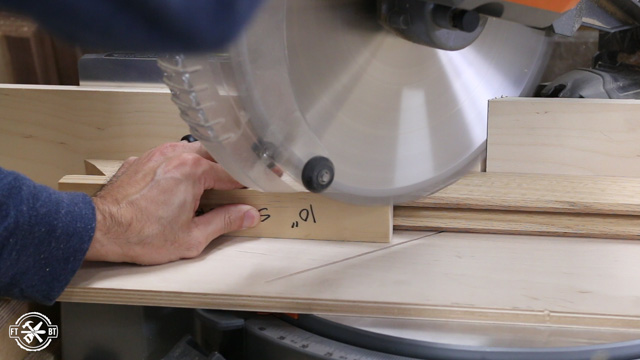
 I used a tip I picked up from Jon Peters and made some reference lines on the fence. For the 8×10 frames I went 8-⅛”” and 10-1/8” from the blade kerf and made marks on the back fence. Then I used a 45 degree drafting square to draw lines parallel to the cut the line.
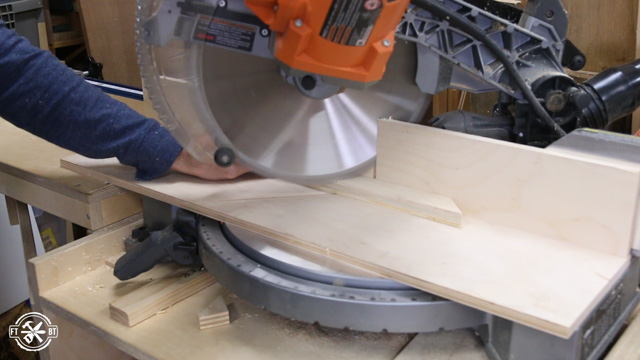
To make this picture frame I’m using an 8’ select pine 1×2 you can get at most home improvement stores. I started by cutting it in half as you can get two 8×10 frames from one board. But I’d actually recommend cutting all your material directly in half at 90 degrees before adjusting your miter saw.
b) Use Handheld Router to Cut Recess on Picture Frame
Next I grabbed my handheld router to make a spot for the picture and glass. I used a ⅜” rabbeting bit and set it to about half the total depth I wanted.
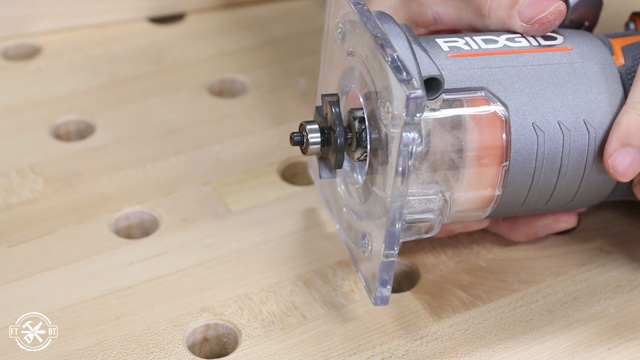 Then I made one pass with the router along the length of one edge of the 1×2. I lowered the bit to the full depth of ⅜” and made another pass to get the full rabbet for the frame.
 c) Cut Miters for the Picture Frames
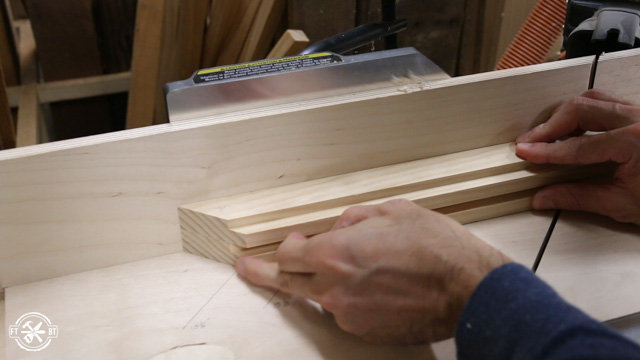
With my rabbet cut I could start cutting the miters. I cut the board in half again to let me do stacked cuts, but let’s talk about the measurements first.
When cutting picture frames you really have three different measurements. The outside length of the frame, the inside length of the frame and the length of the rabbet which is the one you need to get right to fit your artwork.
 Instead of doing a bunch of math and figuring out the outside or inside lengths you can just line up the end of the rabbet with the mark for the size you want. This will give you a perfectly sized recess for your glass and artwork.
To help eliminate any small errors between matching pieces I stacked one on top of the other and cut the second 45 degree angle at the same time. This way if the pieces are slightly off the mark they are still the same size.
 And with that I had my 10” sides for my picture frame. I repeated the process, establishing a correctly angled miter on the remaining piece first, then cutting them to size. And as you’ll see later, it’s very important to always keep the position of the rabbet top of mind.
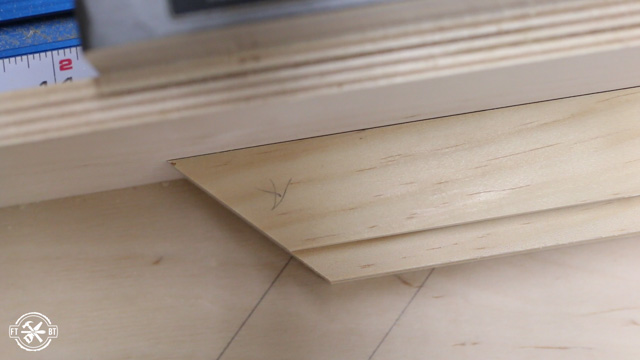 I lined up the 8” pieces and cut them to size to complete my four frame parts.
d) Glue the Corners of Picture Frames
Since this is a DIY version for how to make a picture frame, I didn’t use any special clamps for this one, just tape for the glue up. I lined up the parts end to end and used tape on the outside corners where each piece met. This let me fold up the joint without the parts moving.
 I used a special glue on the miter joints to help make the end grain joint stronger. It’s a thicker glue that sets up faster so it doesn’t soak into the end grain as much. I put it on all the joints then folded them up and taped the last corner.
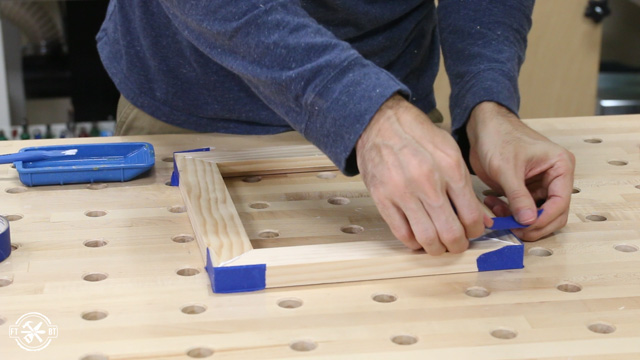 Then I used more tape to try and pull the corners tight. And honestly, I’m not a fan of this at all. I’d use some type of clamps here and I’ll show you my preferred version later. That said, it did work, but the joints needed some reinforcement.
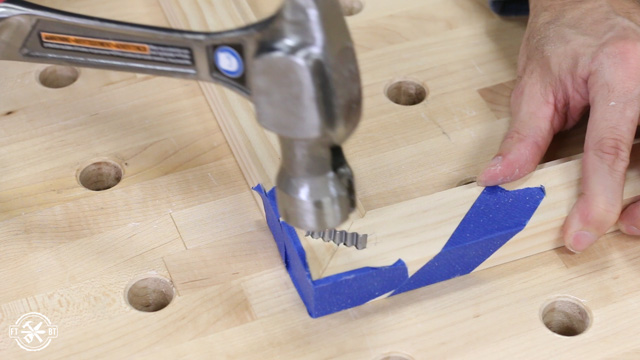
A DIY version of reinforcement is to use these corrugated fasteners. They get hammered in across the miter joint and lock it into place.
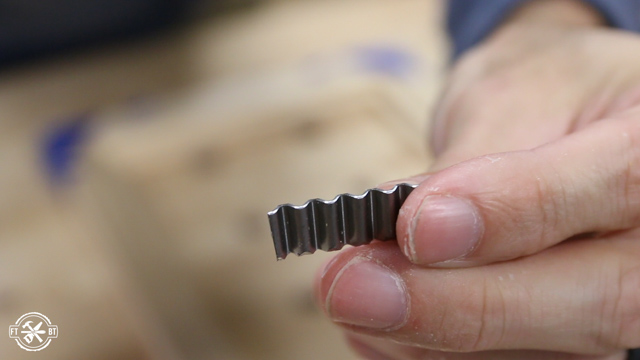 After the glue was dry, I held the fasteners in place with pliers and hammered them in. And I don’t know why, but this didn’t go well at all. I kept bending the fastener and it was really just a mess. One was good, two were so so and the fourth was a complete disaster.
 When I tried them out on a plywood test frame they worked great, so I think if you get your technique down right these are a good option.
e) Apply Stain to the Picture Frame
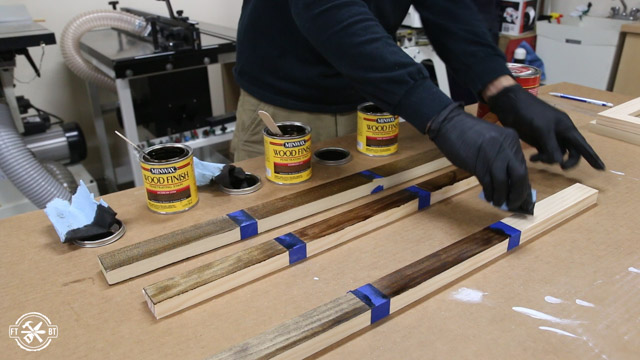
I don’t love the look of pine so I wanted to stain the frame dark for a richer look. I’m using stain and finishes from Minwax, a sponsor of today’s project, and I wanted to see how three different stains looked.
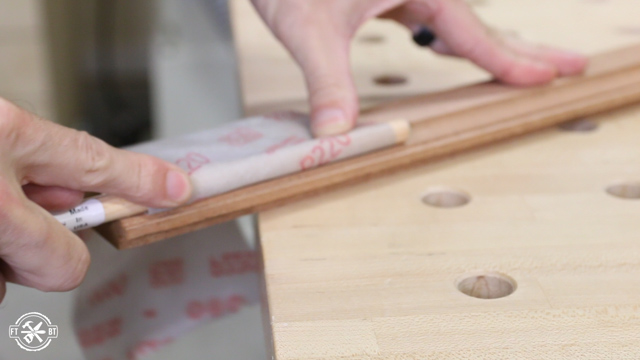
I made an identical frame from poplar to show the difference in the two woods, so I made some sample sticks to test the stain.
I applied pre-stain conditioner to the poplar test stick and one pine stick. This helps even the absorption of the stain and reduces blotchiness. I tried out Jacobean, Espresso, and Dark Walnut. The Espresso ended up being the one I liked the best and the conditioner definitely helped reduce blotchiness, so I went with that combo. Making test sticks like this is a great way to hone in on the look you want.
 My favorite way to apply stain is with a shop towel and I wiped on a coat of the stain to both the pine and poplar frames after pre-treating them with the conditioner. The conditioner reduces blotchiness and makes the stain absorb evenly. I ended up doing 3 coats to get to the darkness I wanted.
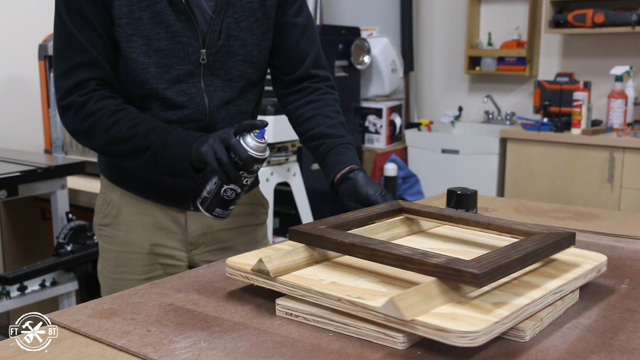
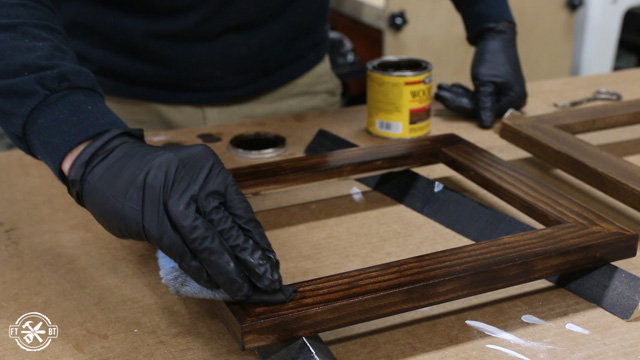 After letting it dry I came back and topped the frame with a Minwax clear aerosol lacquer in satin. I love this lacquer because it dries very quickly and I could go back and forth between the frames almost immediately.
 2. How to Make a Picture Frame using a Table Saw
a) Cut Chamfer and Recess Rabbet Using Table Saw
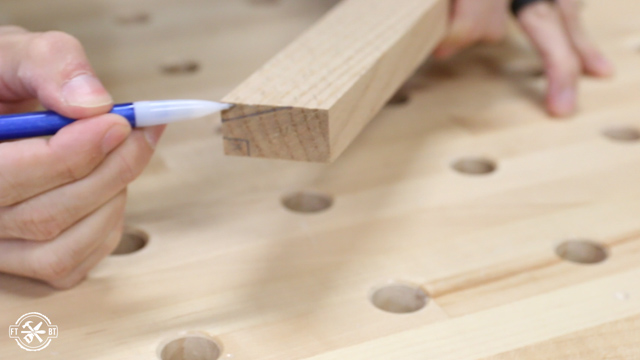
For the 2nd frame I’m upgrading to a hardwood and adding a table saw. I laid out the profile I’d be cutting on the end grain of this oak.
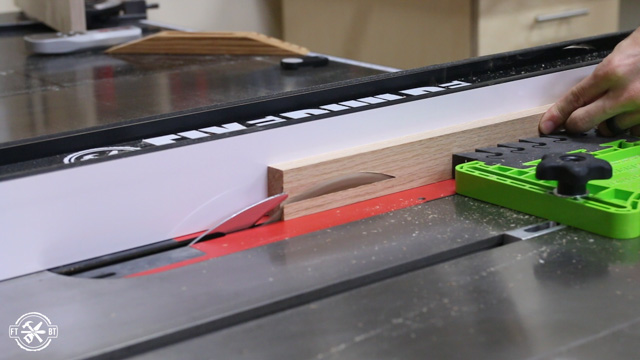
 The first cut to make is a subtle chamfer on the inside of the frames edge. I tilted the blade to 15 degrees and set the fence a half inch from the blade. Using a featherboard for these cuts makes sure the cuts are consistent along the entire piece.
 With the chamfer cut I could move on to the rabbet for the glass and artwork.
 I raised my blade to ¼” and set the fence so the blade would just hit the outside of layout for the first rabbet cut.
 For the last cut I flipped the board on edge and moved the blade and fence to line up with my last layout line.
 Here’s the final profile using just the table saw. It’s a simple design but definitely looks more custom than just a squared off frame.
 I cleaned up the saw marks on the frame with a card scraper before heading over to the miter saw.
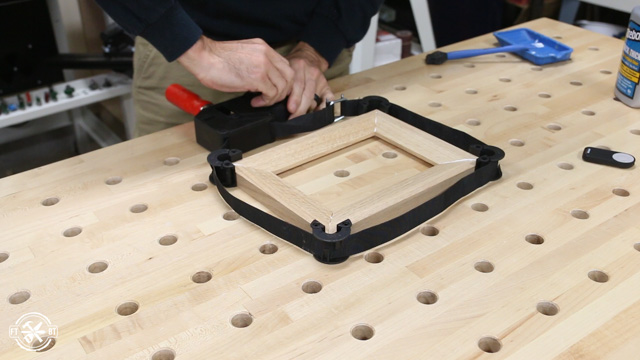
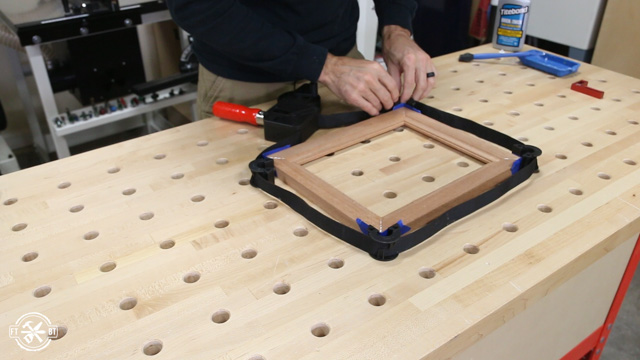
To glue up this 5×7 frame I’m breaking out my web clamp. This thing makes clamping mitered pieces so much nicer. The little corner supports span both sides of the miter giving you even pressure around the whole frame.
 b) Add Splines to Picture Frame and Apply Finish
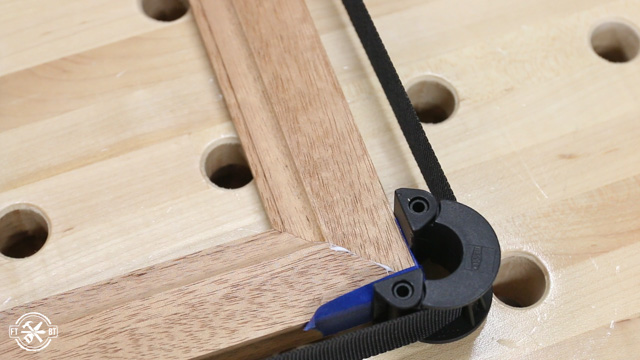
After the glue dried I wanted to add some splines for support. Those corrugated fasteners would be a real bear in a hardwood like oak. I used a jig to position the frame and cut a slot in each corner.
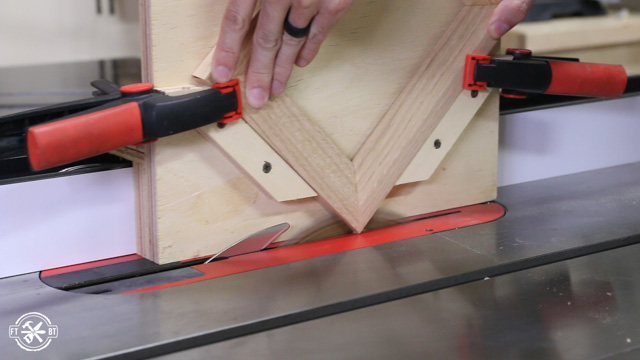 Then I sized a piece of oak to fit the slot and cut out little triangles on my JET bandsaw. I flattened the bottom of each triangle on sandpaper to make sure it had a solid fit. Then I glued them all in place making sure the triangle was bottomed out in the slot.
 After the glue dried I cut the splines off with a flush cut saw. Be careful to cut with the grain here and not against it or the corner can chip out. I finished by sanding them flush with the frame.
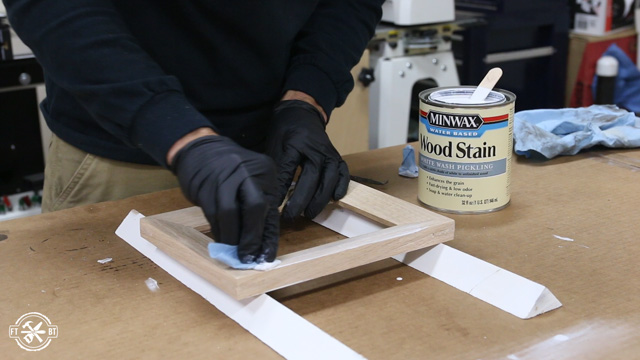
 We’ll be putting a beach picture in this frame so I wanted to try a white washed finish. I used the Minwax white wash pickling stain and applied two coats. After letting it dry I top coated the frame with Polycrilic by Minwax. This is a new take on oak which is not one of my favorite woods, but the white wash definitely changes the feel.
 3. How to Make a Picture Frame using a Router Table
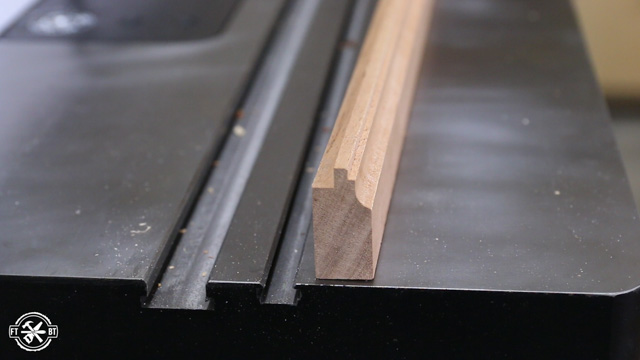
a) Use Router Table to Cut Profile on Picture Frame
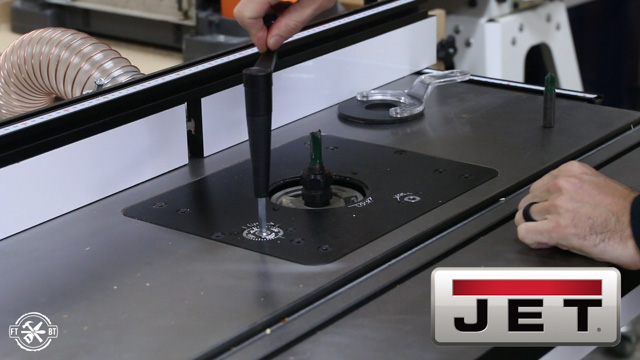
For the third frame I brought out the big guns and added a router table to the mix. With a router table you open up a whole new world of options for profiles. The one I’m using here is the cast iron top table from JET, the other sponsor of today’s project. It’s got a chain-driven router lift that let’s you change bits above the table and make micro adjustments to the height of the bit.
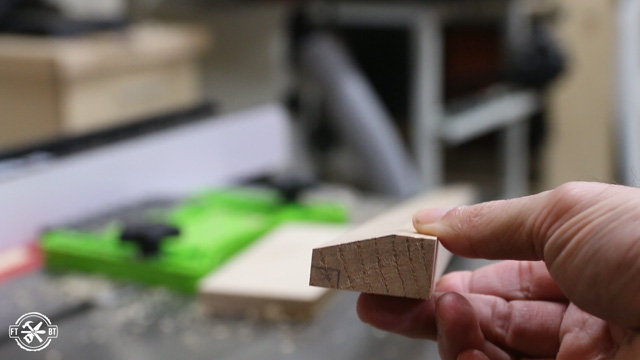
 I had a rough idea of what I wanted to do with the profile, but honestly I just jumped into it. Using a cove bit, I made a sweeping curve on the inside of the frame.
 It was a little small for what I was going for so I raised the bit and made another pass. That’s the beauty of working on this JET router table, you can really fine tune things very easily.
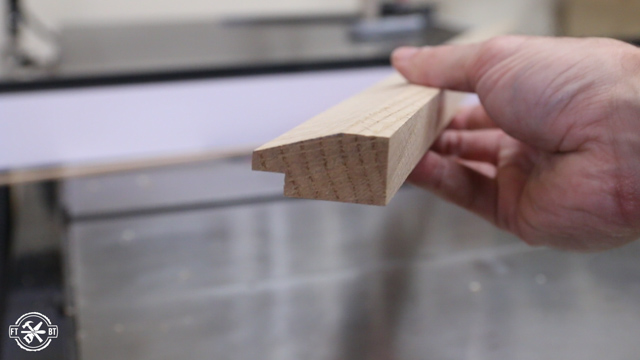
 Next I unplugged the router and changed over from a cove bit to a straight bit. I put a small ⅛” by ⅛” groove along the inner edge.
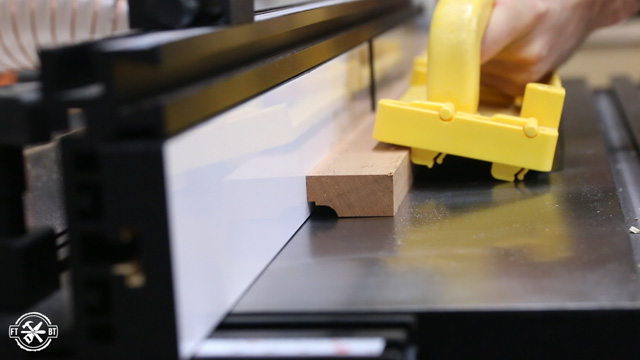 This is very subtle but will create some really cool shadow lines in the final piece. I’m really a fan of simple looks so I decided to stop the profiling here.
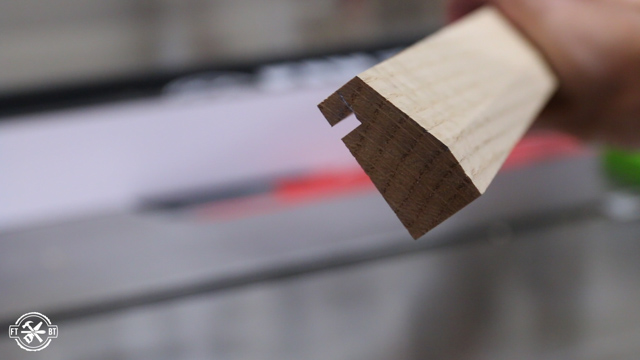
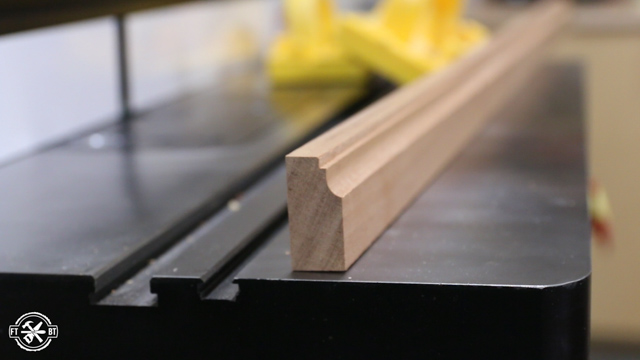 I put a small roundover on both sides of a ¼” off cut from the frame stock to show how this could look. The possibilities really are endless when doing profiles on the router table.

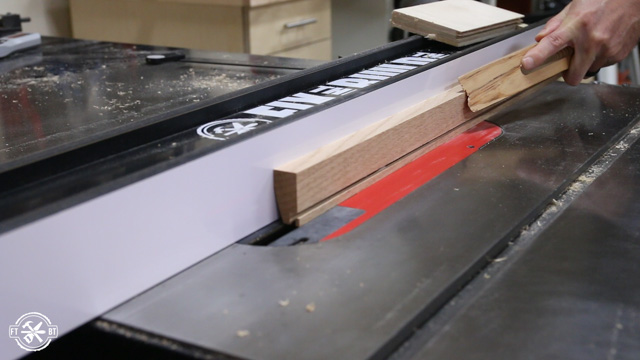
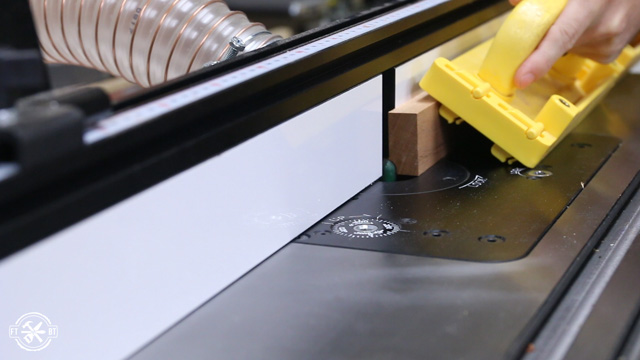
b) Cut Recess Rabbet and Sand Picture Frame
Cutting the recess rabbet for the glass and artwork can be done with the same straight bit. And the dust collection on this table is superb with both above and below the table collection points.
With the more detailed profile I needed to sand everything before assembly. Wrapping sandpaper around a dowel is a great way to get into the curved areas.
 c) Cut Miters, Clamp and Apply Finish to the Picture Frame
I went through the same process on the miter saw to cut the miters. Frankly I was going to cut them on the table saw using a jig, but my results were so good with the miter saw and auxiliary fence I just stayed with it.
For this frame I went back to the taped corner method but paired it with the web clamp. I got overconfident in the web clamp with the oak frame and the corners did slip a little up and down.
 This combination gave me my best results yet and the profiles in the corners met up perfectly.
 I went with a clear aerosol lacquer by Minwax to let the mahogany shine.
 And for all these frames mounting pictures or artwork is as easy as dropping in some acrylic or glass, then attaching your piece to a backer like ⅛” plywood or even cardboard and securing it with glazing points or finish nails.
Whether you only have a few tools or access to some advanced woodworking machines, you can make some awesome frames.
If you liked this project, make sure to check out more of my Home Decor Projectsand Shop Projects!