

Oh my…I’m so excited to share this project with you! It is one of my favorite DIYs in this house so far! I work with Minwax occasionally throughout the year and this project is another I accomplished with their awesome products.
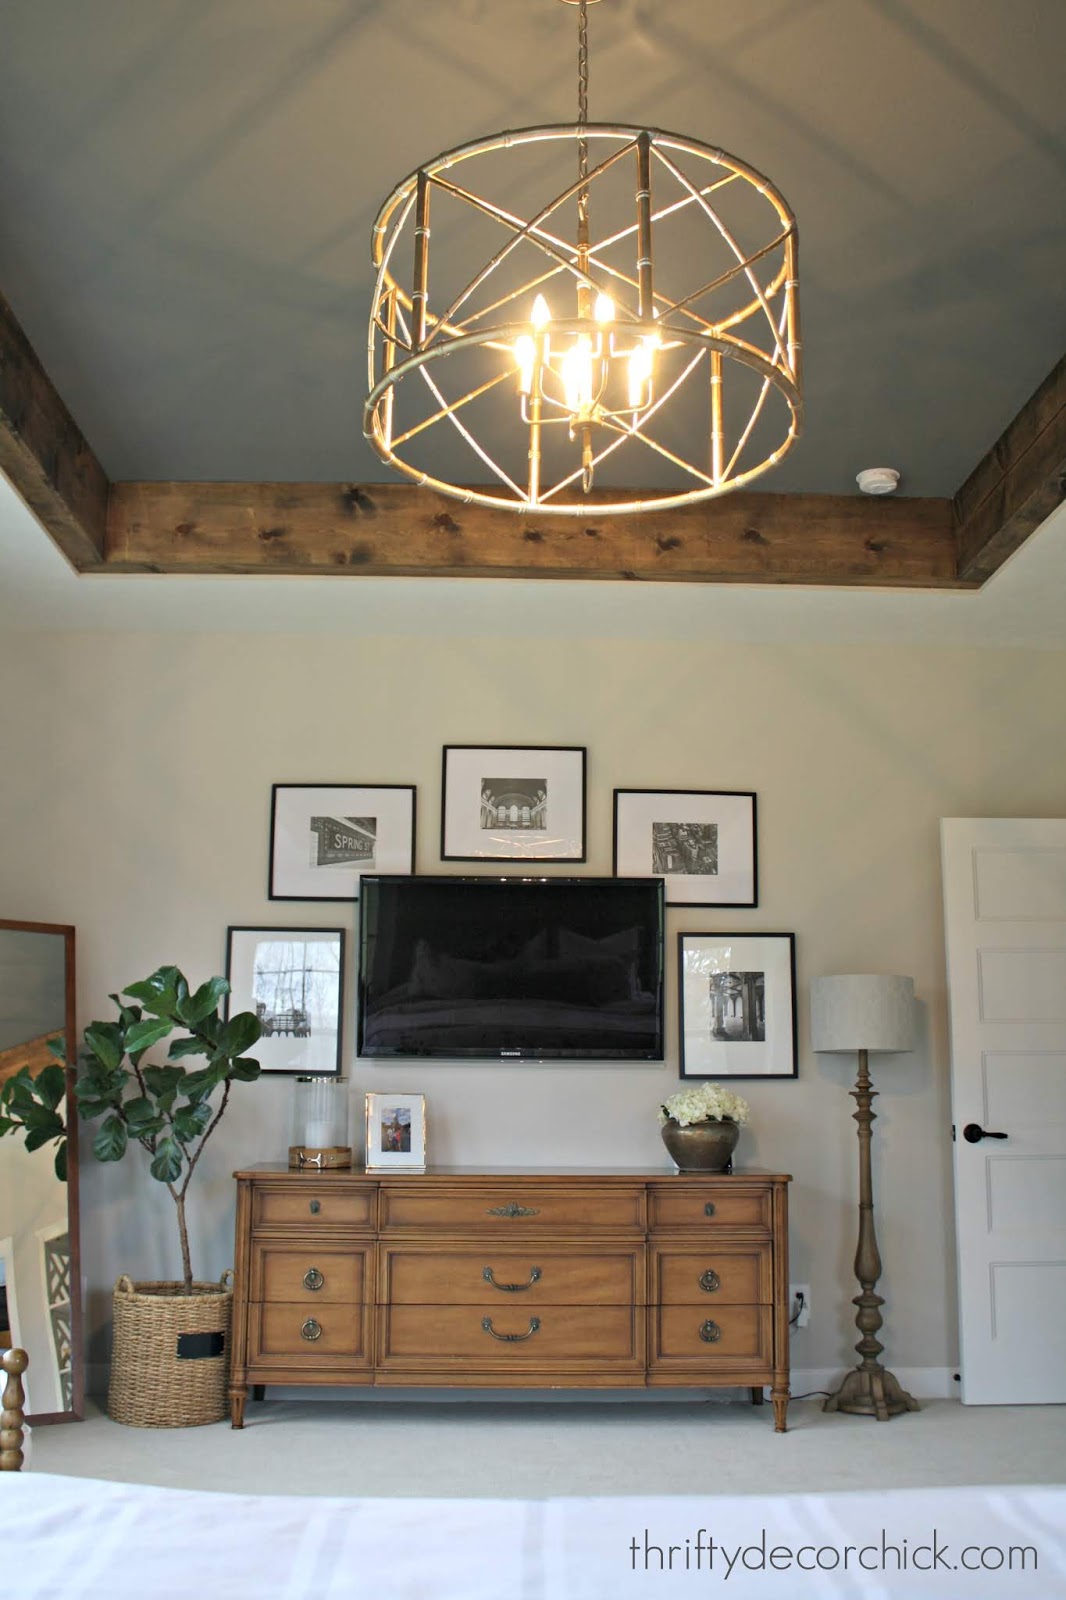
Our master has ten foot ceilings thanks to the tray ceiling. I shared the new light in this room a few months ago:

We love the tall ceilings, especially because we were so used to the tall angled ceiling in our last master. It really opens up the space nicely. But when I see a tray ceiling I see a potential project! I’ve seen many treatments on these types of ceilings, from adding crown to installing wood to the tray part.
I first saw my project in a model home but haven’t seen it anywhere since! This was a different take on the typical tray ceiling treatment and we LOVE how it turned out!
I had help with the first part of this project and because of that I did the steps a little backwards. I would have much preferred to paint the ceiling and then stain the wood after, but because I was at the mercy of someone else’s schedule, I did the steps the opposite way I would typically recommend. It wasn’t a big deal though. More on that in a bit!
Anyway, the goal was to create “beams” around the sides of the tray ceiling. We had two options — take the wood and 45 it on the table saw so when we nailed the side and bottom together, it would look like a true beam. Or, take the two pieces of wood and just nail them into each other to create the look of a beam. We went with the latter, mostly because we were using very long pieces of wood — two at ten feet and two at 16 feet. I don’t trust that the mitered corners would have met up perfectly for the length of all the wood.
I’m glad we didn’t go that direction — it would have been WAY more work and the final result looks great without that extra step.
To start, you’ll need something to attach your wood to. The “beams” are only two sides — the bottom and the side. So the piece on the ceiling (be sure to attach to studs) was there to stabilize the side board, and the wood attached to the side of the tray ceiling was there to hold the bottom piece in:
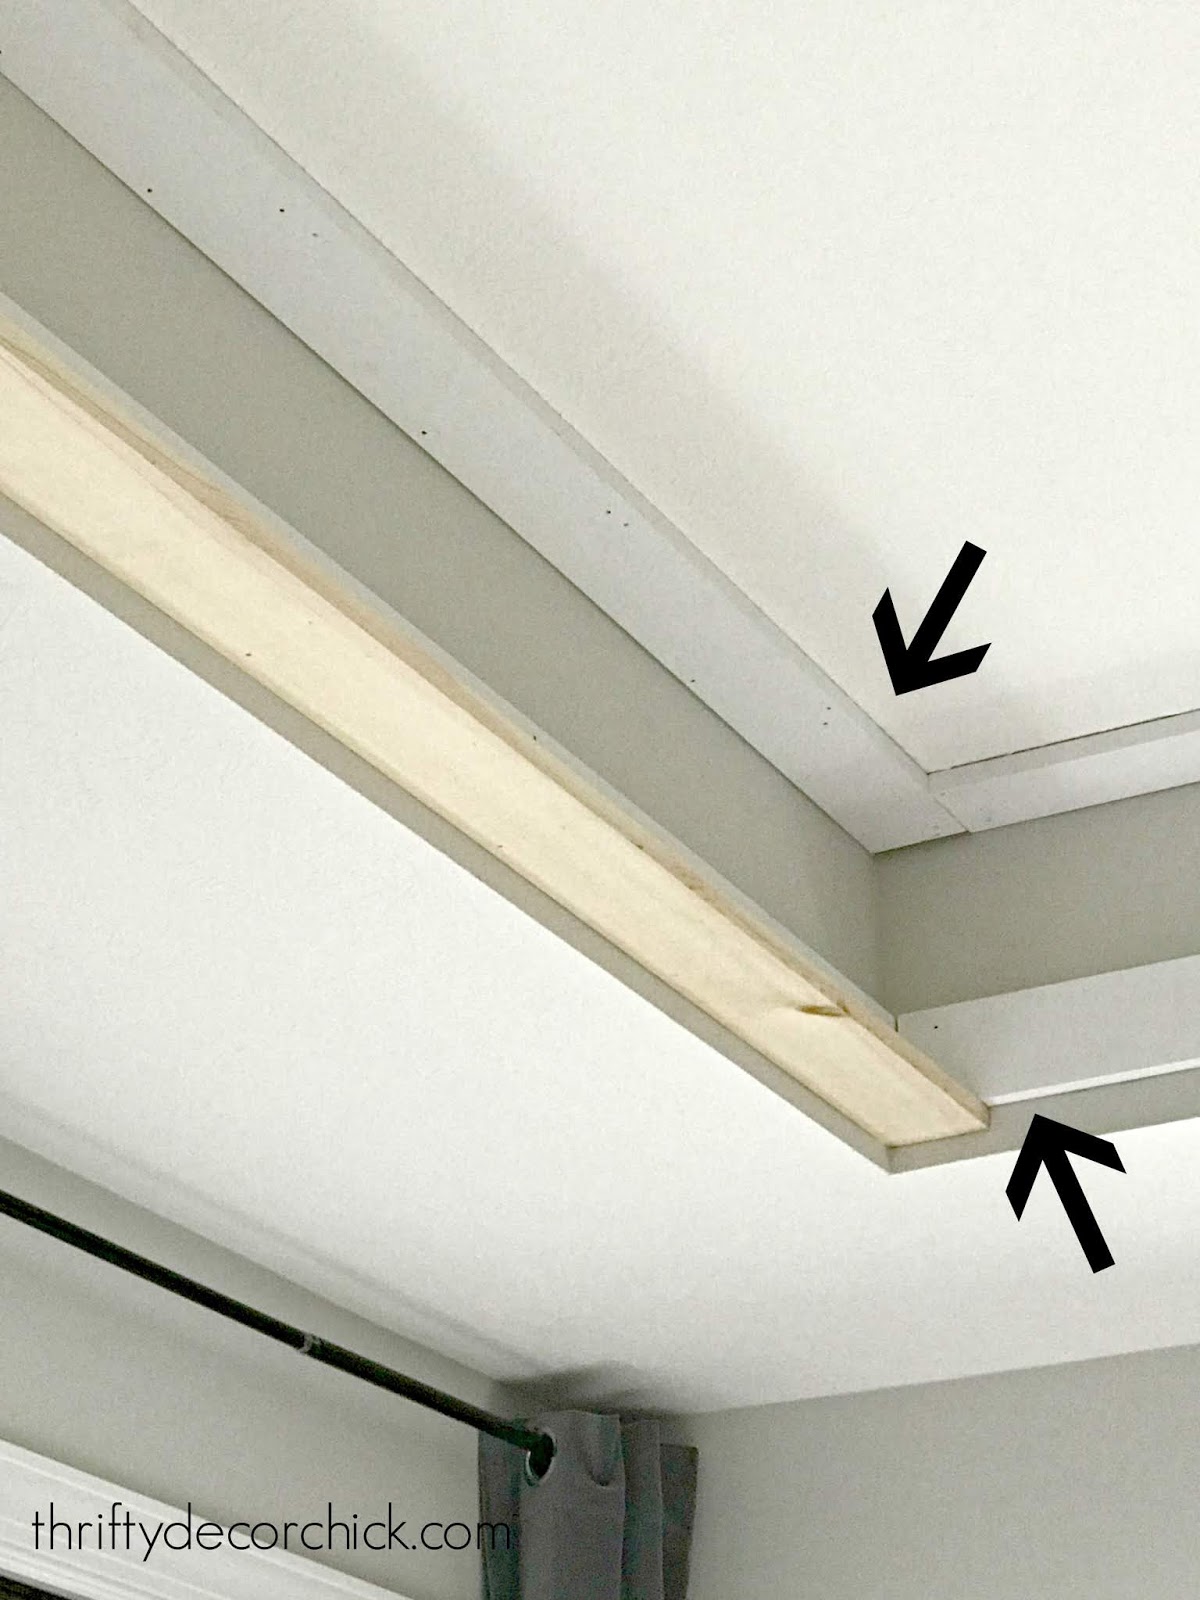
I hope that makes sense. The arrows are pointing to the pieces that the wood that makes up the beam were attached to. You can see the bottom part of the beam started in that photo above.
When the bottom pieces were up, the sides could go on — nailed into the board attached to the ceiling and then nailed to the bottom piece. The arrows show you where to nail:
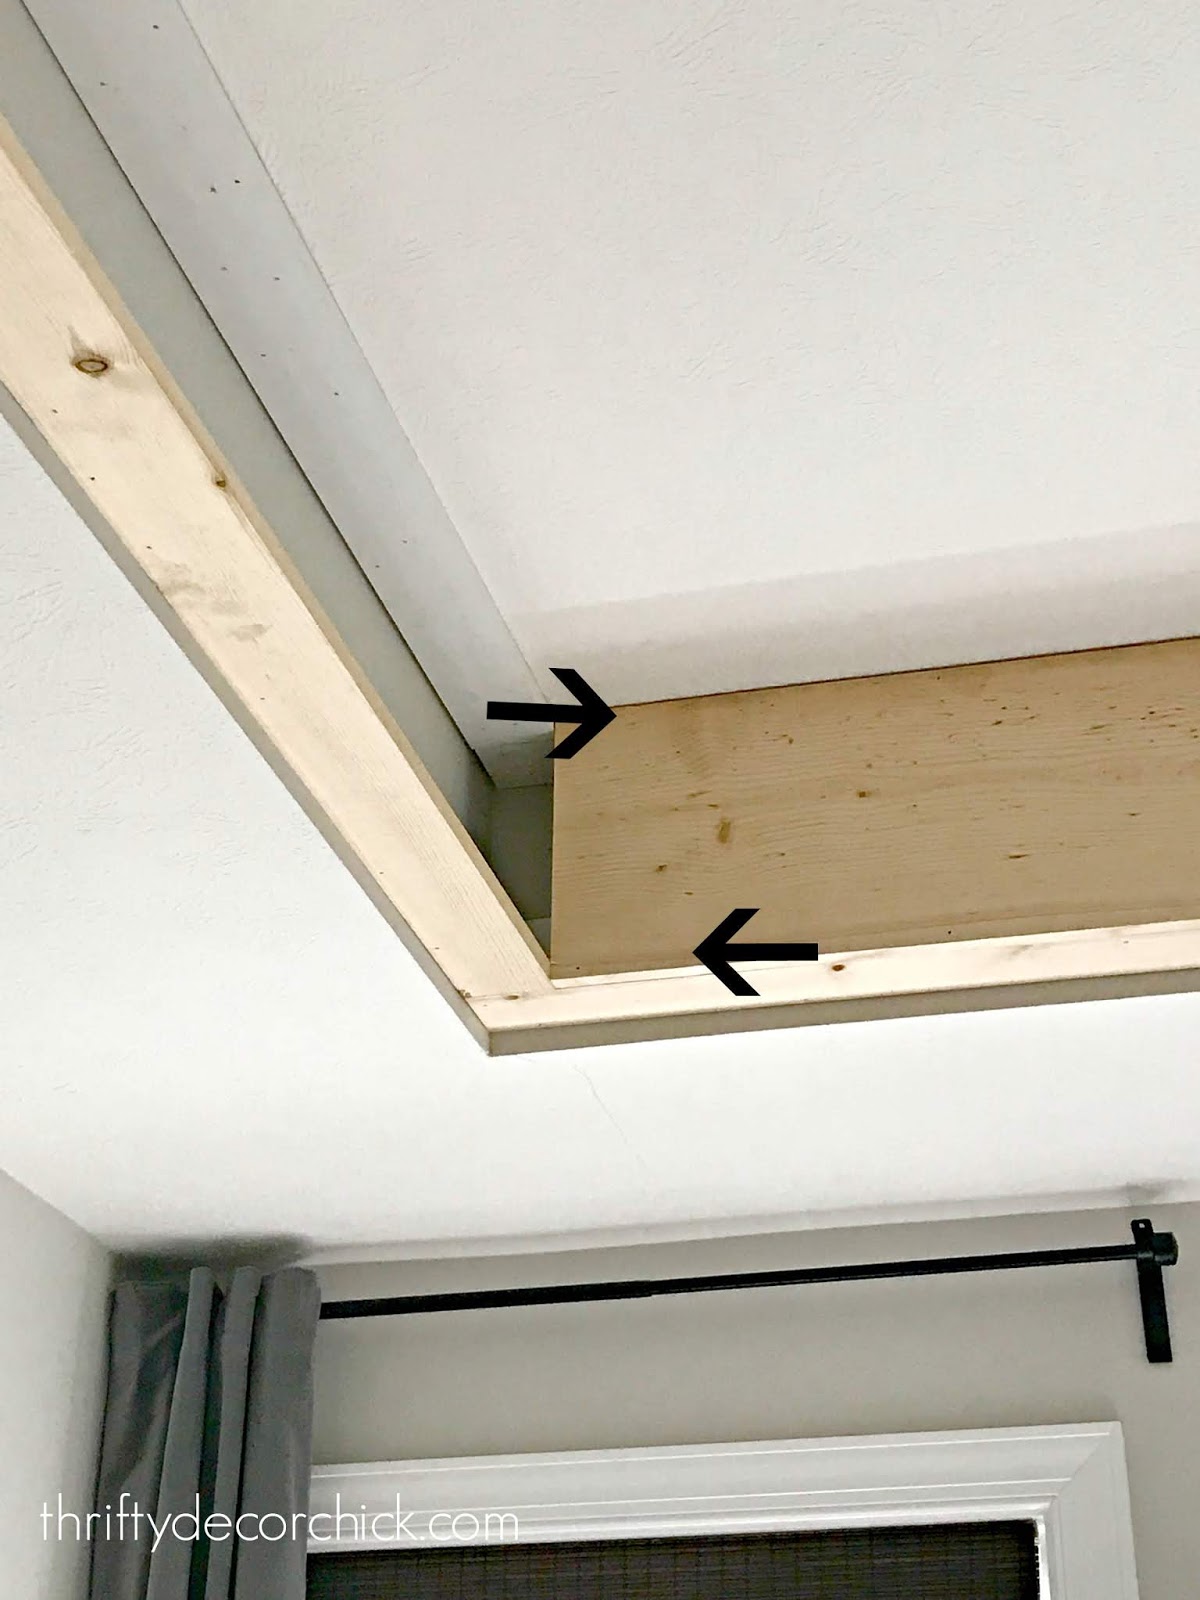
When you’re done you have “beams” running around the tray ceiling.
Like I said…the ideal way to complete this project would be to prep before hanging the beams. I painted the ceiling after the wood was up. Painting a ceiling is never fun but it went quicker than I though it would. I used a long painting pole to get the two coats up.
We moved furniture and put a big painter’s cloth over everything as I moved around the room. I did have to climb up and down the ladder a million times to cut in around the wood. If you paint before the wood goes it up it would be SO much easier because you wouldn’t have to worry about cutting in. (The wood would be covering it.)
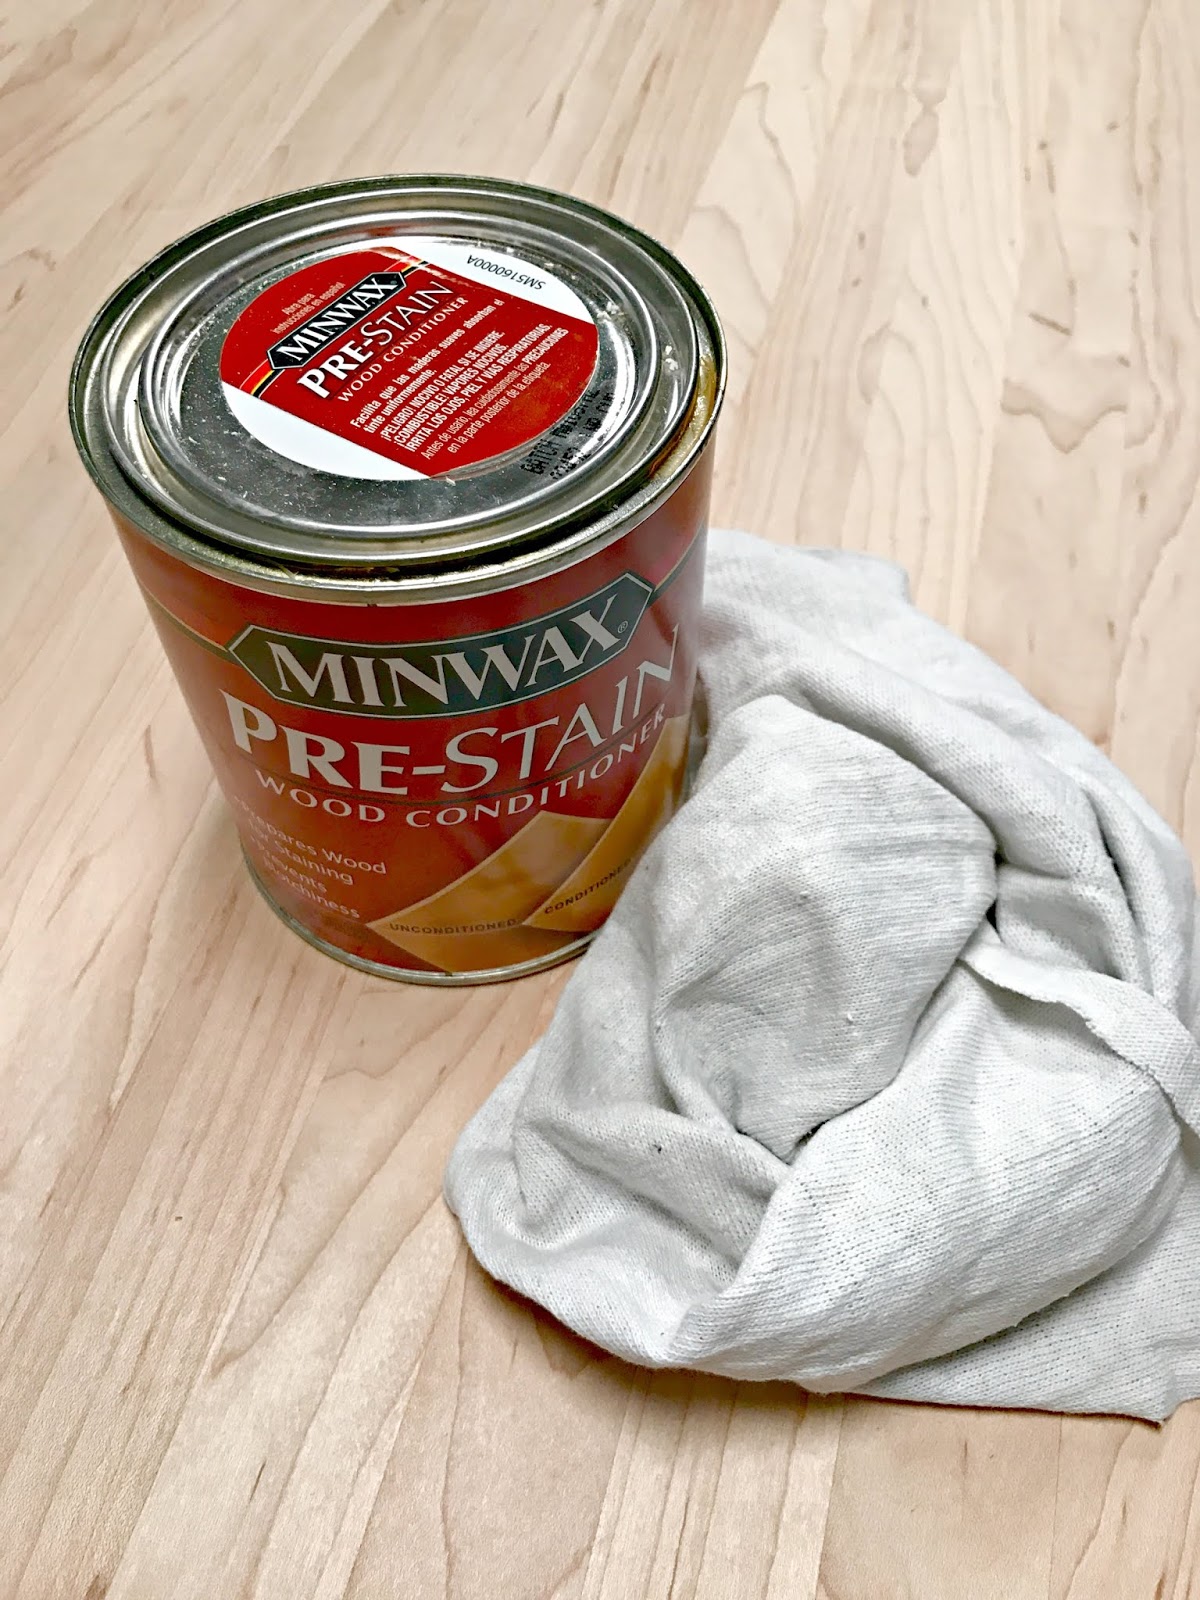
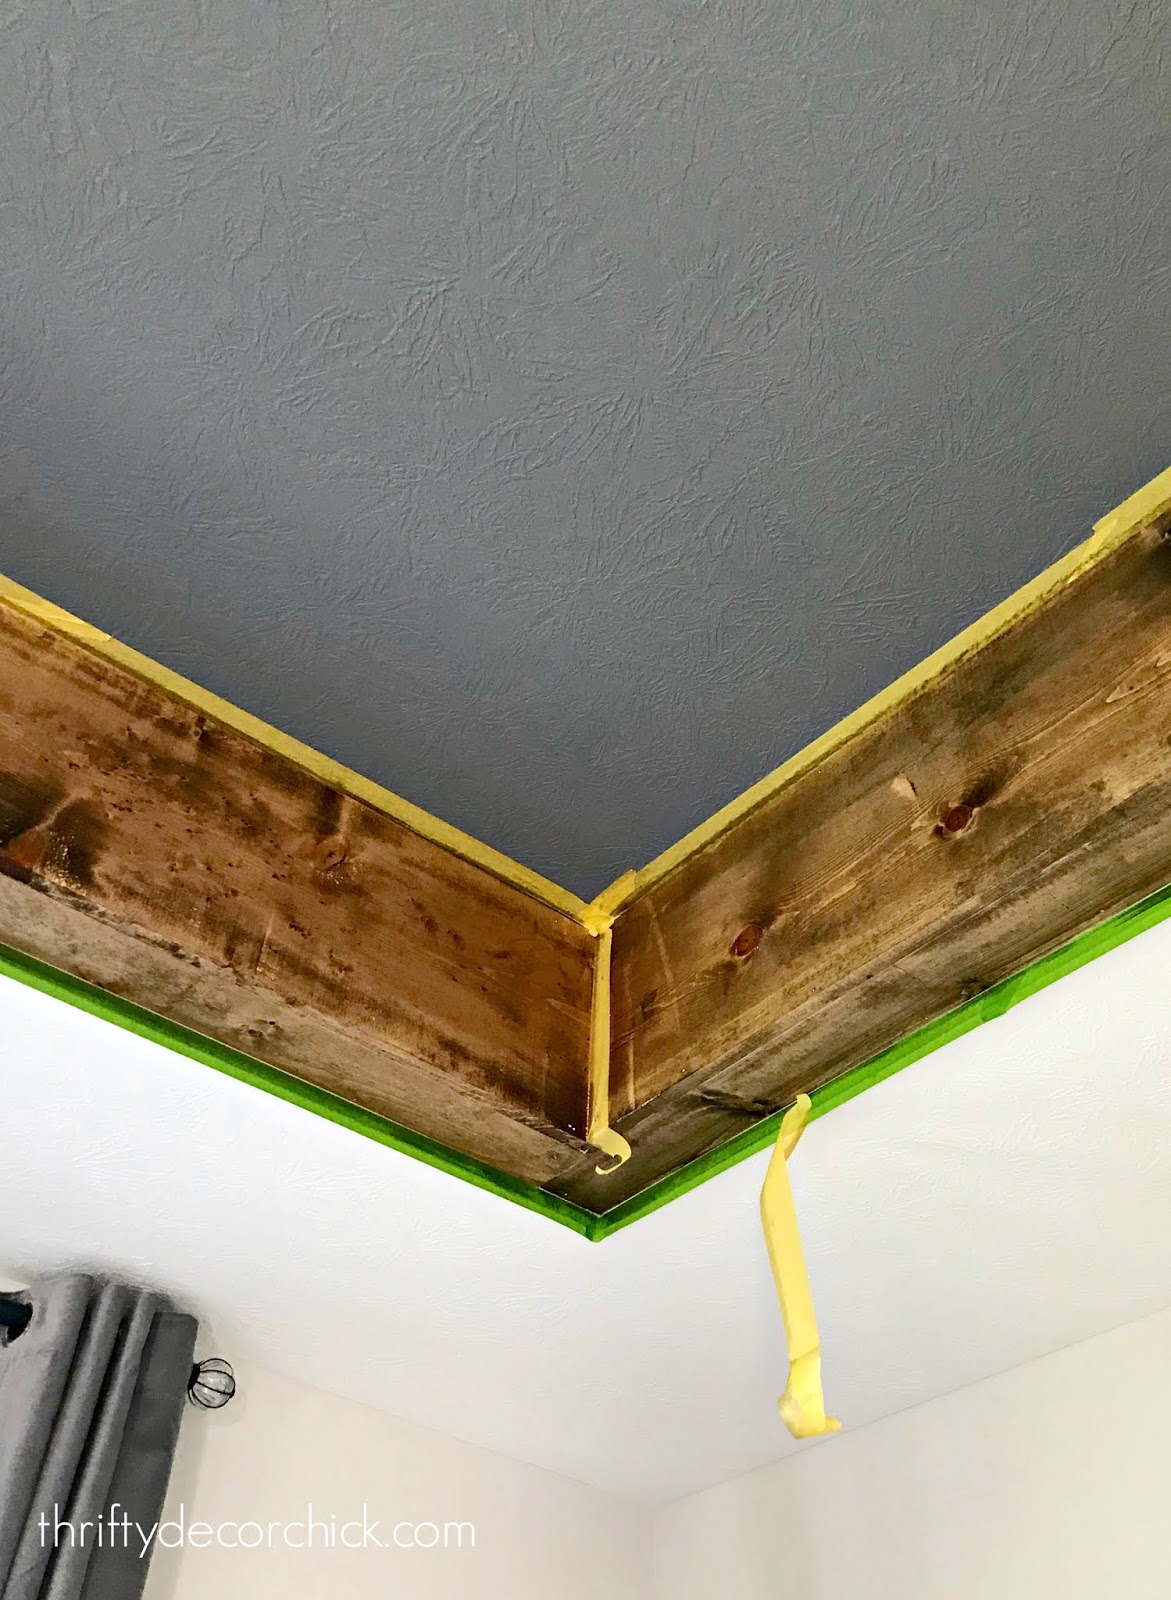
I painted the ceiling in Westchester Gray by Sherwin-Williams (flat finish!) and then it was time to start the staining process. Even with the wood already installed, it went much easier than I thought it would! I taped off the ceiling and then started with what I think is a VERY important product, especially on a project like this:
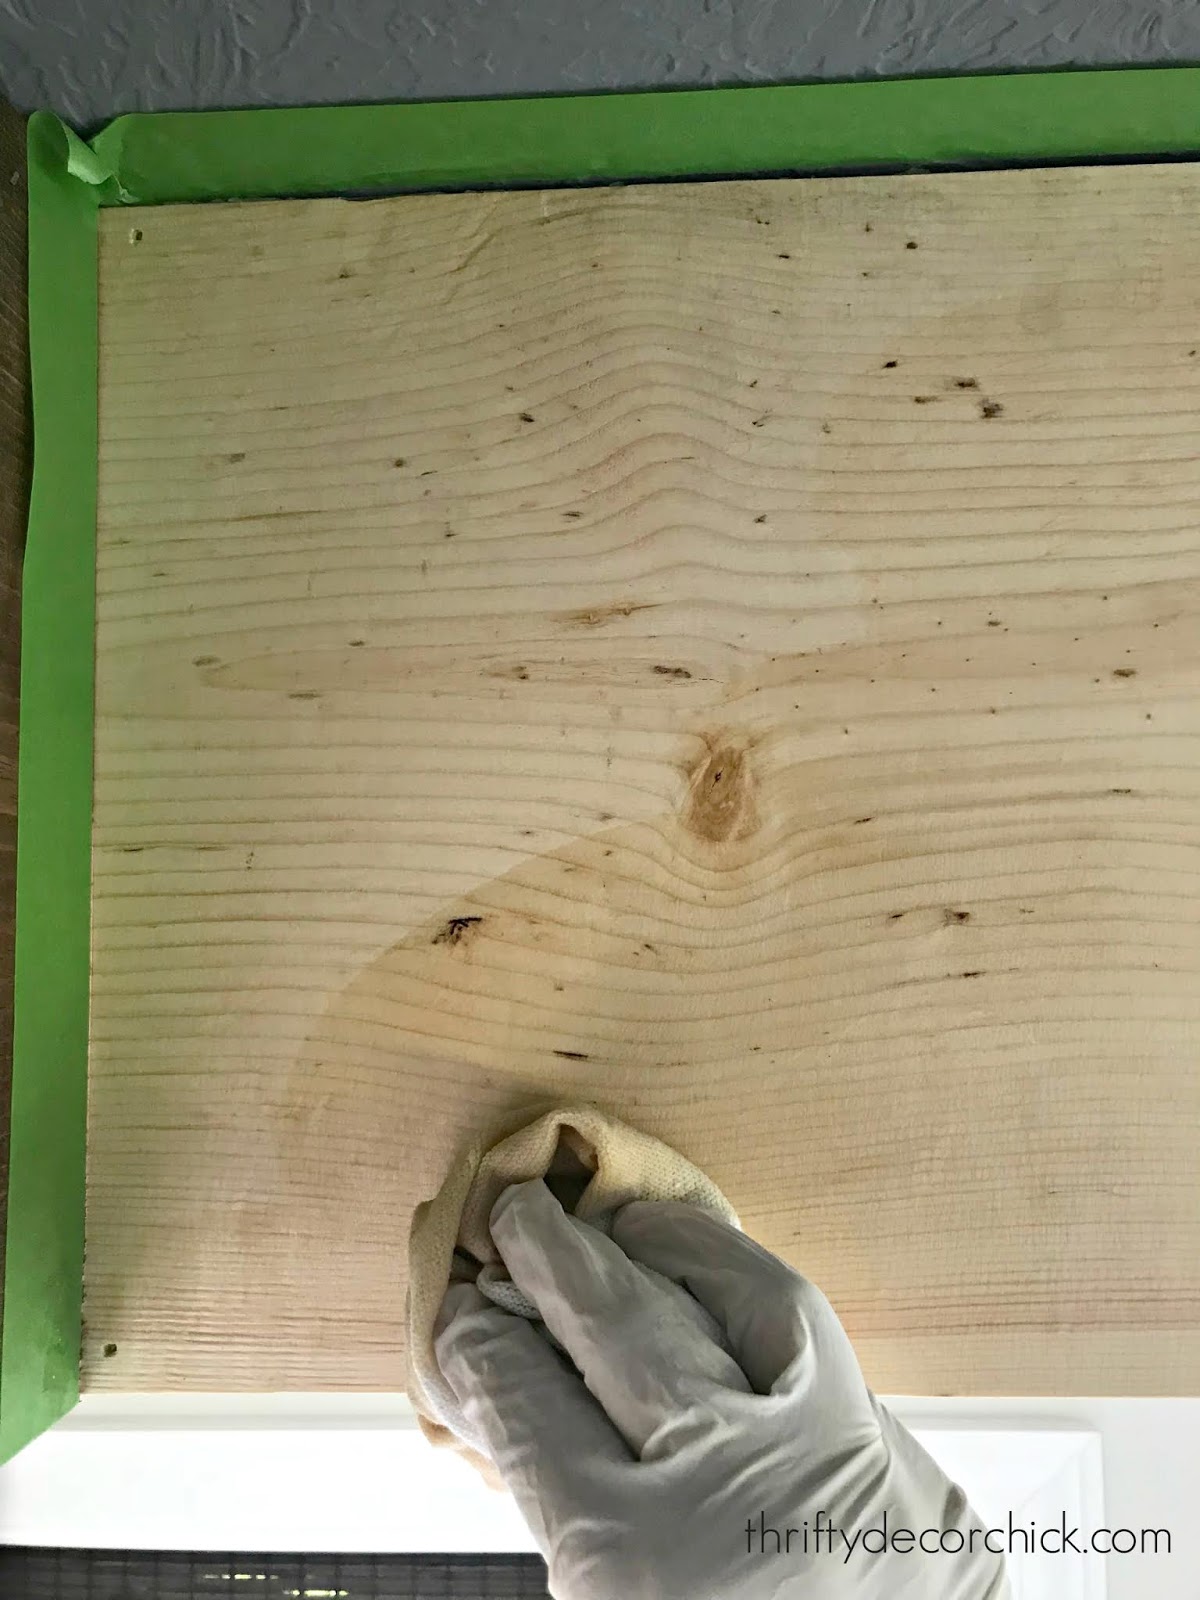
I talk about using the pre-stain wood conditioner a lot because it is SO important. Conditioning the wood preps for stain so it isn’t blotchy. More importantly, it gives you time to stain the wood, which is incredibly important on a project like this that has large pieces you’re working on:
It’s important to keep a “wet edge” when staining — which means you want to be sure you don’t apply the stain and then let it dry at all at any point. If you do, you’ll see where you stopped and started. The conditioner makes it much more forgiving so you have a lot more time to work.
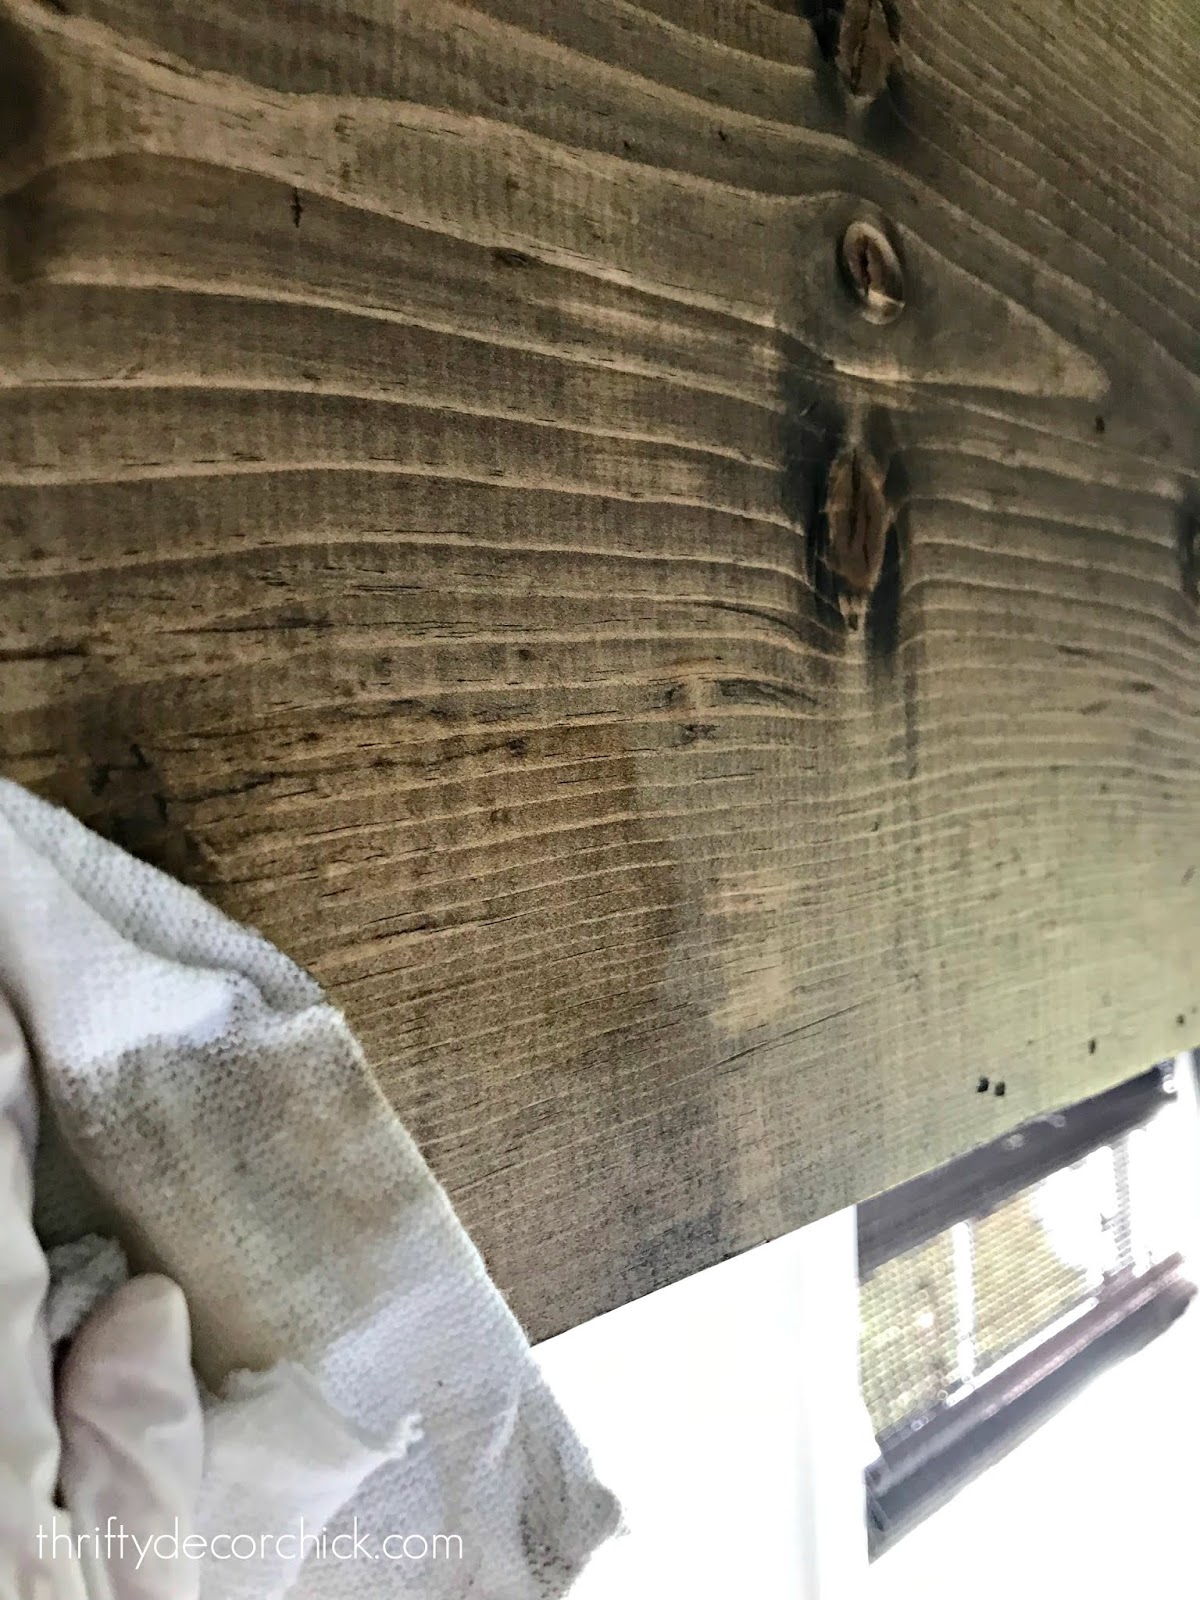
Right after conditioning, I started with the stain color I thought I wanted to use — Provincial:
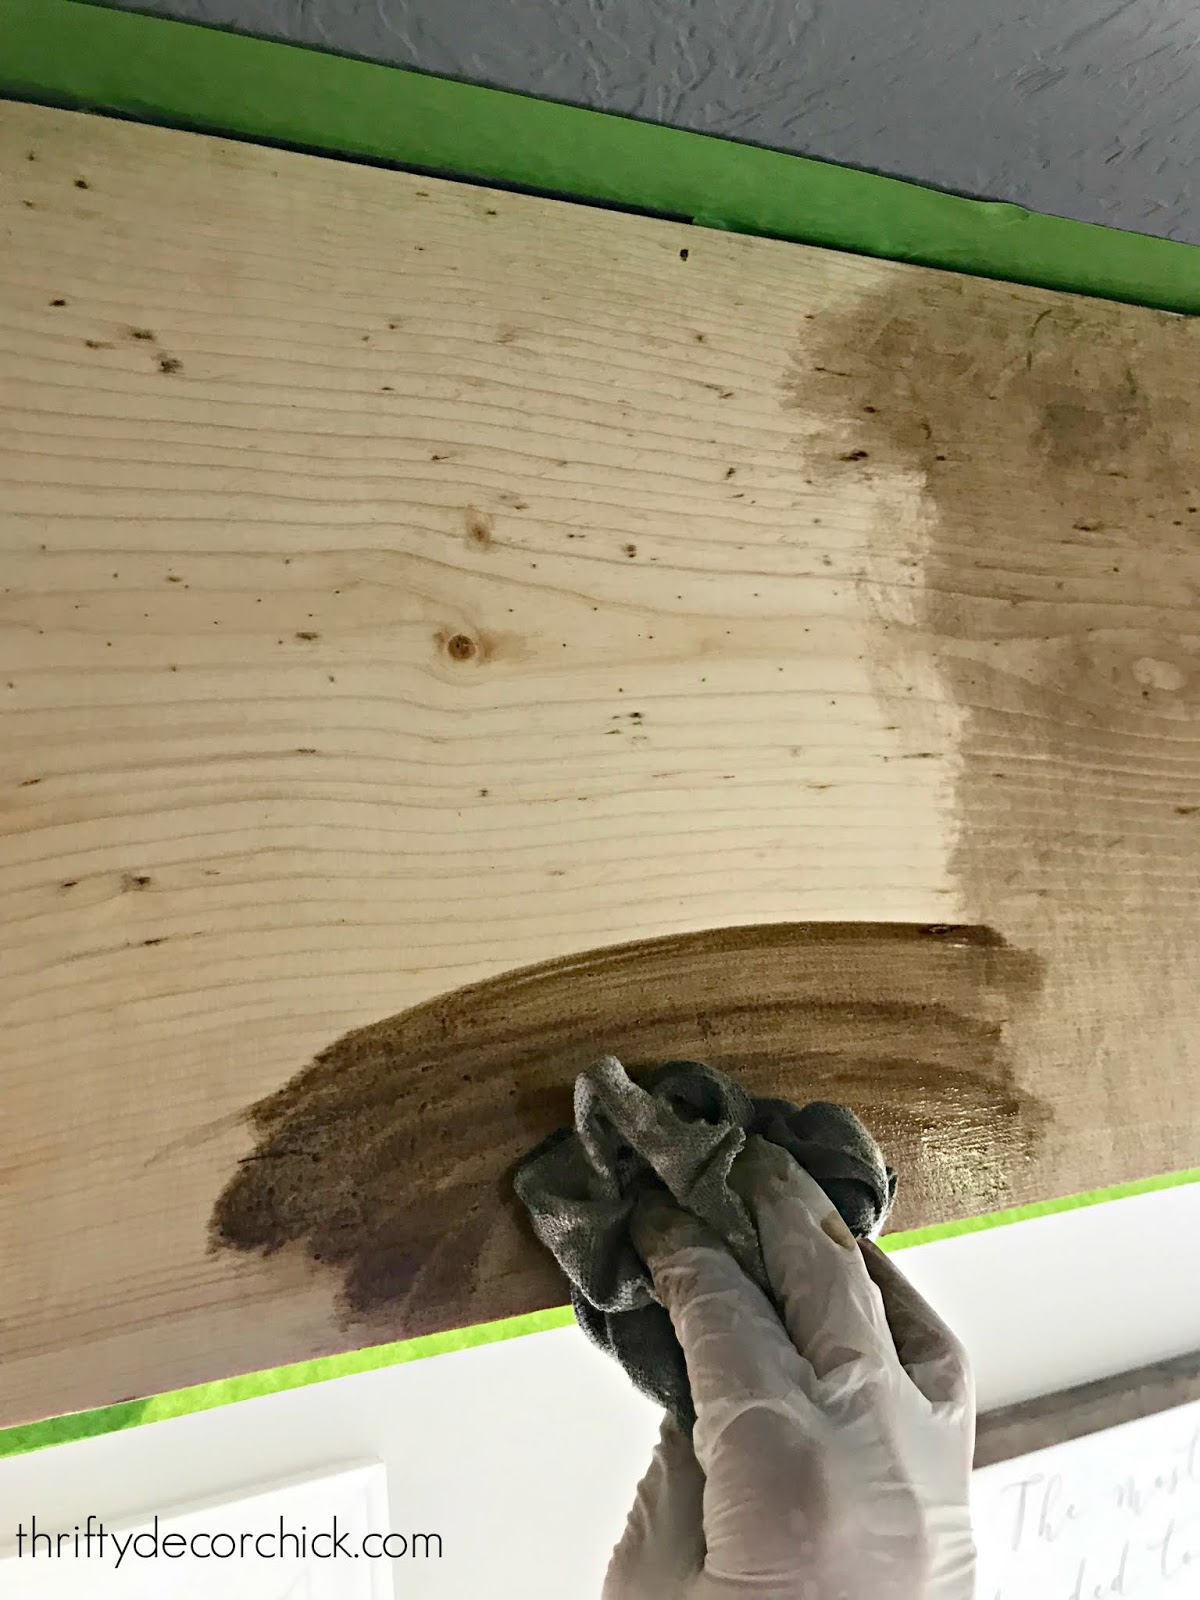
Over the years I’ve found the easiest way to apply stain is with a rag. Gloves are needed! You just use the rag to wipe the stain on, then rub it into the wood:
See that edge there? Where it’s wet and meeting the part I had just done? (The stain to the right looks like it’s dry but I had just applied it.) If the wood was not conditioned some of that line would stay — and it doesn’t look good!
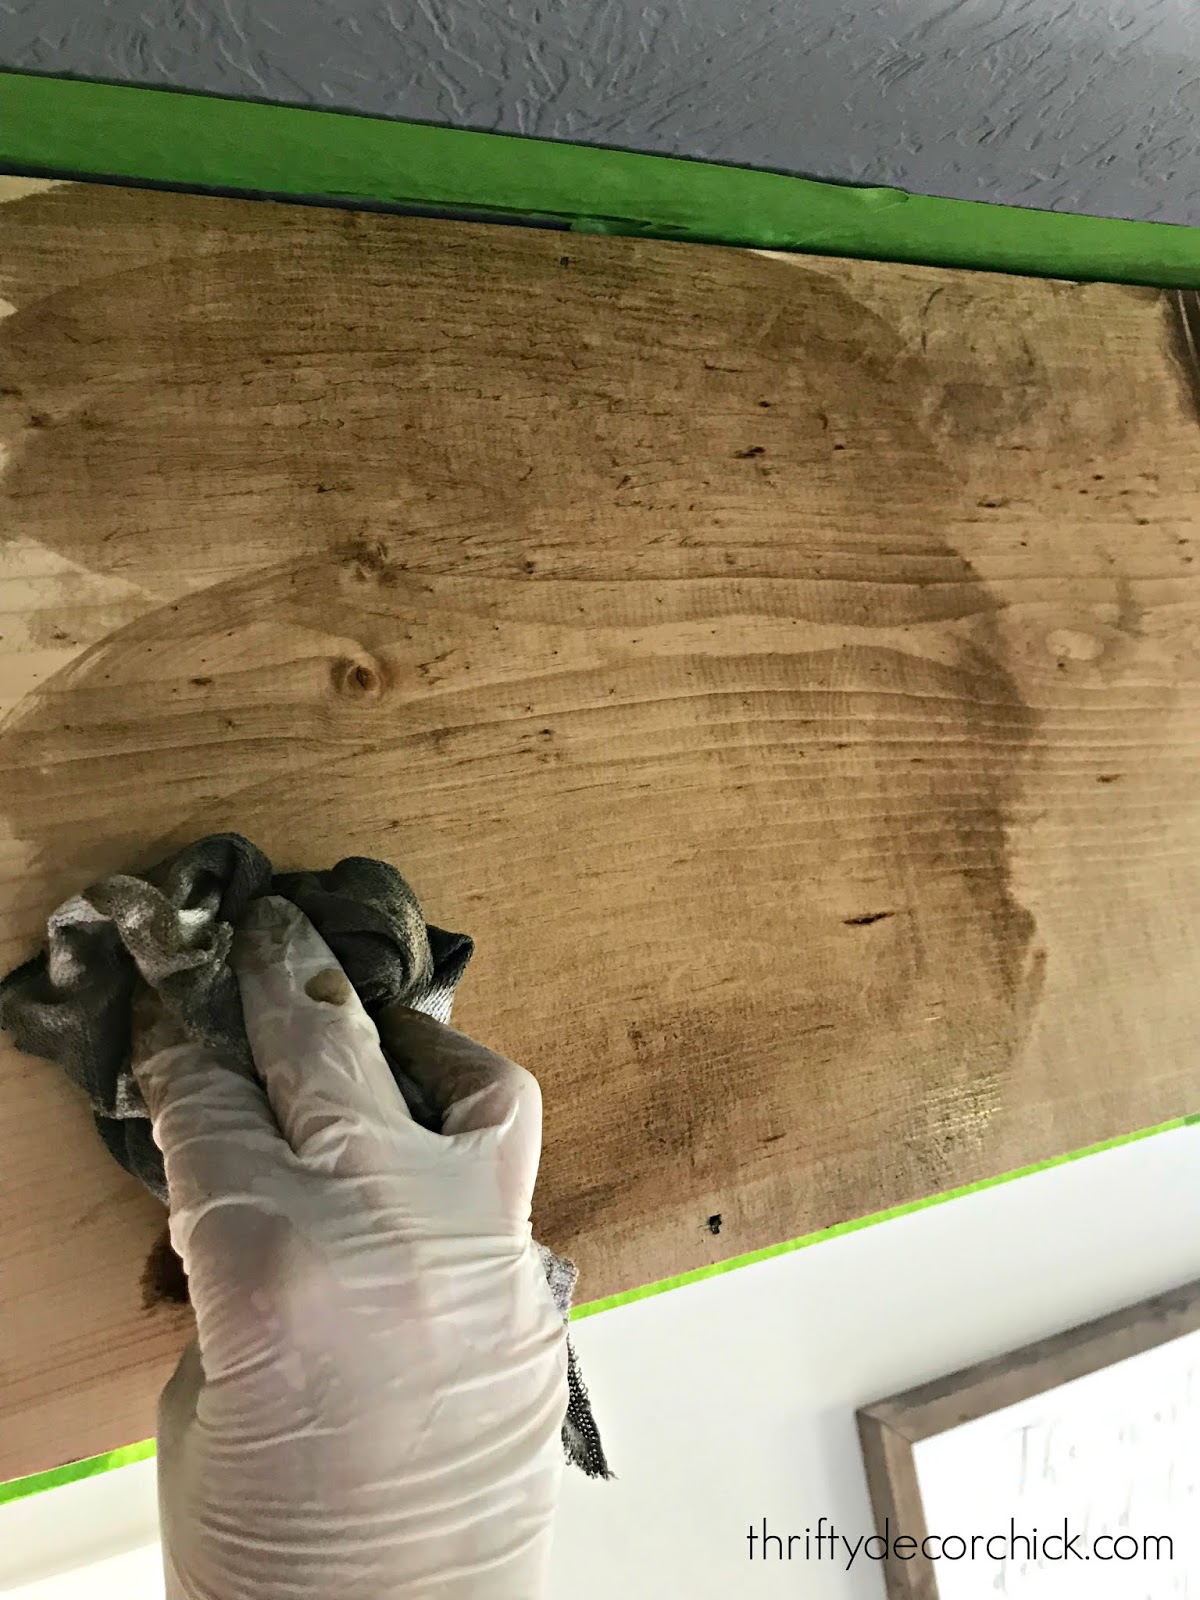
Because of the pre-conditioner, it came together nicely. No line!:

On the first beam, I did the first coat and stepped down to check it out. I usually only use one coat of stain on my projects — more coats will deepen the stain but I find it’s rarely needed.
I love the Provincial color, but it was leaning a little orange on this pine. I didn’t really notice it until I stepped back. Because of that, I went back with another coat of stain, but this time with another favorite, Jacobean:
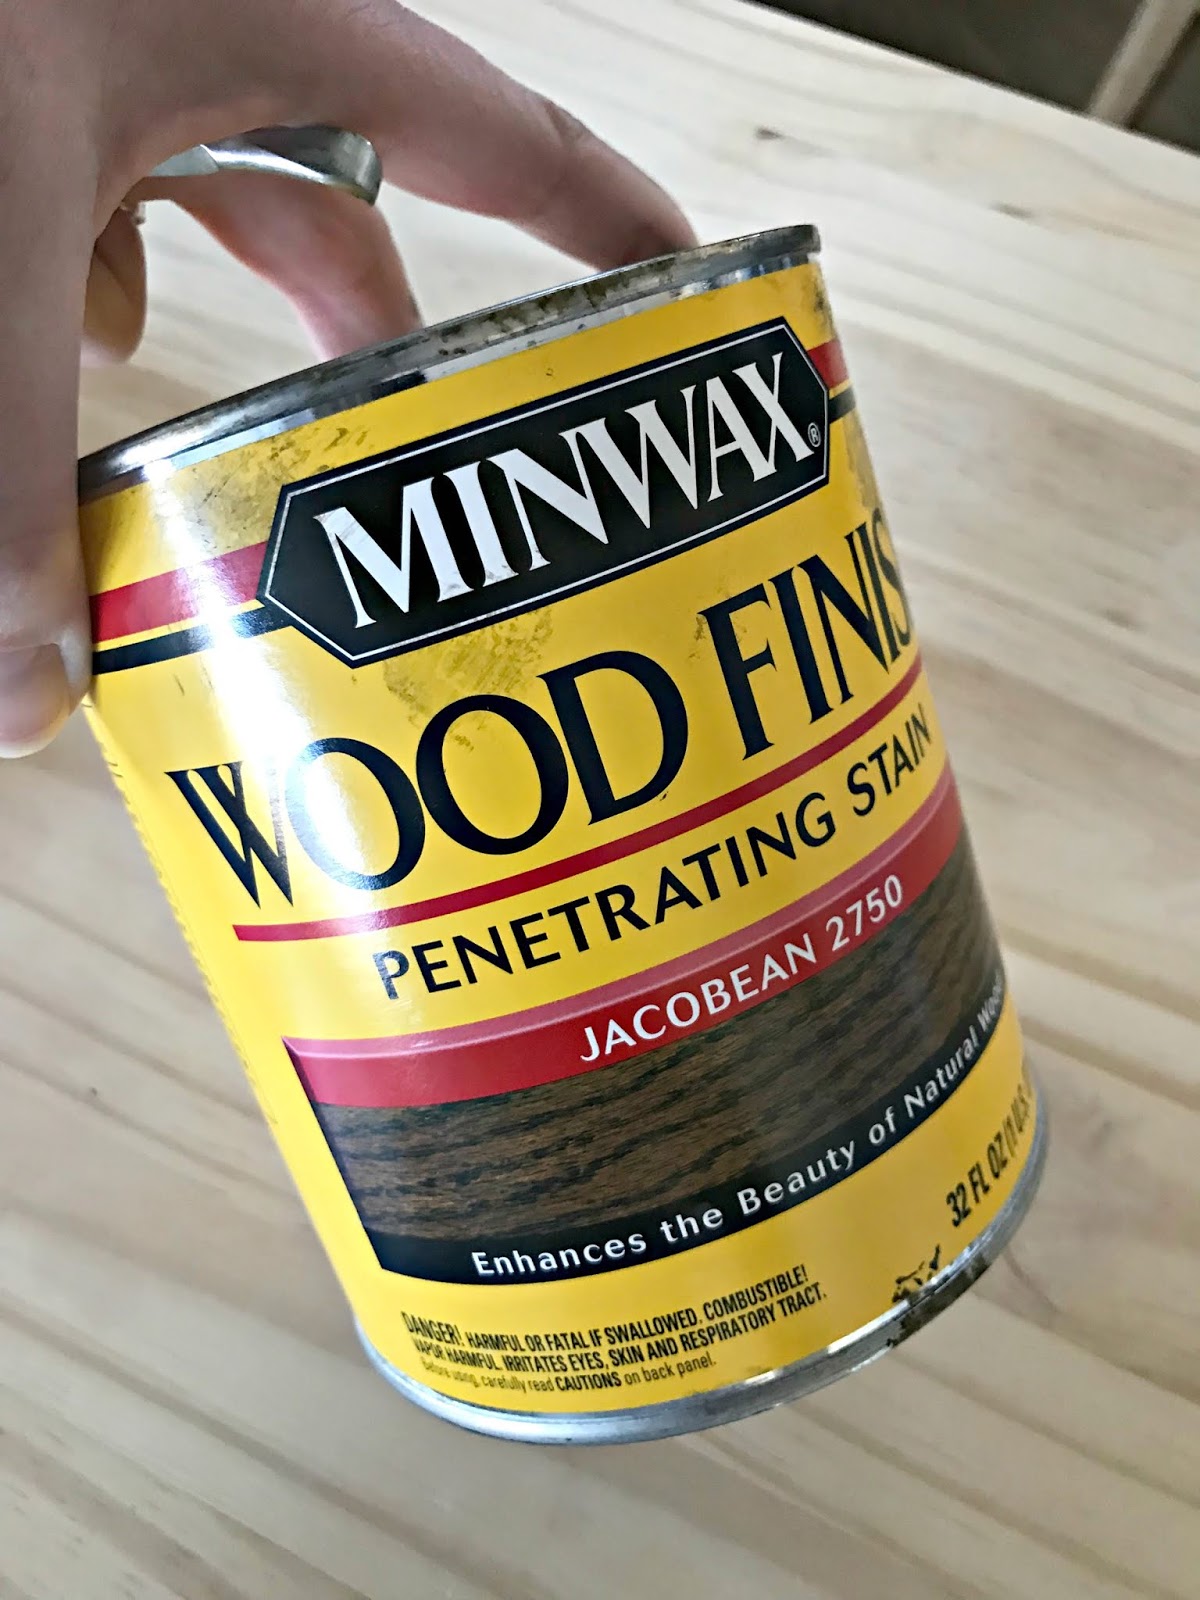
You may remember Jacobean because it’s the color we used on the hardwoods in our old house.
It’s a beautiful color! Definitely more brown, which is what I wanted. Here’s a look at the difference — Provincial on the left, then with a coat of Jacobean as well on the right:
This is another reason I love working with stain! You can experiment with different layers of colors and get a custom look. You can also mix stains ahead of time to find a color that’s perfect for your needs.
The final step (after letting the stain dry) was to add a coat of polyurethane. I only did one coat since these will never be touched. Thankfully Minwax has a wipe-on poly that was perfect for this project!:
Again, you’ll need gloves and a clean rag to apply. You can see how the poly on the left really deepens the stain and makes it look even better!
One thing to note here — when you stain there will be fumes! I had the windows open all day each day and had a air purifier running constantly. We didn’t sleep in this room for a few days.
(Side note — if you ever have floors refinished or do a staining project and smell a burning smell coming from your dryer or another heat source, check out this post!)
After all was dry, we were finally able to enjoy this room again…and we are obsessed with the ceiling! It looks amazing and I couldn’t be happier with it:

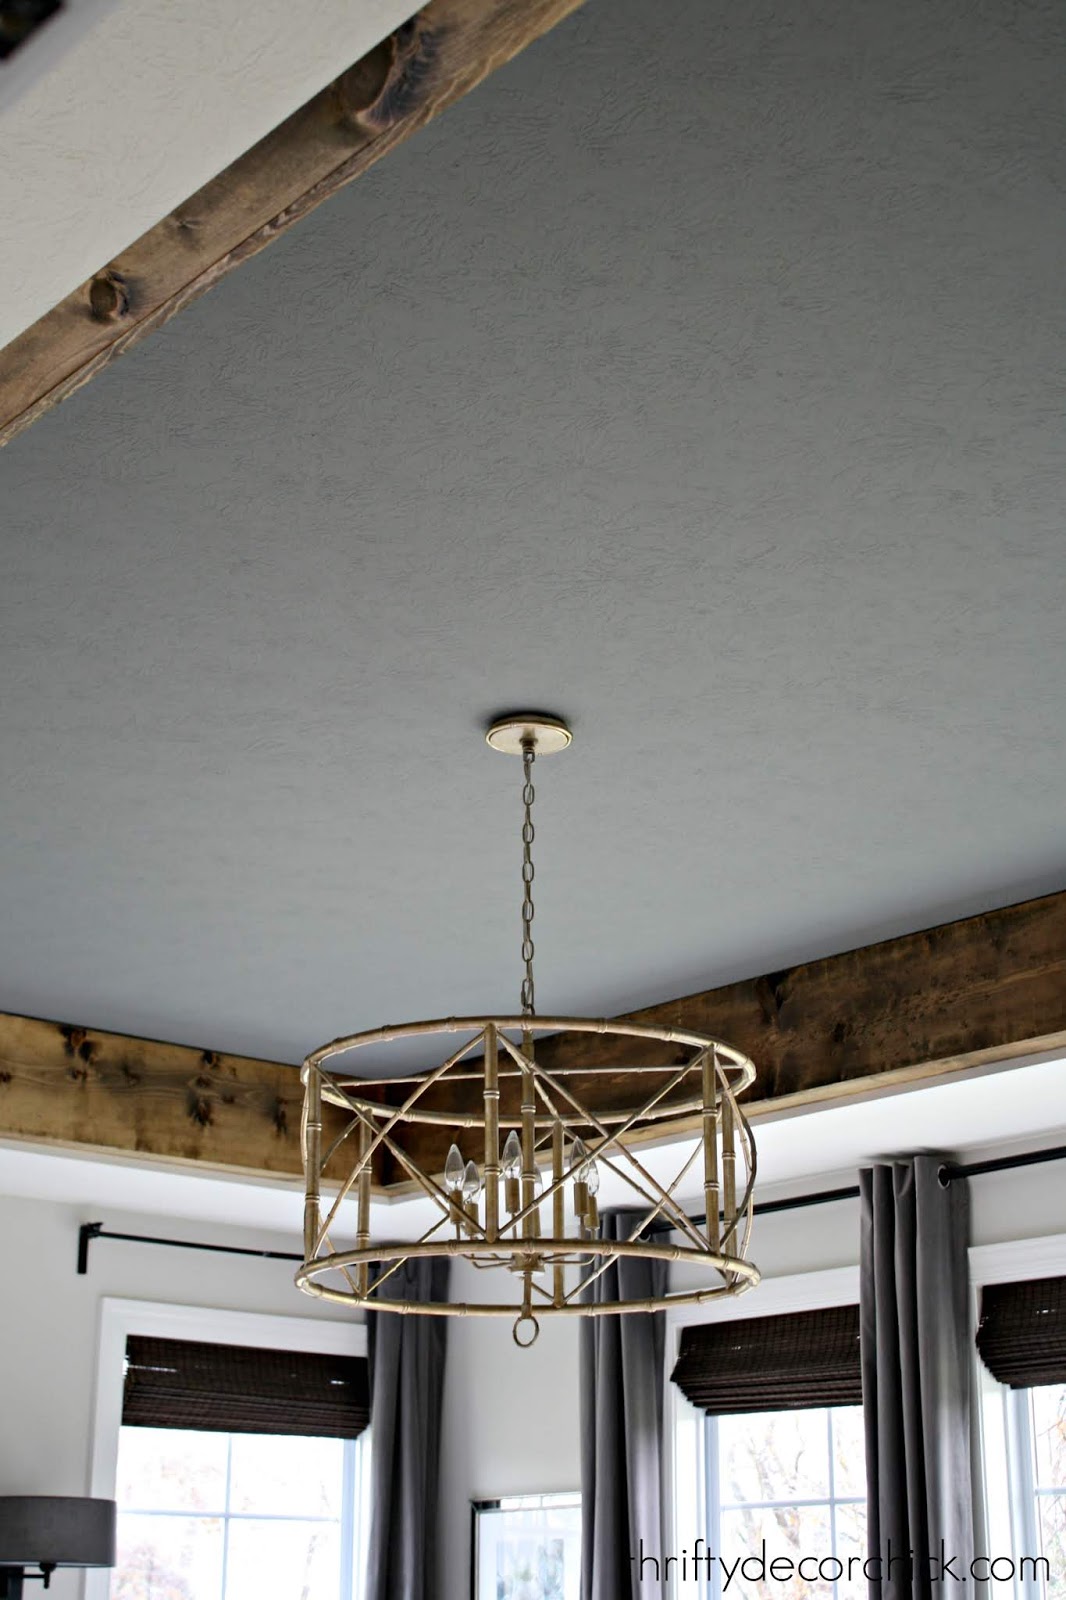
It completely changes the feel of the whole room. It doesn’t darken the room at all — just adds a warm, custom touch that I like to lay in bed and look at. 😉
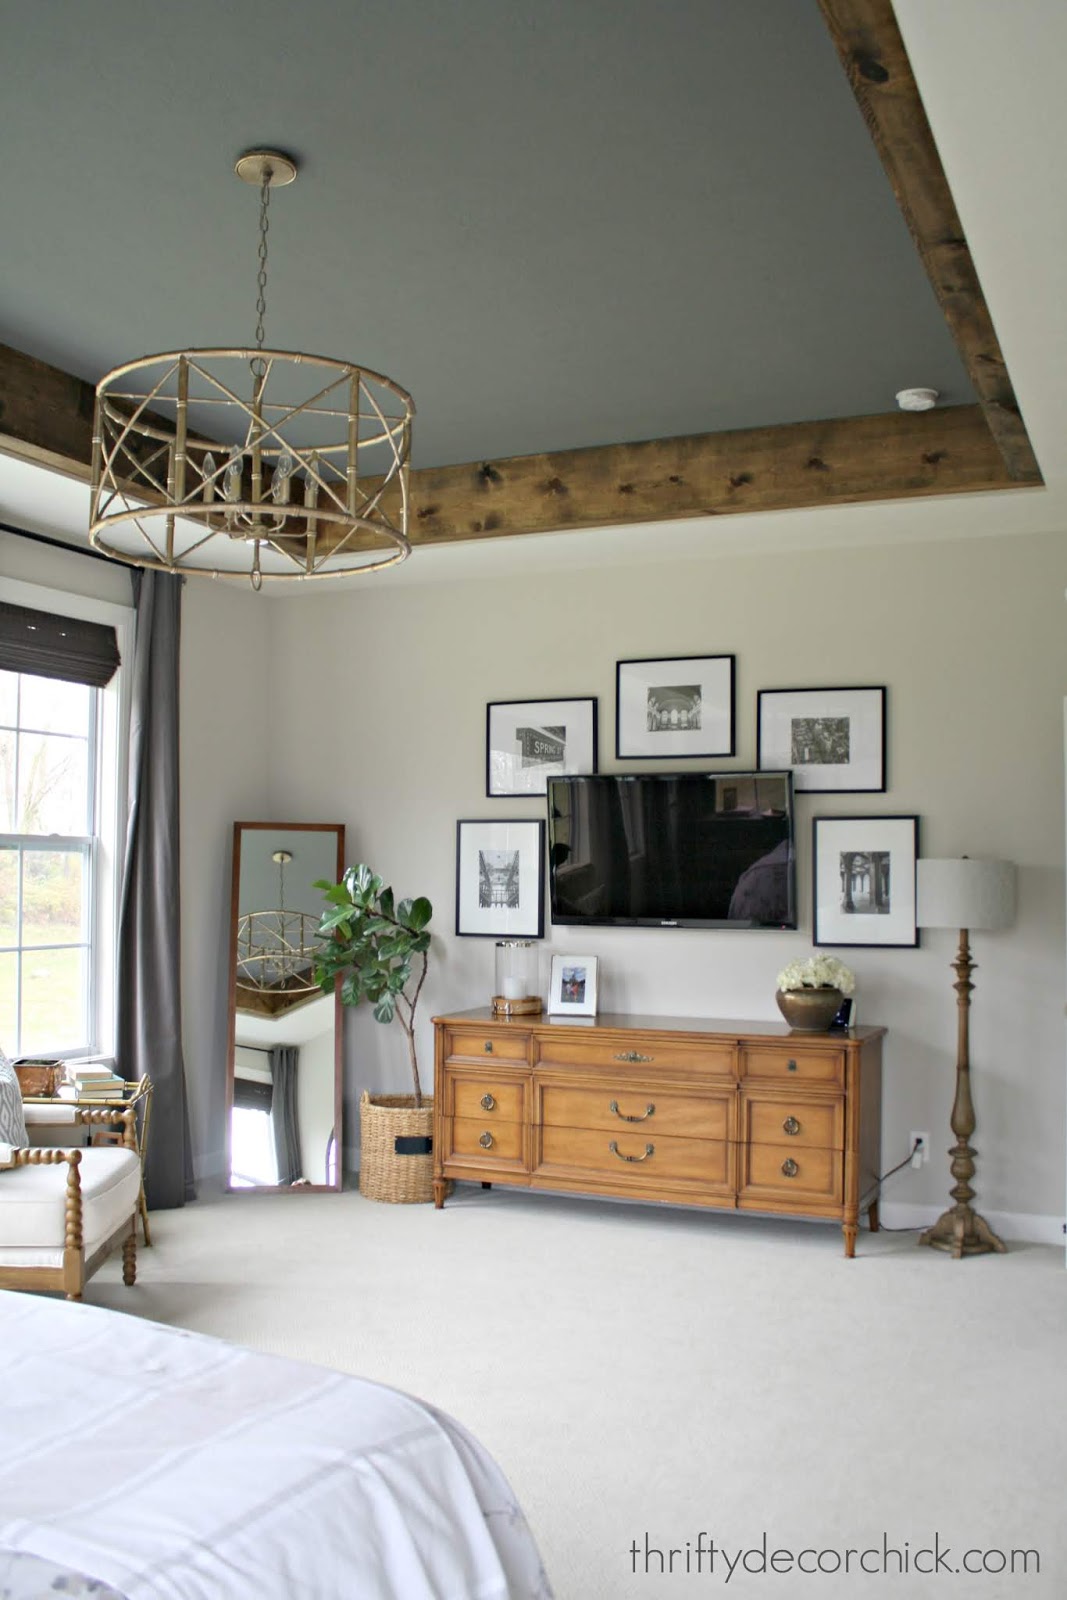
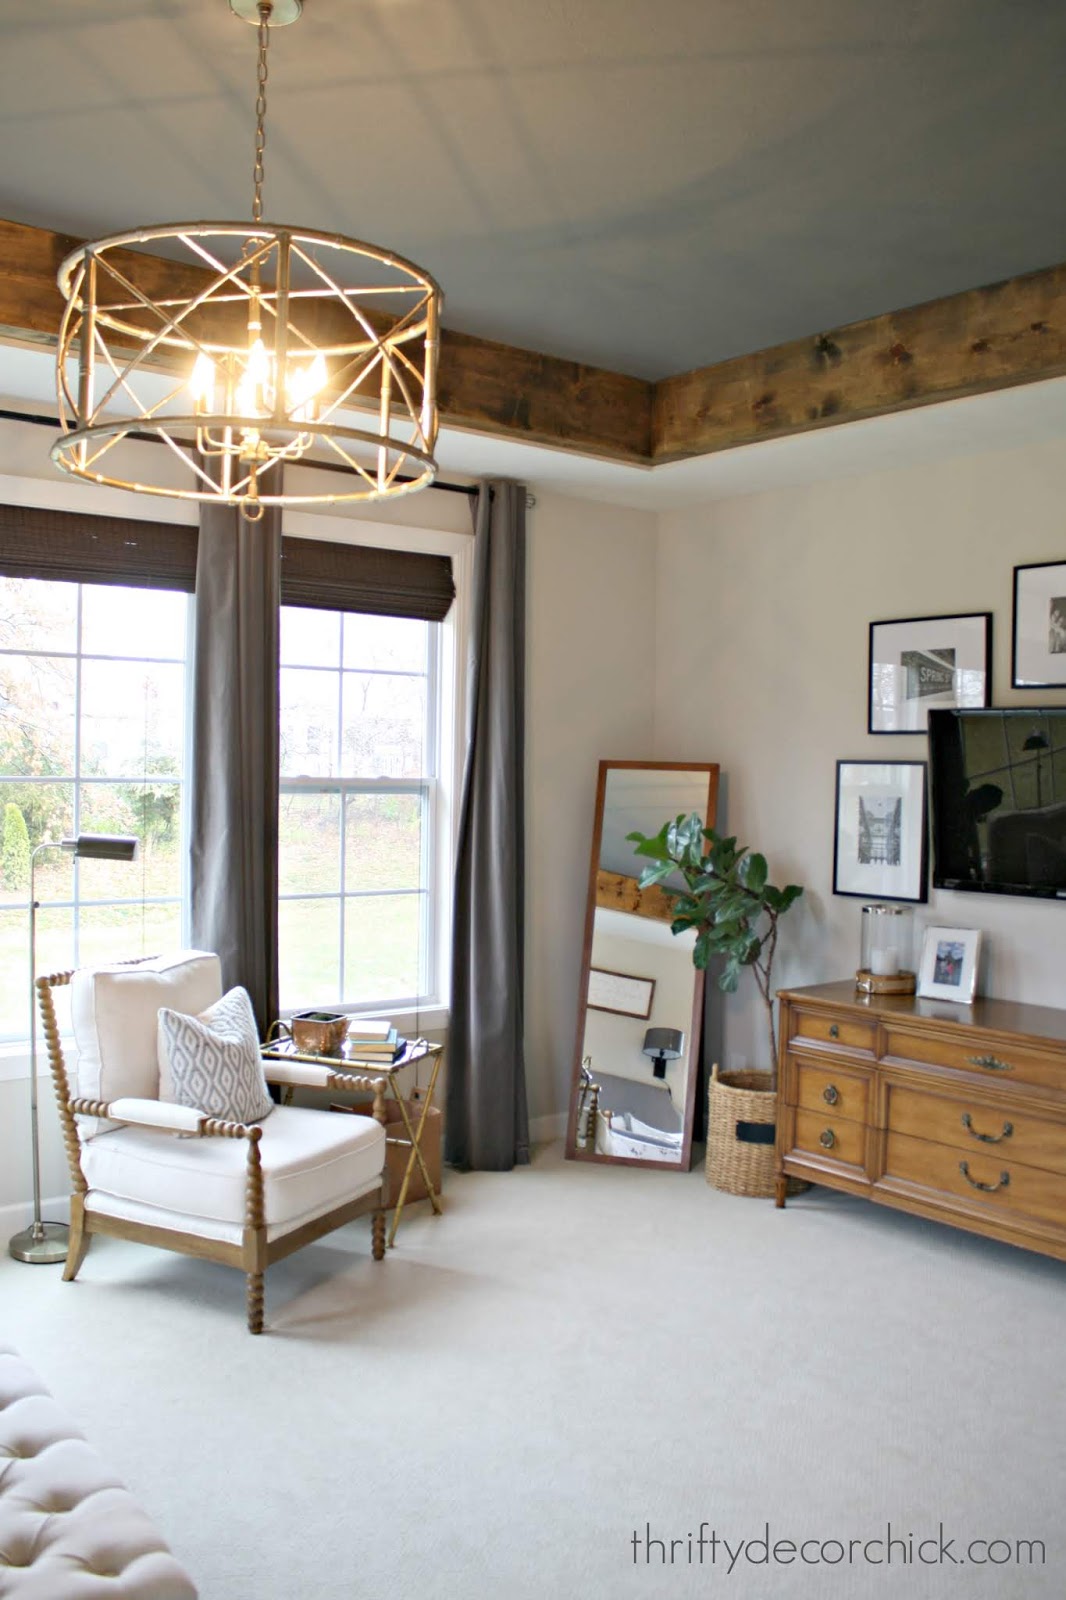
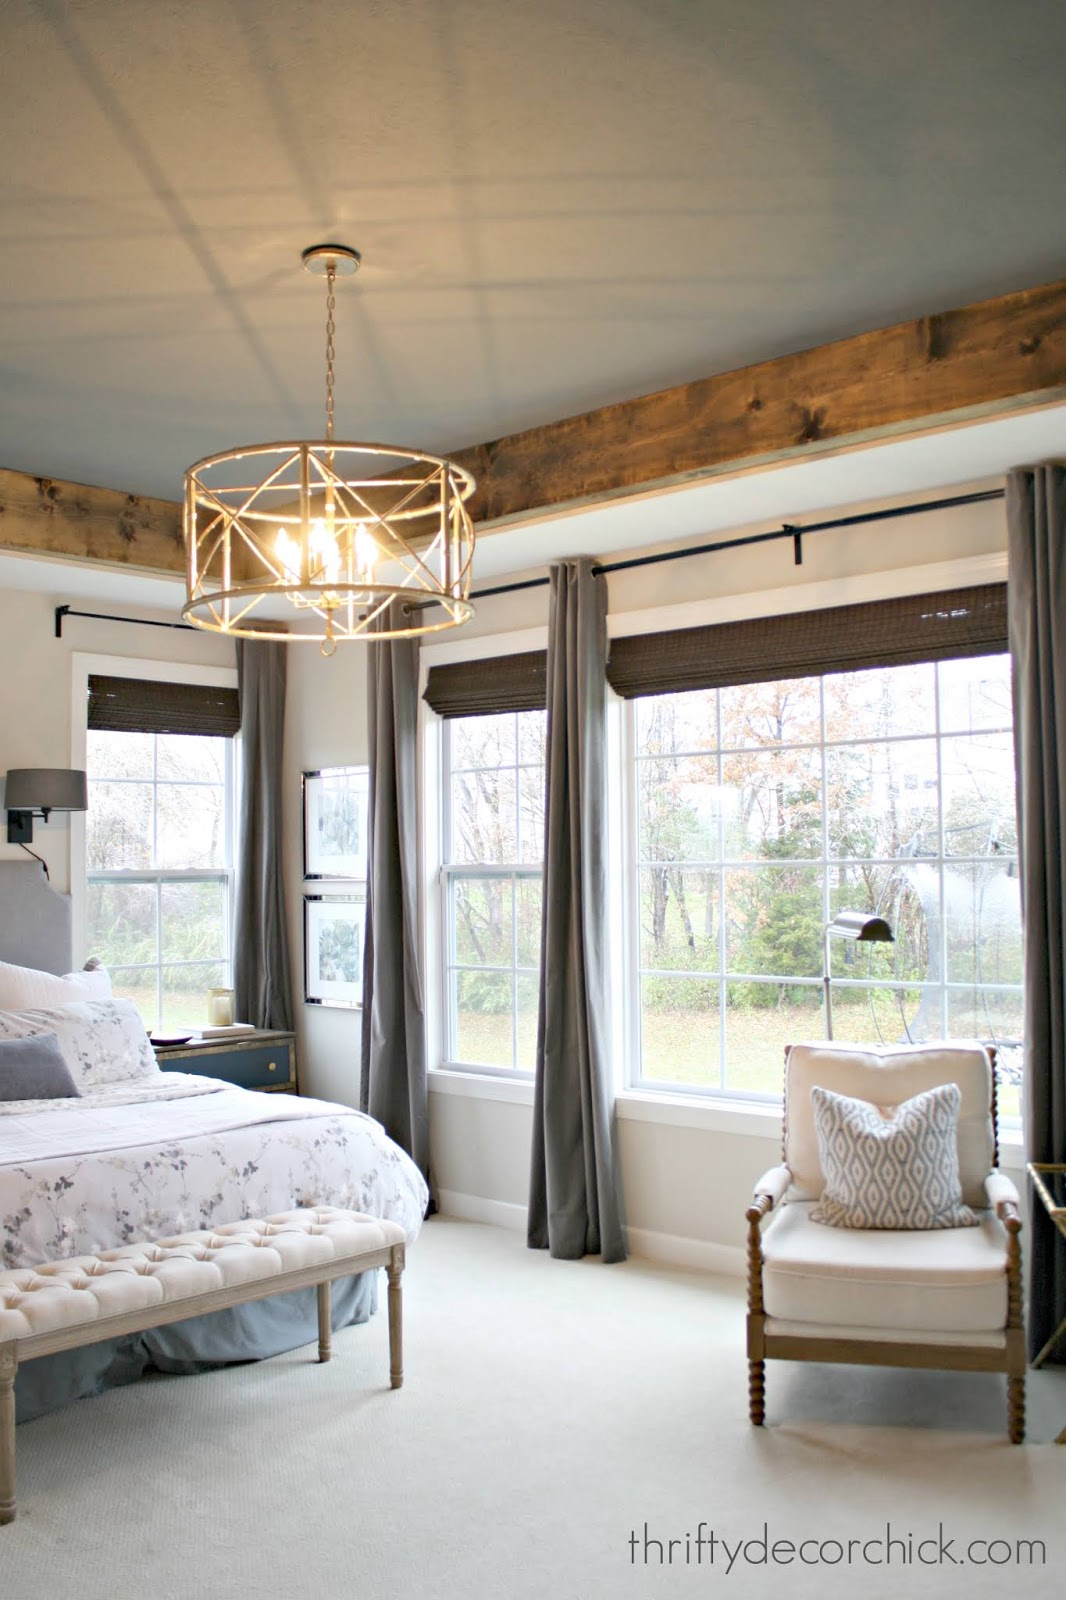
Because of the ceiling height and having a bunch of windows in here, it doesn’t make it feel closed in at all. It does make it feel much more cozy and that’s our favorite part:

There is a lot of gray in the room now but not for long — this is phase one of two as far as changes to this room. Or maybe one of three…when you give a DIY blogger a cookie she wants to change a bunch of things. 😉 I’m super excited about the changes coming up!
And I’m considering painting the dresser now too — still deciding on that one. Maybe black?
My favorite part — the before and after pics! Here’s a reminder of how it looked a few weeks ago:

And this is how it looks now! Doesn’t that fixture look amazing against the dark ceiling?:
There are a few things to consider if you want to try this project:
- If you can do the staining and painting before the wood goes up, that’s ideal. But it really wasn’t that big of a deal to do it after. I thought it was going to be a lot worse!
- We didn’t cut down the width of the boards — they are off the shelf and just the length was cut. We used 1×4 and 1×12 boards. We found the long 16 foot boards at a local lumber store (I don’t believe the big box hardware stores carry that length but I could be wrong.)
- The 1×12 used for the side piece didn’t go all the way to the bottom of the tray ceiling, which doesn’t bother me at all. You don’t even notice it.
This project gives me ideas for the rest of the house! I love the power of stain! And I just love the warmth of it against both lighter and dark colors.
See another one of my favorite Minwax makeovers here!
—