

In my first post, I shared my history when it comes to staining and restoring furniture. In this post I will share lessons I’ve learned over the years and how that has helped fuel my passion for refinishing pianos.
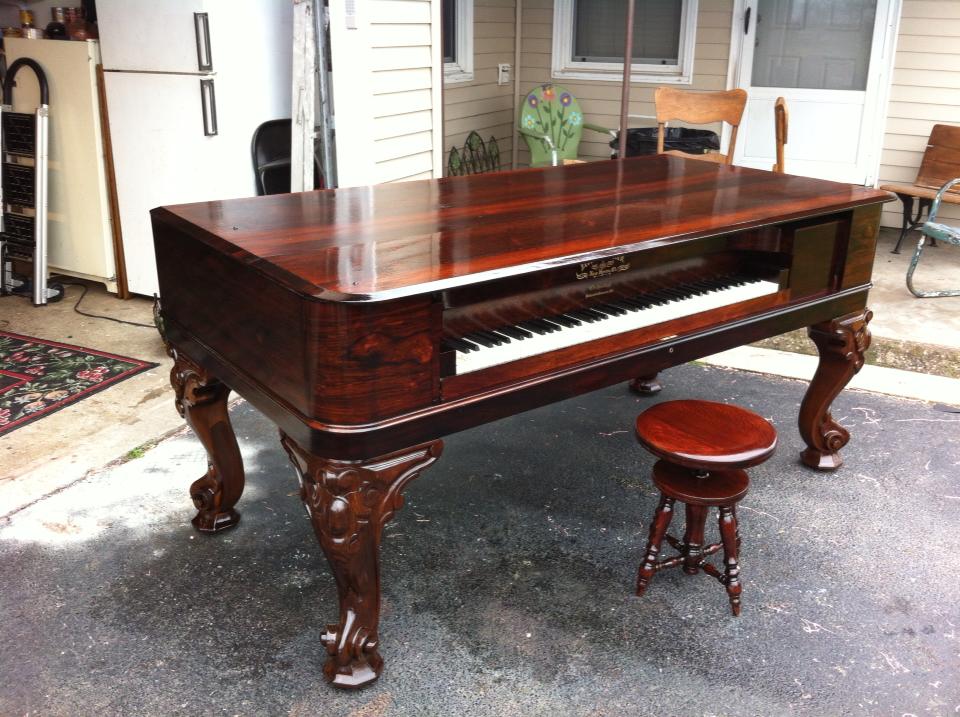
A lot of piano makers in the 1800’s started out as cabinetmakers. Pianos were extravagantly made, and more importantly, made to last forever. Under that old black varnish is beautiful warm brown wood. My parents had bought me a piano when I was little, and because of that piano, I grew up to play and write music for some of the most famous artists in history.
Now a days, budget cuts in school systems deprive children the opportunity to learn music. This gave me the idea to restore and refinish pianos for children whose families could not afford to give them the chance to express themselves through music. I believe strongly that every child deserves the opportunity to have a piano in their home, so they too, can learn to make their own music.
Restoring an old piano is ambitious. It takes some patience, but the rewards are well worth the effort. Here are some tips to get started:

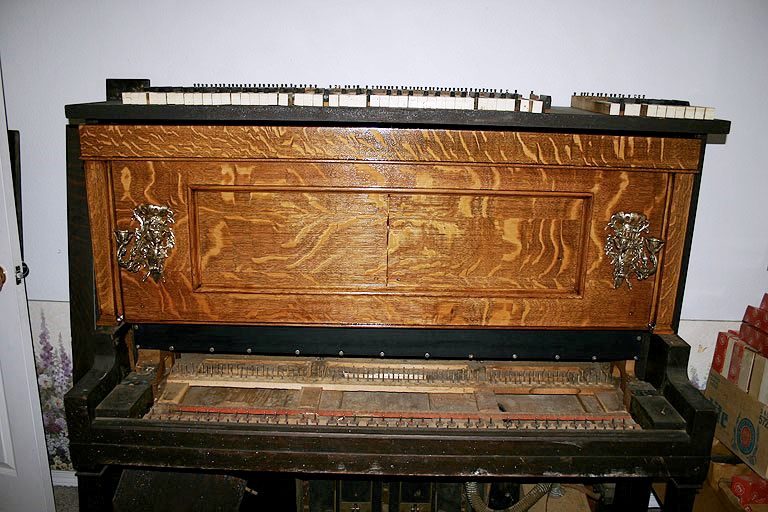
First you will need to take off all the pieces that are not part of the main piano body. Take off the front-top panel, the bottom panel, the part that holds the music, as well as the keys. Tip: Keep the keys in order or you will spend a lot of time figuring them all out! Behind the black and white keys you’ll find numbers on the wood. I found a diamond under a set of keys once, treasure!
In the late 1800’s and early 1900’s, veneer was an art form. If any of the veneer is loose, put wood glue under it and clamp it. For missing veneer, take some from the bottom where the pedals are. To do this, use a putty knife and hammer then tap lightly to remove the veneer off the bottom. You can sand and stain the wood later to match. Next cut a square around your broken veneer and cut the piece you took off the bottom. Glue it in place and clamp it. If it hangs over the edge, you can sand it to be even when it’s dry. Now you can start stripping the pieces that you took off.
Tip: For stained white keys use 40 volume hair developer and paint it on the white keys then let them sit for a day. It acts as a tooth whitener for all keys, especially ivory ones.
Tip: Gold labels can be replaced very inexpensively. I use the Pierce’s Piano Atlas to find my gold labels to put back on in the end.
As I’ve gotten older, I still find myself passionate about restoring the most hopeless antique, despite the complaints from my body. The hard work is always worth the final result.
My goal will always be to save family treasures until I die.
Lori Bowers
For more tips, you can email me at: mrsloribowers@gmail.com