

Annie of Zevy Joy shows us how she stained a beautiful Shaker style bench using Minwax® products.
So you may remember last month when I shared about my visit to the Seattle Renegade Craft Fair and my time with Minwax® there. Inspired by the campaign for this project, I’ve partnered with Minwax® again for this post. I’m sharing how I used their stain to finish a beautiful Shaker style bench.
I had a great time trying their products out and really am so pleased with the final product. It was so much easier than I had ever thought staining would be and the color stain is right up my “decor” alley.
Here is what I used and the steps I followed to get this white stained bench…
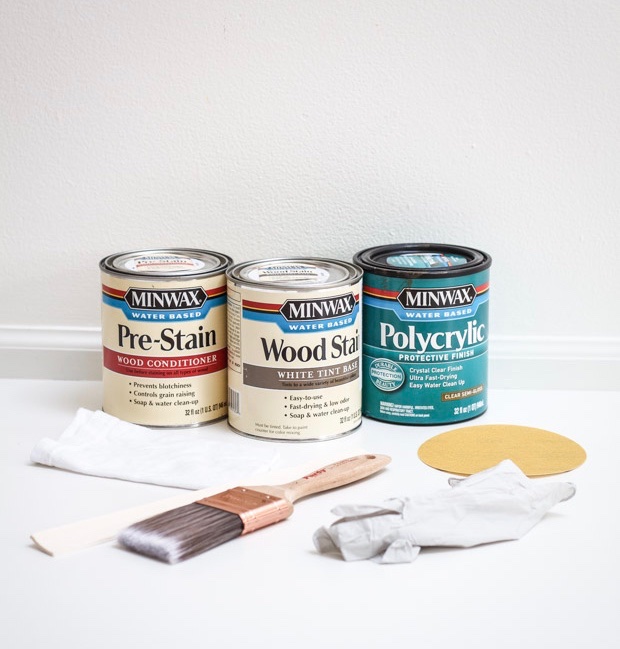
- Minwax® Water-Based Pre-Stain Wood Conditioner
- Minwax® Water Based Wood Stain
- Minwax® Polycrylic® Protective Finish
- A high quality synthetic fiber brush
- 220 Grit Sandpaper
- Gloves
- Clean, lint-free cloths for wiping dust and for staining
- Paint stir sticks
- Paint opener
Here is how I completed these simple steps, including the pre-staining process all the way to the final polycrylic finish.
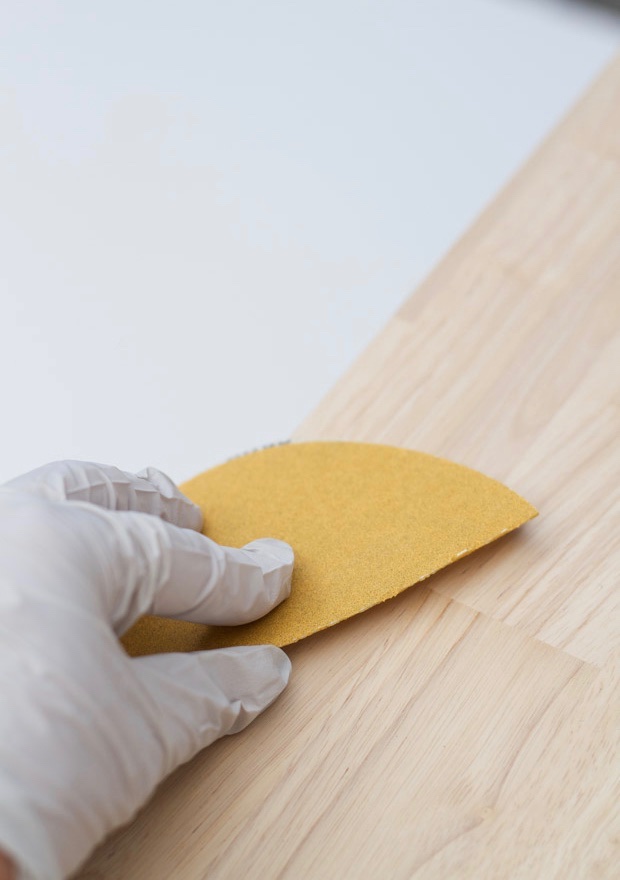
I made sure the wood was free of dirt, paint or stain. Once it was ready to start, I gave the unfinished piece a light sanding with my 220 grit sandpaper.
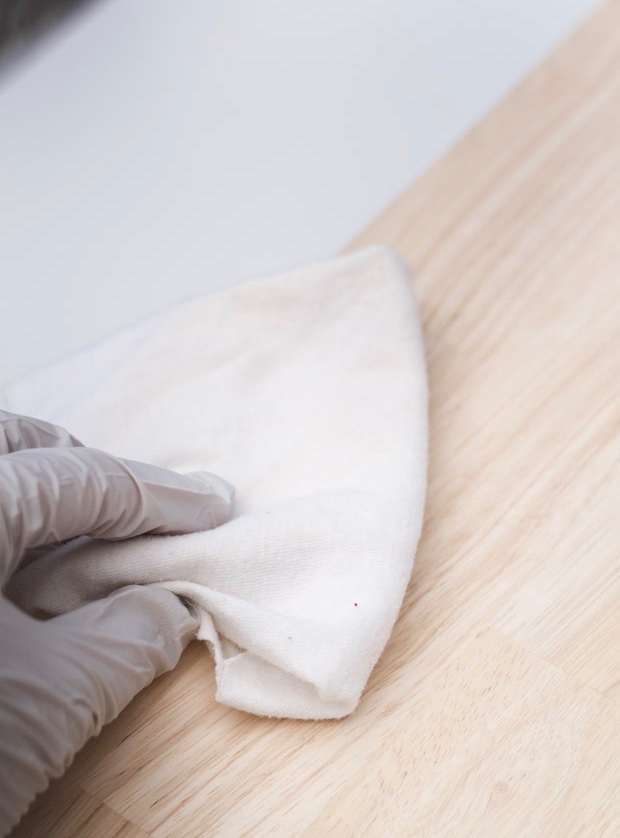
Next, I wiped the sawdust away with a clean lint-free cloth.
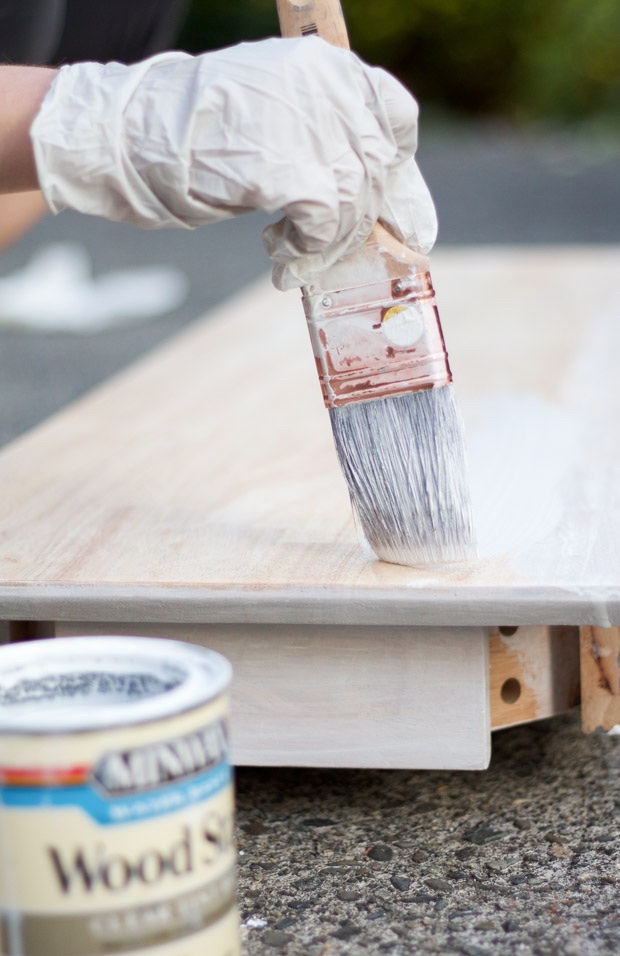
I then took the Minwax® Water-Based Pre-Stain Wood Conditioner (after stirring) and used my synthetic brush to apply it in the direction of the grain. I let it sit for no more than 5 minutes and then I rubbed any extra off (making sure not to let any excess unsaturated conditioner sit and dry). Once the piece was coated, I let it dry for 15 -30 minutes.
I came back after the wait time and lightly re-sanded in the direction of the grain to smooth out any raised grain (from the conditioner). As before, I wiped away the dust with a lint-free cloth.
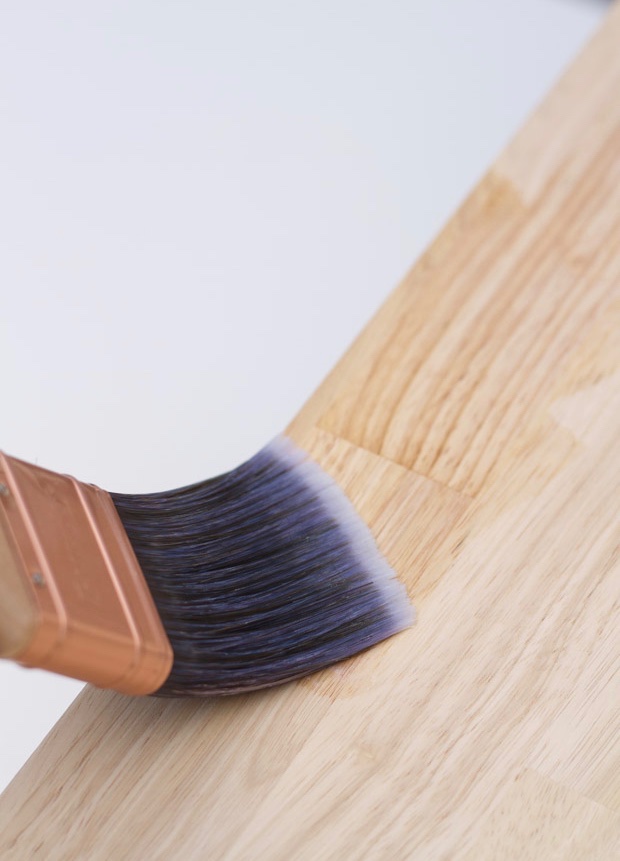
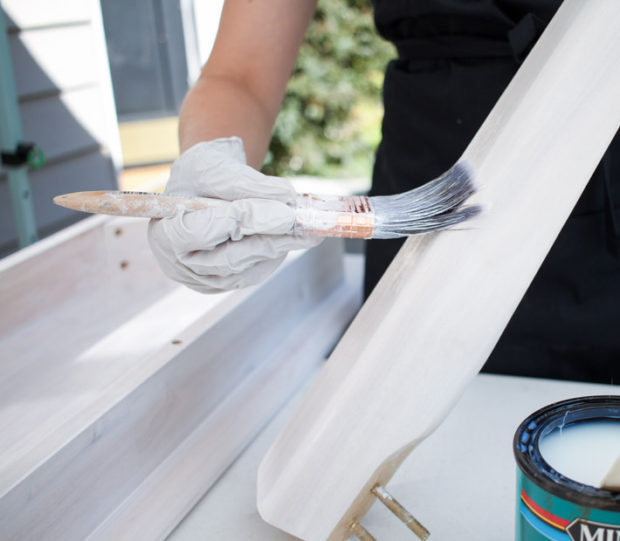
Now came the fun! I carefully applied the Minwax® Water Based Wood Stain in Pure White (making sure to carefully stir it before use). I used my synthetic brush to paint it on (always going in the direction of the grain) and then followed up with a lint-free cloth to smooth it out. I let it dry for 3 hours and then repeated the staining step once more with a second light coat and let it dry for another 3 hours. When I was done staining, I gave the stain a full 24 hours to set and dry. Then it was ready for the Polycrylic top coat.
I used my clean synthetic brush to apply the Minwax® Polycrylic® Protective Finish (always stirring before use). This protective finish needed 2 hours to dry in between coats.
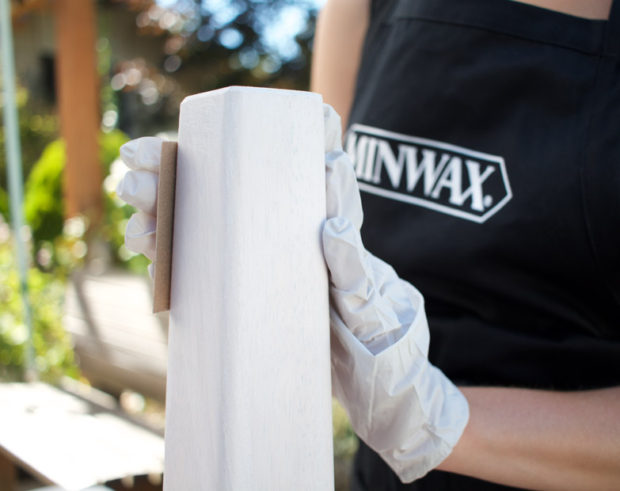
Once dry, I gently sanded with my 220 grit sandpaper (this ensures an even second/third coat) and repeated the steps. I applied a total of 3 coats with a 2 hour wait time and sanding in between. The final 3rd coat remained unsanded as it is the final finish.
And that is it! I let it dry for a full 24 hours before we put it in its’ new home.
A couple things I learned along the way…
- To practice beforehand. I tried out the process on some small unfinished pieces so that I could play around with colors and dry times etc… I thought that this step was valuable as when I went to work on the bench, I felt confident with the products and how they were applied.
- Move fluidly with the stain, to always follow the grain and swiftly. I would be aware of drips or unevenness before dry times so that they were easy to adjust.
- If needed, I could re-stain spots that were lighter than others to make the stain consistent. I didn’t need to do this in very many places but it did work
- Just to go for it ;)… I didn’t worry too much and I enjoyed it. That is an important part!
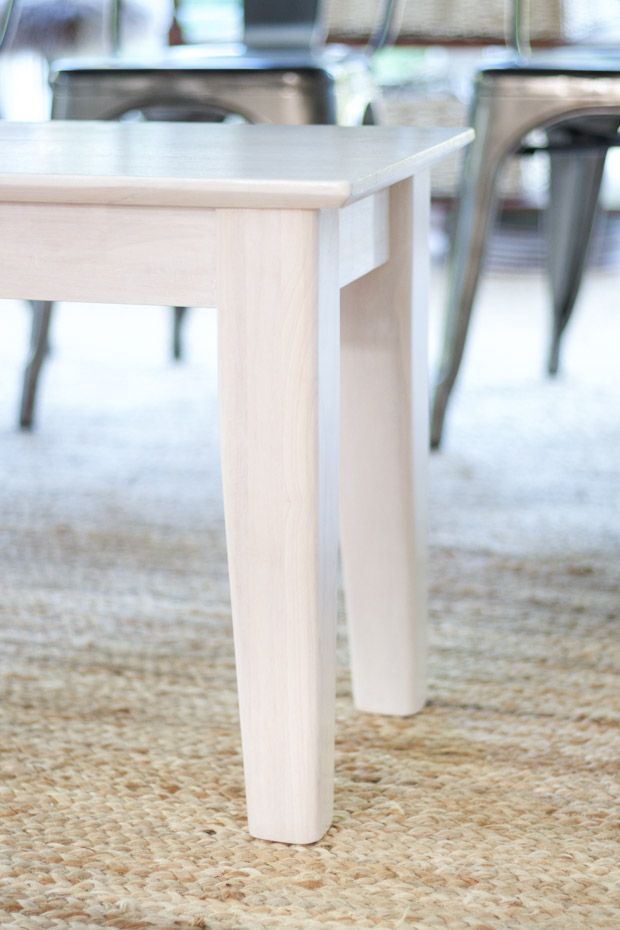
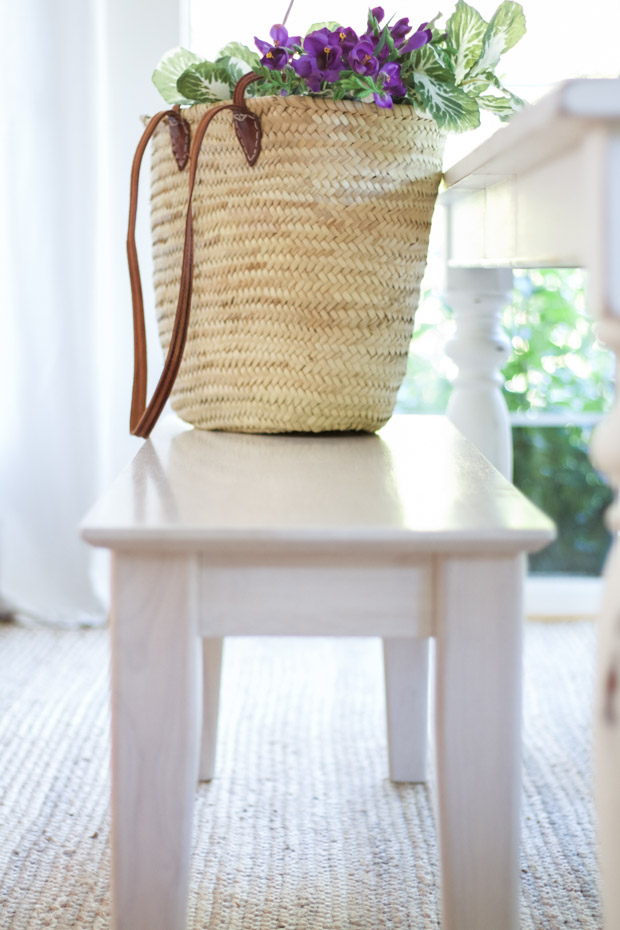
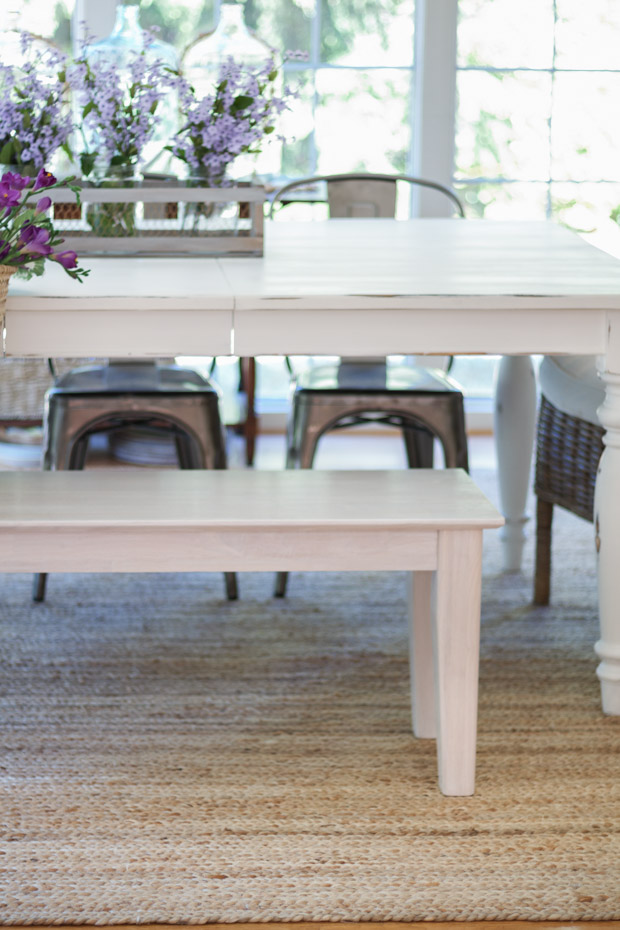
Here is the final product and I couldn’t be happier. The protective finish gives it a smooth coat on top that just enhances the shine. And my favorite part about this stain is how it really lets the wood grain steal the show.
Even though I love painting, chalk paint and more; stain is a wonderful way to achieve color while allowing the wood to show through and give detail to the piece. Or more so, it allows the wood grain to shine.
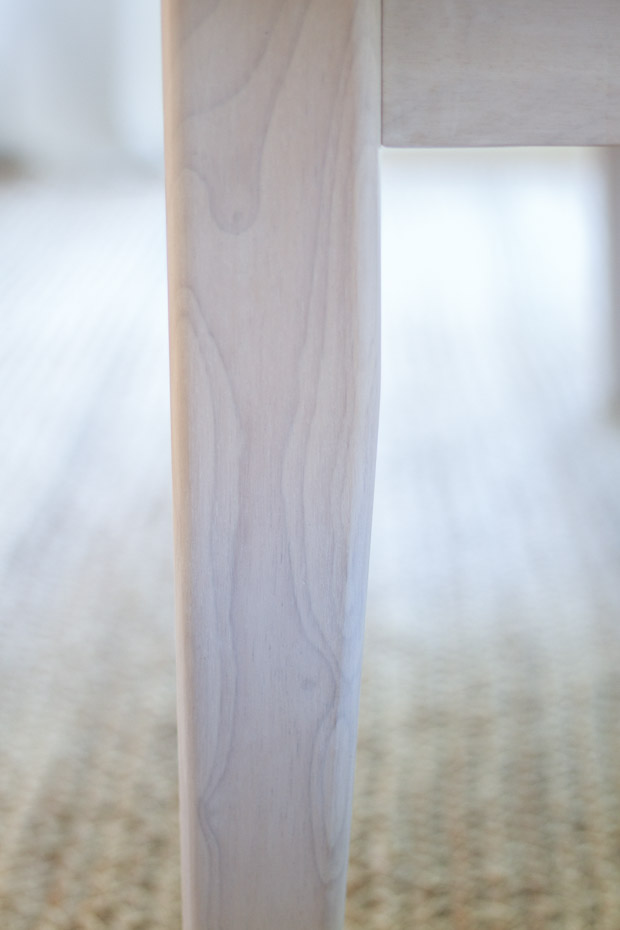
As you can see above, this bench is white, but the pattern of the grain goes unhidden.
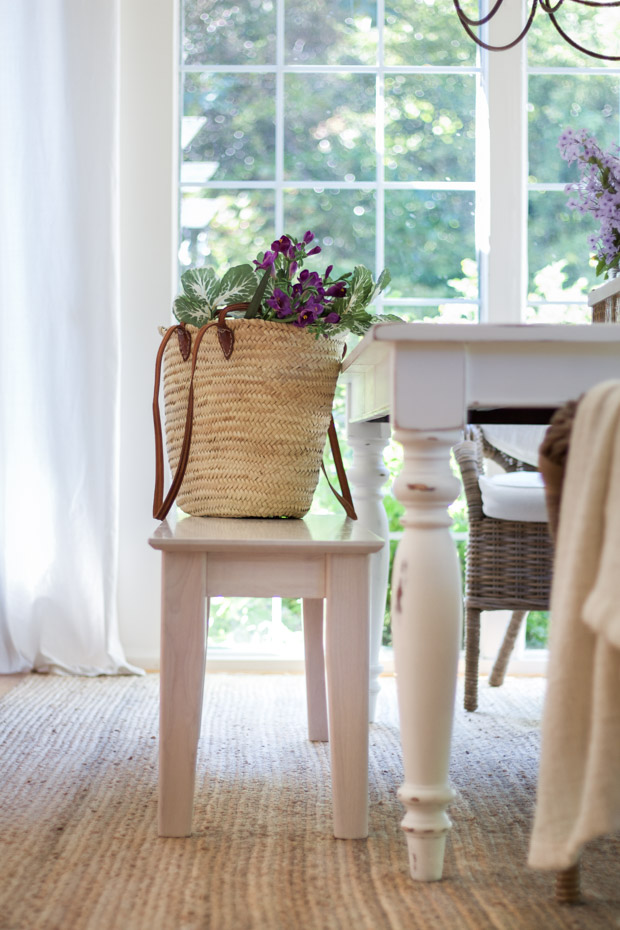
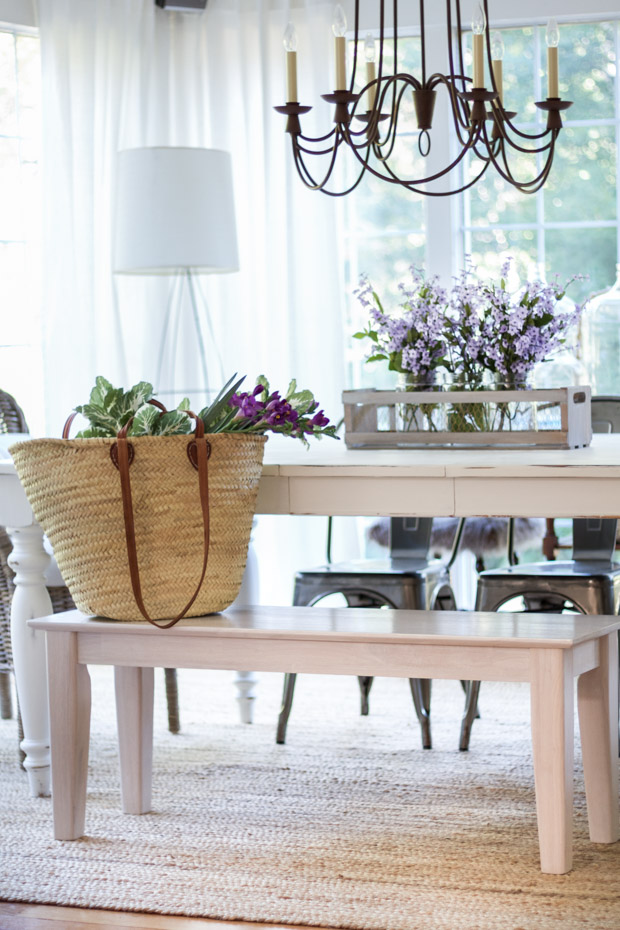
It has become such a lovely addition to our dining set and it will continue to grow with our family over the years
Getting to try this out really set the record straight, that stain truly is user friendly and colors available today are versatile. They range from traditional wood tones to coastal colors. More than anything, staining allowed me to make this piece special for our family and give it my own style.
As I was working on this piece of furniture it was during the thick of warm summer days, I had my music going and the smell of sanding wood instantly brought me back to childhood memories.
My dad was a carpenter and as a little girl, he would work many days/nights out in our backyard (in his workshop) with music on, sawdust everywhere… I was always so proud of how he worked so hard and used his hands to make beautiful things…

This project really was nostalgic for me. It was a delight to finish something like this myself, be reminded of those childhood memories and of my daddy making things too. I saw my kiddos watch from afar and through the windows as I fondly worked on this bench. It now has a dear place in my heart and I am anxious for the memories we will make sitting on this bench together here at this table. A little stain, a lot of heart and more memories to come; this time around with this sweet family of my own.
You can also head over to LIKE Minwax® on Facebook for more woodworking/wood staining inspiration! You can also watch this inspiring video that shares the heart behind the whole idea of, “Made With Love. Finished with Minwax®.”
I hope this post shows you how easy it can be to stain and how user friendly these Minwax products are. All opinions are 100% my own and I was flattered at the opportunity to work with Minwax on this project.
In her blog, Zevy Joy, Annie shares her experiences living on a budget, dressing for less, and decorating with what she has. See he story one project, recipe, and room at a time. Follow her on Facebook and Pinterest for more inspiration.