

Sarah of Thrifty Decor Chick is back with another amazing DIY project. See how she created a giant chalkboard to create a school house look for the perfect space.
Hey there! I’m still in beast mode as I work on finishing up the loft/craft room/office makeover. I’m determined to get it done by the end of the month and I think I’ll make it!
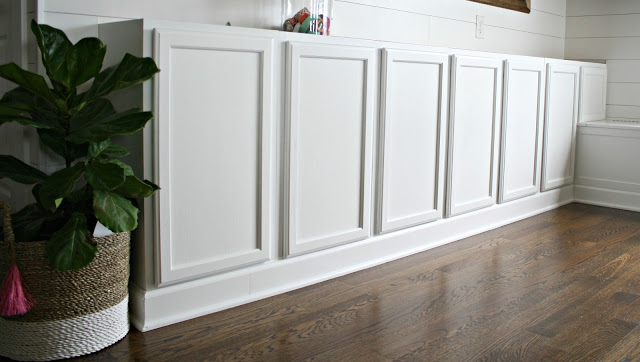
I got a TON done in the past few days. I’m excited to share the little DIY project I added above the cabinets.
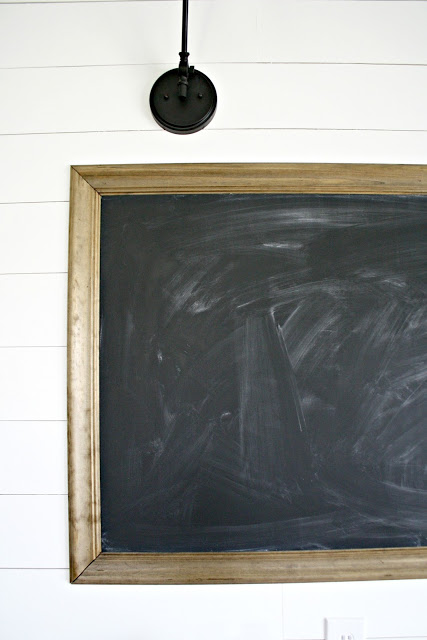
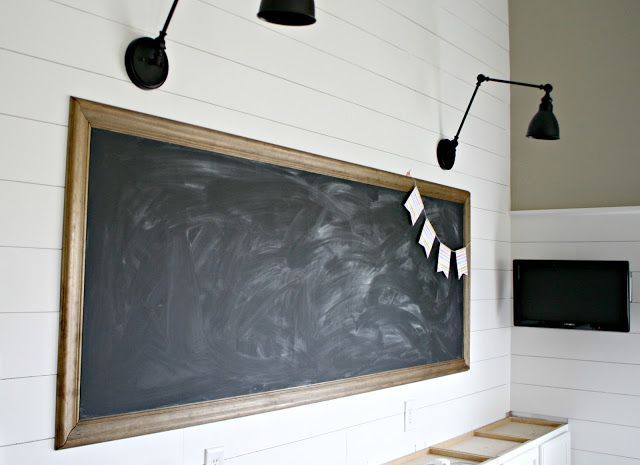
I’ve always known what I wanted to put up there. A massive chalkboard. I knew it would be a fun place for organization but also would look great against the white background.
This was a fairly inexpensive project for the size and I’m loving how it turned out. I joined up with Minwax® as I do occasionally to share how I use their stains, which I used on this project as well.
The first thing you’ll need to do is get a SMOOTH board. This is important, obviously, as you’ll be writing on it. 🙂 You can spend $50 on some nice smooth stuff but I didn’t want to spend that much, so I kept looking. You know I love the luan for the DIY shiplap look I’ve added in here, but it’s not smooth enough.
I ended up finding a higher grade luan/plywood that was $19 for the sheet. I had it cut down to the size I needed — this is how the smooth side looks.
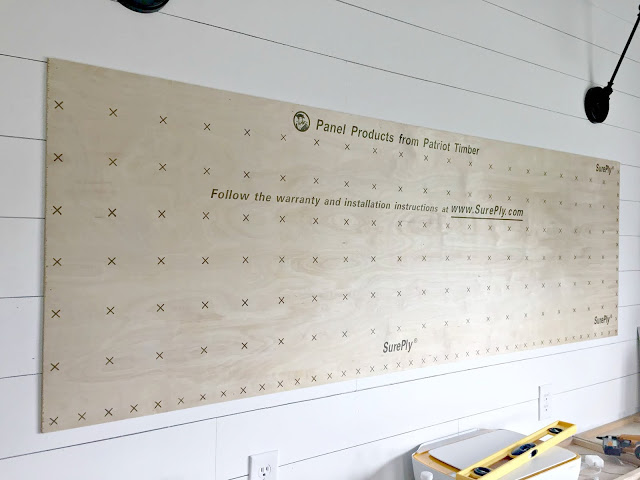
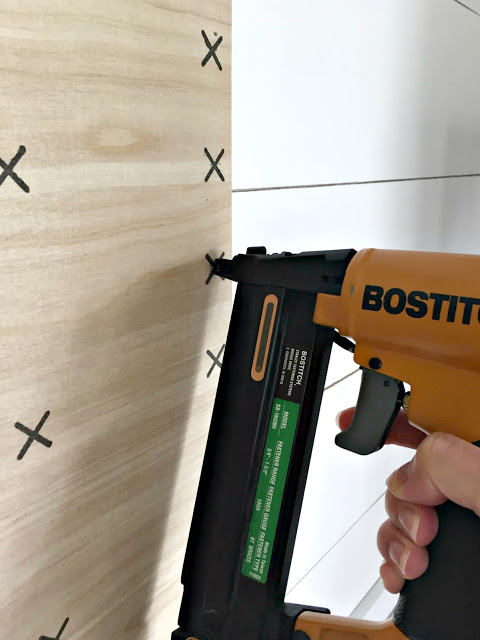
We held it up, made sure it was leveled and then nailed it in.
You can paint before hanging or after, I prefer standing up to do it. I taped off the edges (although I was adding trim so it wasn’t really necessary) and did two coats of a dark paint as a primer (I don’t have any tinted primer right now) and then two coats of the chalkboard paint.
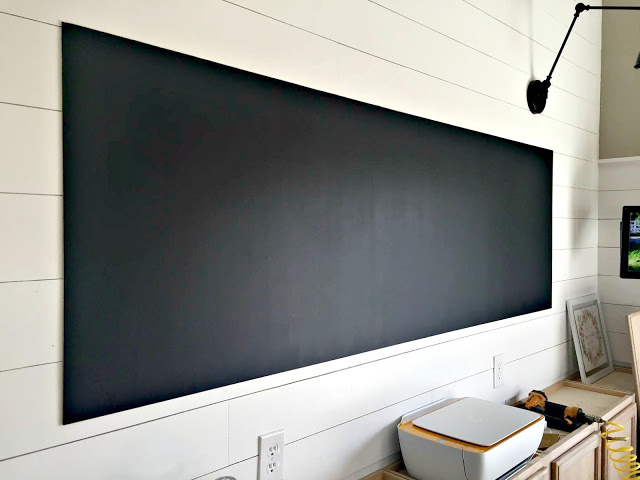
I loved it right away! It was the perfect contrast against the planked walls and I love it with the sconces!
Here’s a tip that some don’t realize — you really need to “season” a chalkboard before using it. This will make it easier to erase the chalk down the road. I haven’t always done this and the chalk still wipes away with a wet rag, but if you are using a real eraser especially, I always suggest doing this.
You just take some chalk on it’s side and rub it over the whole board until it’s covered.

Then wipe it away — if you want a real cloudy board you can use an eraser or dry rag. I use a wet one because I like how it looks after the fact. 🙂
Then it was time to stain my trim. I found a pretty chair rail to use — before I started staining I made sure to pre-stain with Minwax® Pre-Stain Wood Conditioner.
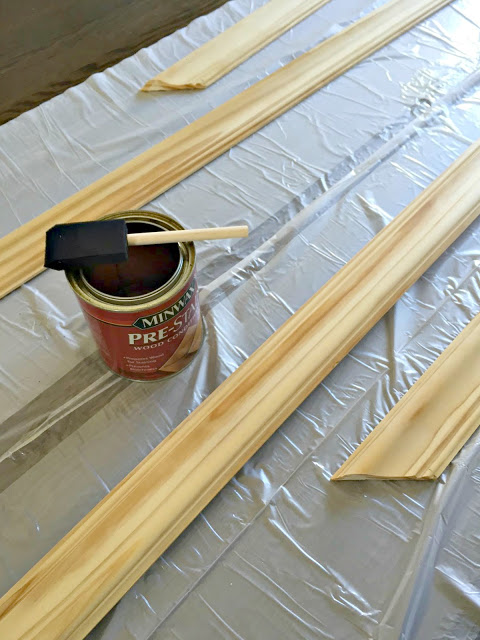
I can’t express how much better your staining projects will turn out if you take the extra few minutes to use this. I used to be too impatient every time and some wood would turn out crazy blotchy. You just wipe it on with a foam brush and then let it dry. You can stain almost immediately.
I went with my favorite Minwax® Wood Finish™–dark walnut. It’s a classic, darker stain that is really brown — no red tones to it at all. I use these foam brushes (at a great price!) to apply all my stains.
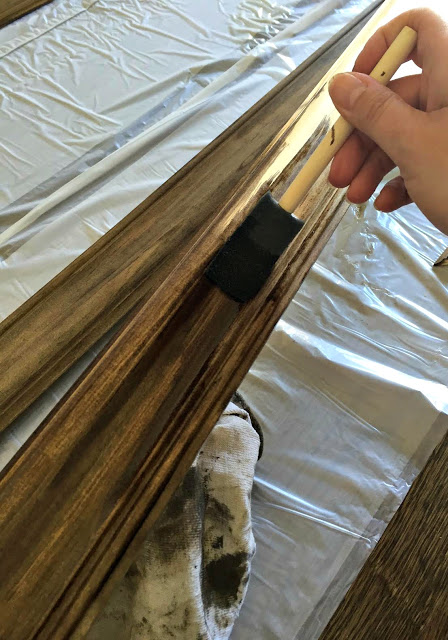
Be sure when staining to not let any part of it dry — so don’t stop one part and then start up again later. You need to keep what is called a “wet edge” while staining. With smaller projects like this it’s not hard to finish up, but if you are tackling something large, be sure you have time to focus on it.
Don’t worry if the piece looks a little iffy while you stain. See how uneven it looked while I was staining? Let it sit for a bit (I usually only let it sit for a minute or two, but the longer you wait the deeper the stain) and then wipe with a clean towel.
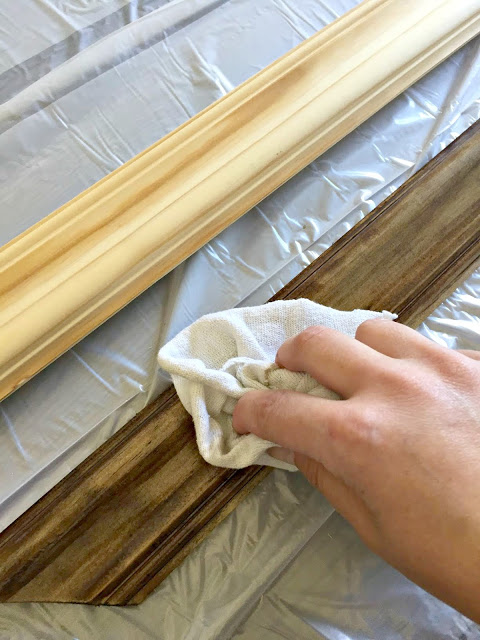
The more you wipe the more it will even out. If it’s still not right you can add more stain and do it all again.
I absolutely LOVE how it turned out. You know how much I love contrast (if you don’t know, I DO) and it looks lovely. The stained trim just makes the whole thing.
I was on a roll and got the cabinets painted too. They turned out great, I just have to do a few touch ups.
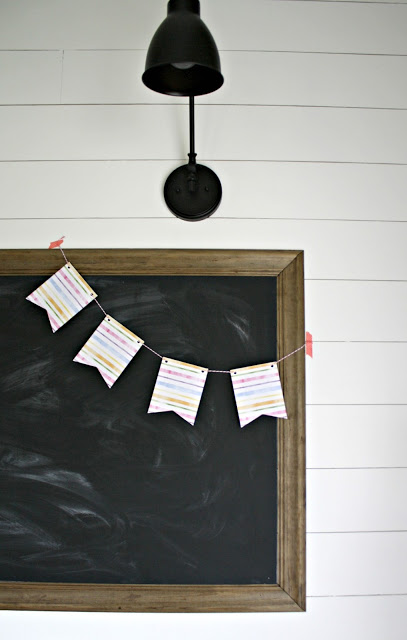
I love love love the sconces with the chalkboard.
I have a few ideas in mind for this — one is a permanent calendar I can write on each month. I also plan to dress it up with photos and other fun stuff to bring in more color.
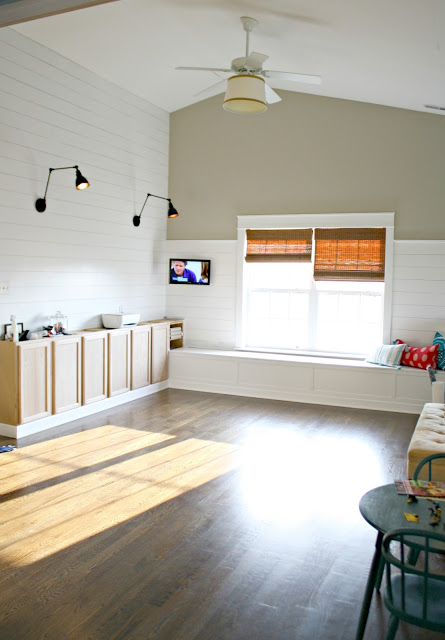
The whole space is very white right now (which I’m actually quite liking) BUT there will be plenty of color coming in with art, pillows and accessories. I picked up some bright knobs for the cabinets last night but I have to see them on before I decide on those.
These were two of the last big projects, whoot!! Some minor stuff is left to do and the desk and countertops, which a big element in here and also the most expensive. I’m just so happy that this room is so close to done and that I love it as much as I hoped I would.
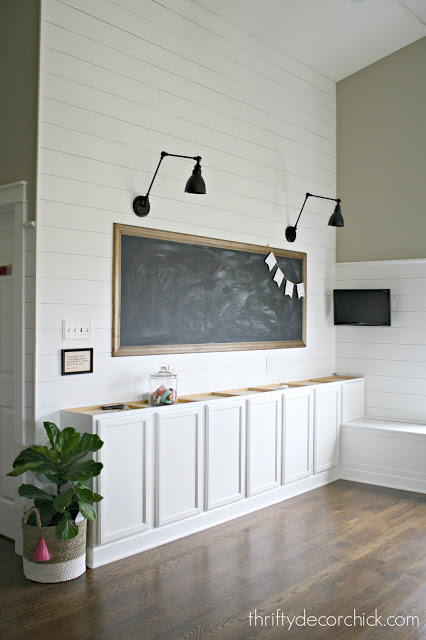
I’m loving the nod to a school house look the chalkboard creates — this room will be used for homework and projects, so it is fitting. 🙂
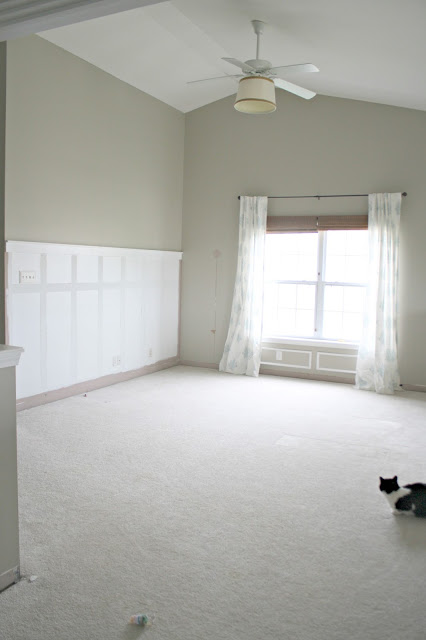
Just for kicks let’s look at how far this room has come. I’m dying to decorate this space but will hold off till the counters and desk are in. It’s so close!! This is going to be such a fun room. 🙂
Sarah’s blog, Thrifty Decor Chick, features more great DIY projects that will help you have a lovely home without spending a ton of money. Follow her on Twitter, Facebook, Instagram or Pinterest for more.