


Guest Blogger Charlotte from At Charlotte’s House joined us for our Habitat for Humanity ReStore Workshop in Philadelphia. Follow along as she shares some helpful tips she learned at the event and watch as she puts them to practice building and staining this beautiful under-the-bed toy storage box in her daughter’s favorite color, PINK!
Disclosure: This post is sponsored by Minwax®, but all opinions and pink reveal are my own.
A couple of weeks ago, I attended a fun event at the Philadelphia Restore hosted by Minwax®! Truthfully, I wasn’t sure of the specifics, but when I walked into the room and saw tables with wood and samples and brushes, I KNEW it was going to be a great afternoon! The experts at Minwax® gave us a crash course in all things wood staining, wood preserving, and furniture finishing. Guess what. This 5 year DIYer was doing all SORTS of things wrong when it came to my staining.
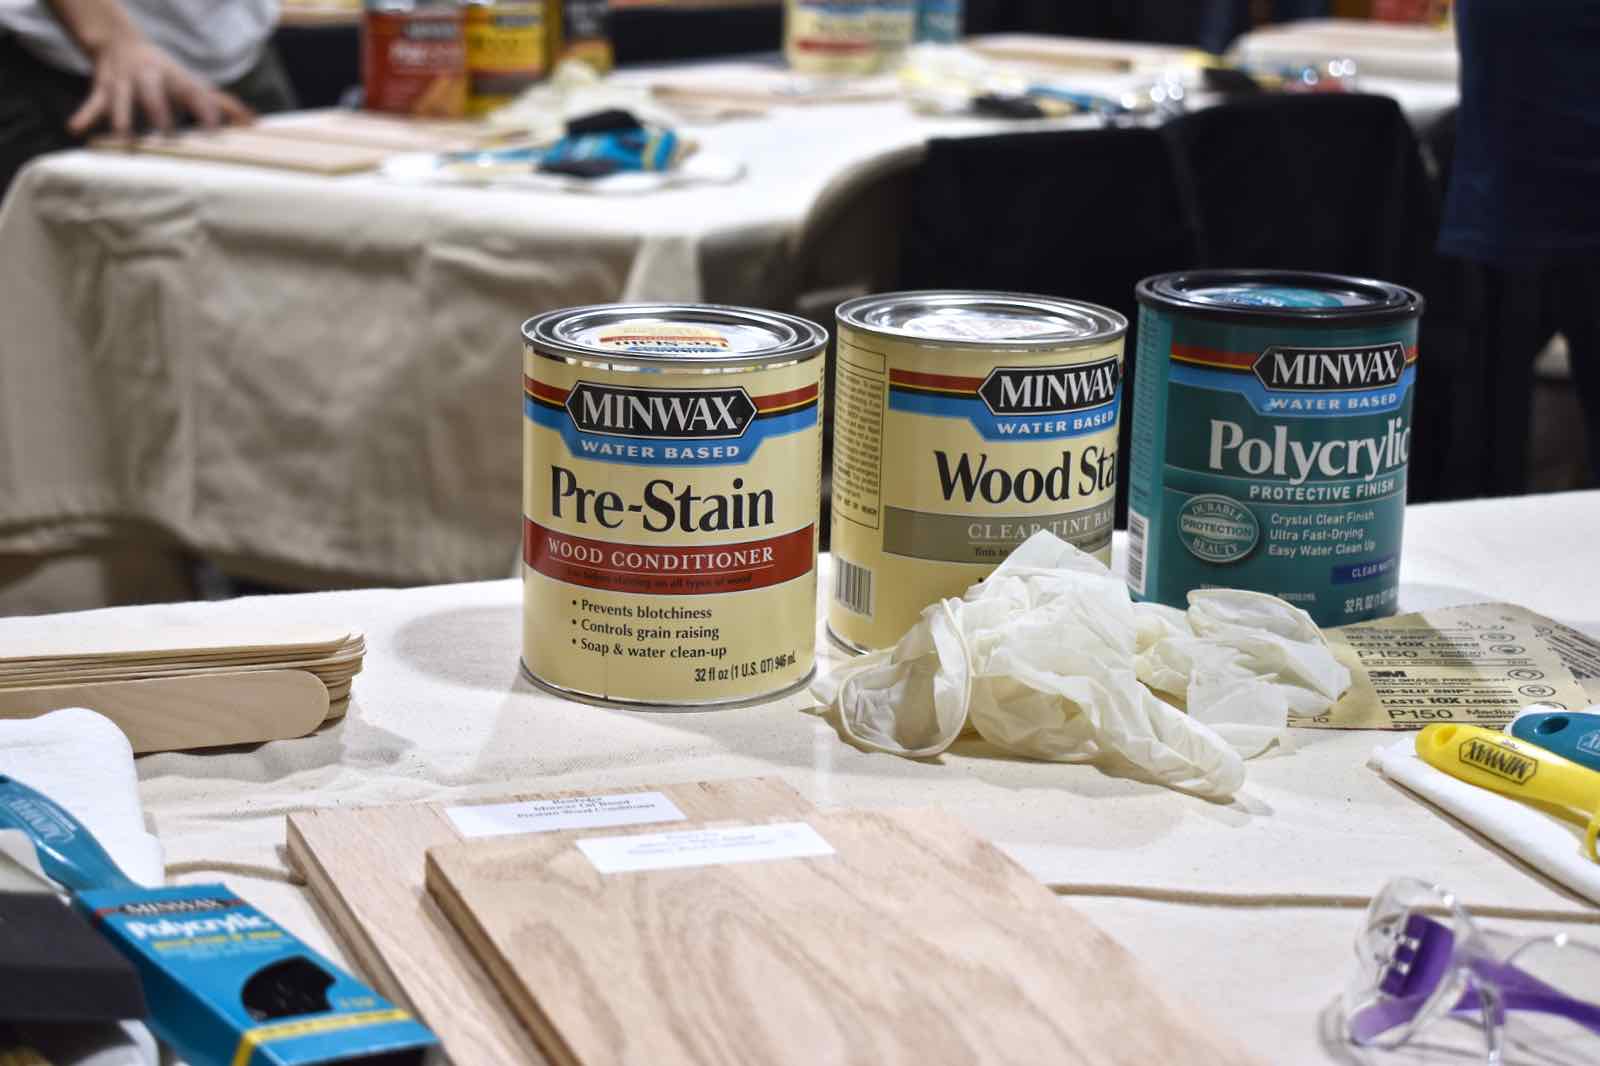
1. I wasn’t pretreating my wood. Which makes for a blotchy stain. No bueno. Use a wood conditioner, Minwax® Pre-Stain Conditioner.
2. I was cleaning my brushes wrong. Alll wrong. When you turn them upside down in the faucet? All that paint just gets shoved down into the nape of the bristles. Also no bueno. Just hold the bristles pointed down, and rinse/ flick until no more paint.
3. No idea about water based and oil based nuances. Oil based stains, like Minwax® Wood Finish™,have a much longer working time, but can smell a lot. Like a lot a lot! Water based stains, like Minwax® Water Based Wood Stain, will dry much faster which can be tricky, but they also come in amazing colors like, ahem… my pink toy tray!
4. Shaking my cans. Don’t do it, folks. Bubbles are bad. Always stir your stain.
5. Brush type. I typically grab the cheapest brush unless it’s one of my favorite angle brushes. Synthetic bristles should be used with water based paints and natural bristles should be reserved for oil based products… the water can cause natural bristles to swell and change their shape.
I could go on, but five major staining mistakes seems like enough.
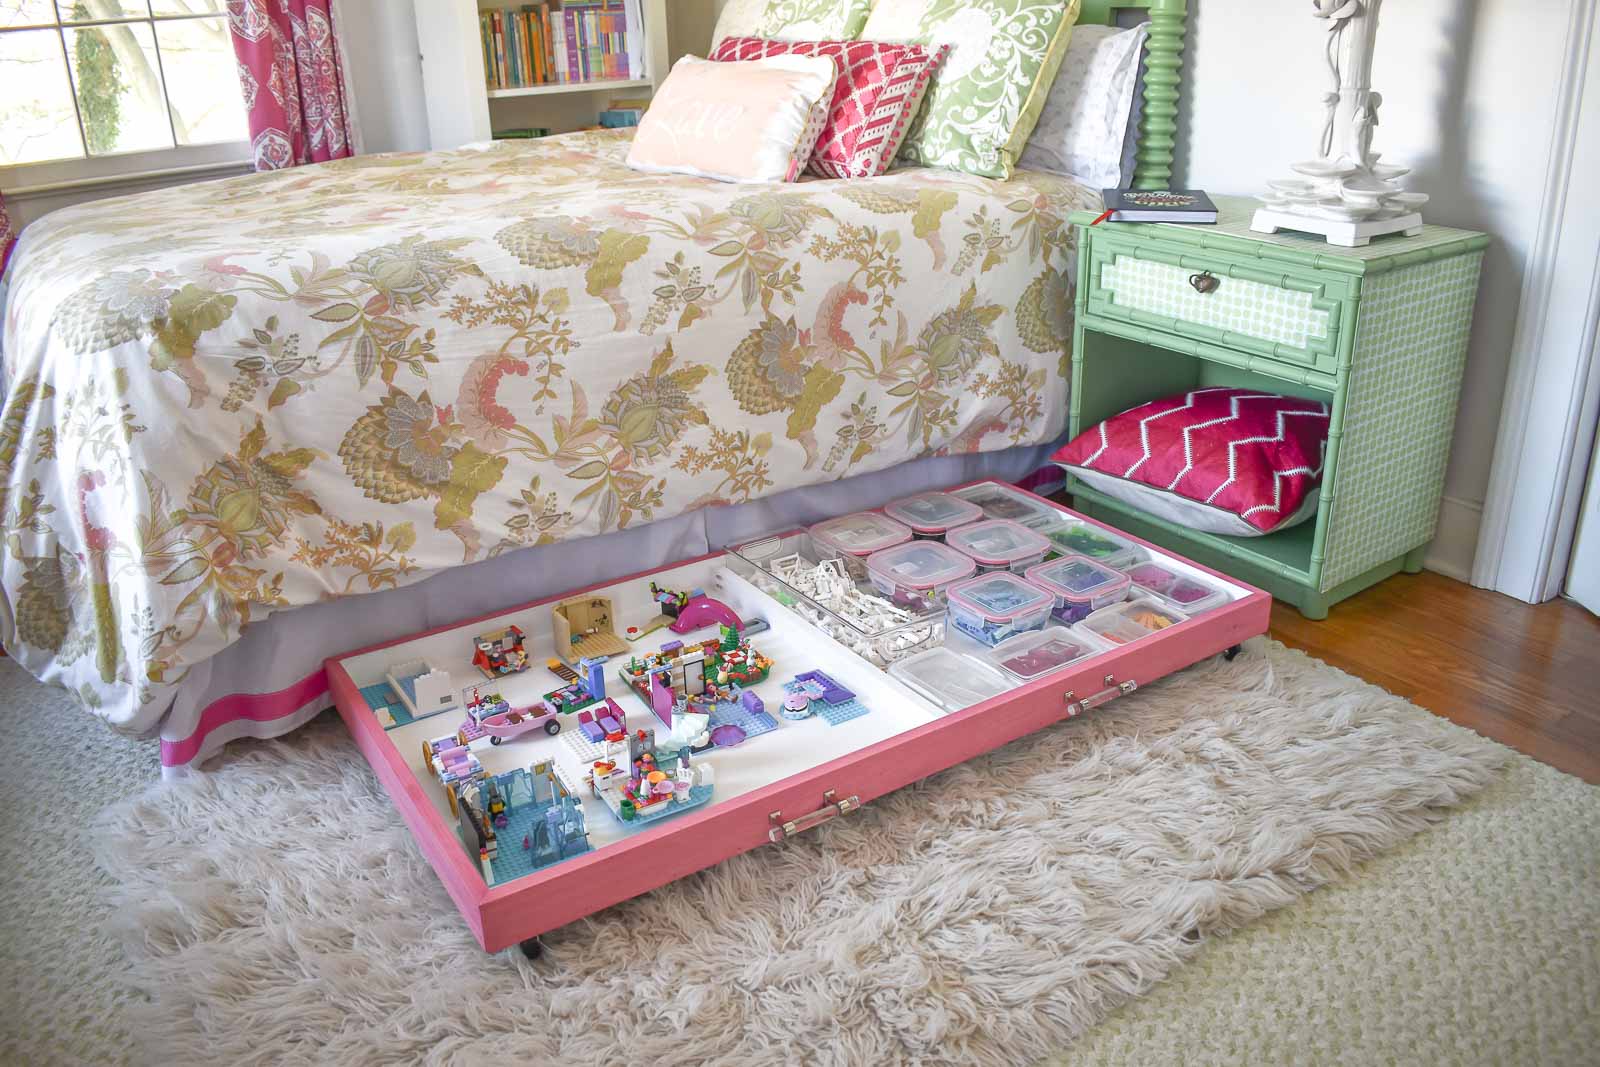
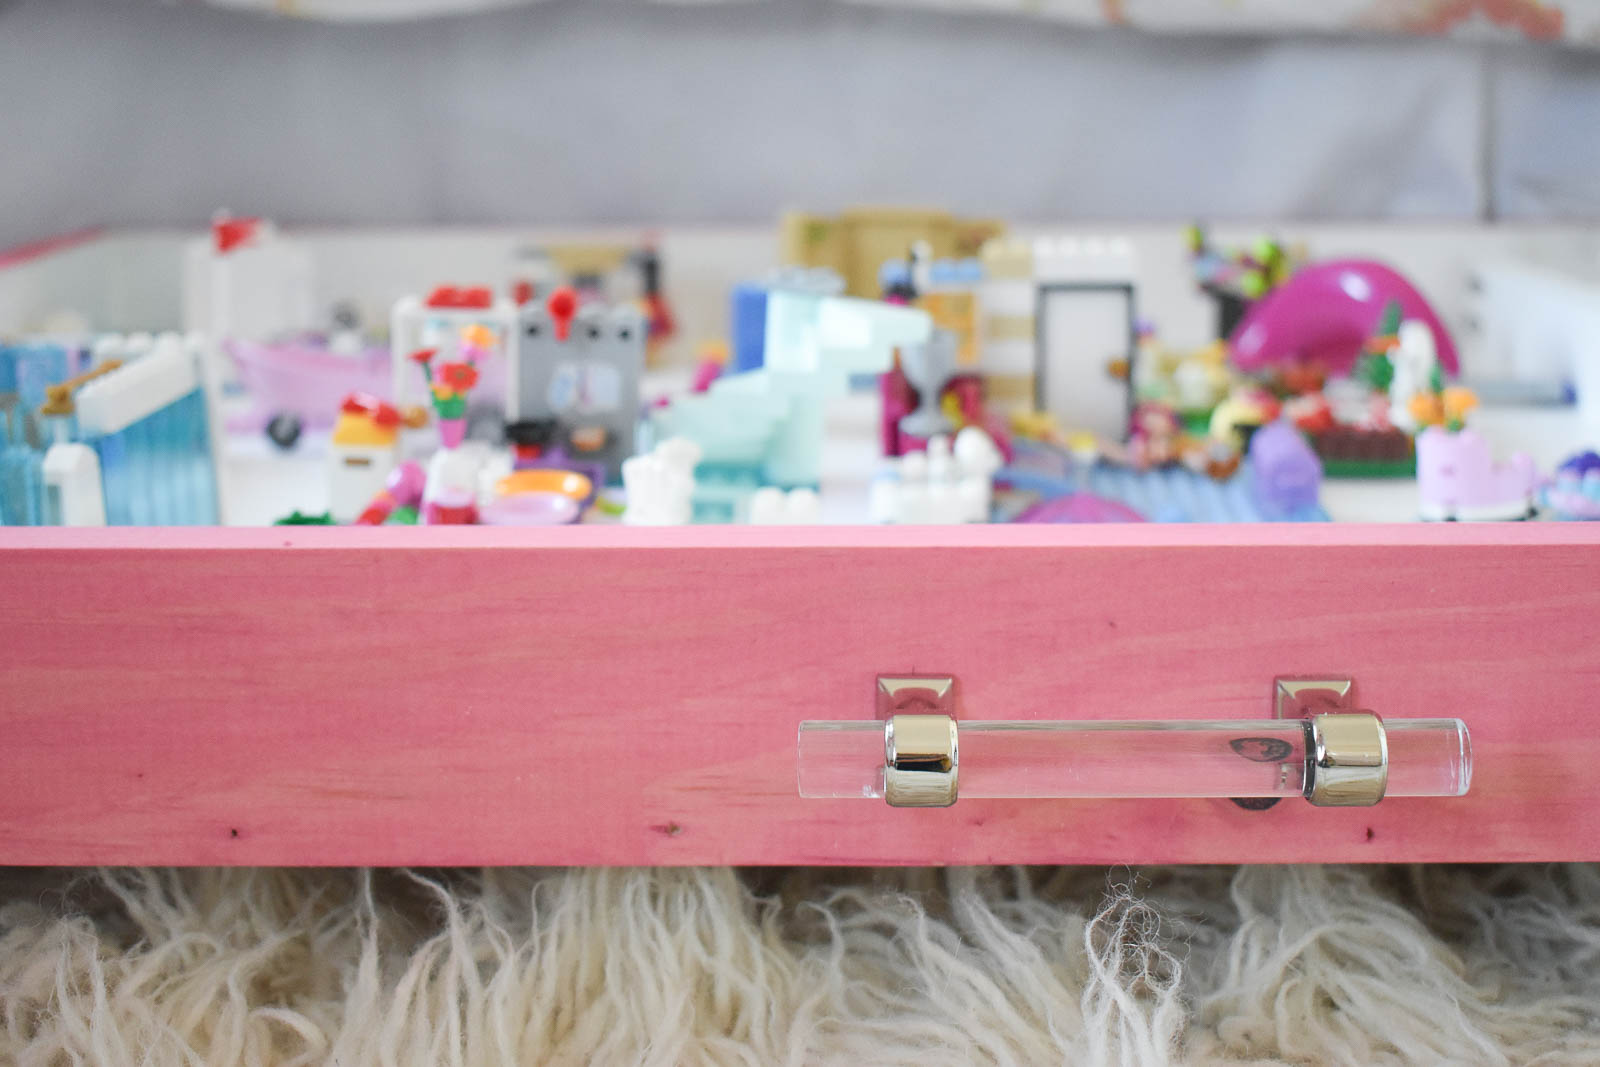
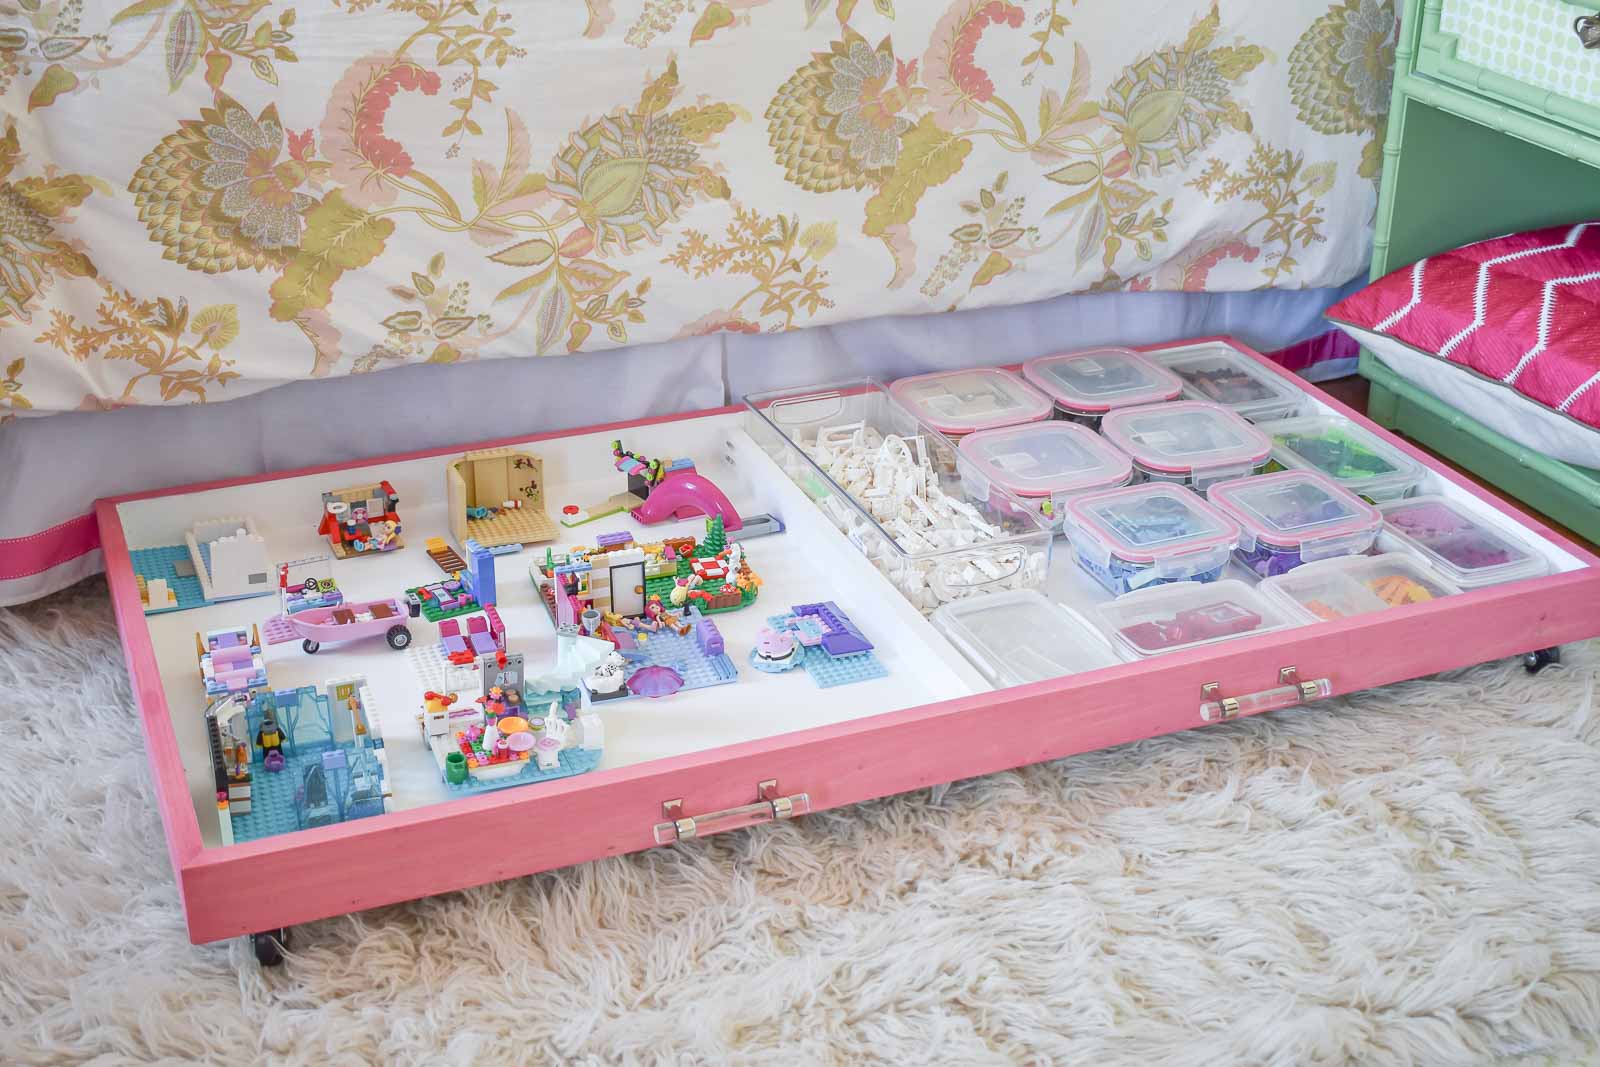
One of the products I fell head over heels in love with was the Minwax® Water Based Wood Stain in “Perfectly Pink.” PINK! As you know, Eleanor’s room is a plethora of fuchsia and we had a bit of a toy situation going on. I decided to build her a simple storage bin for all her toys and stain it… yep… pink!
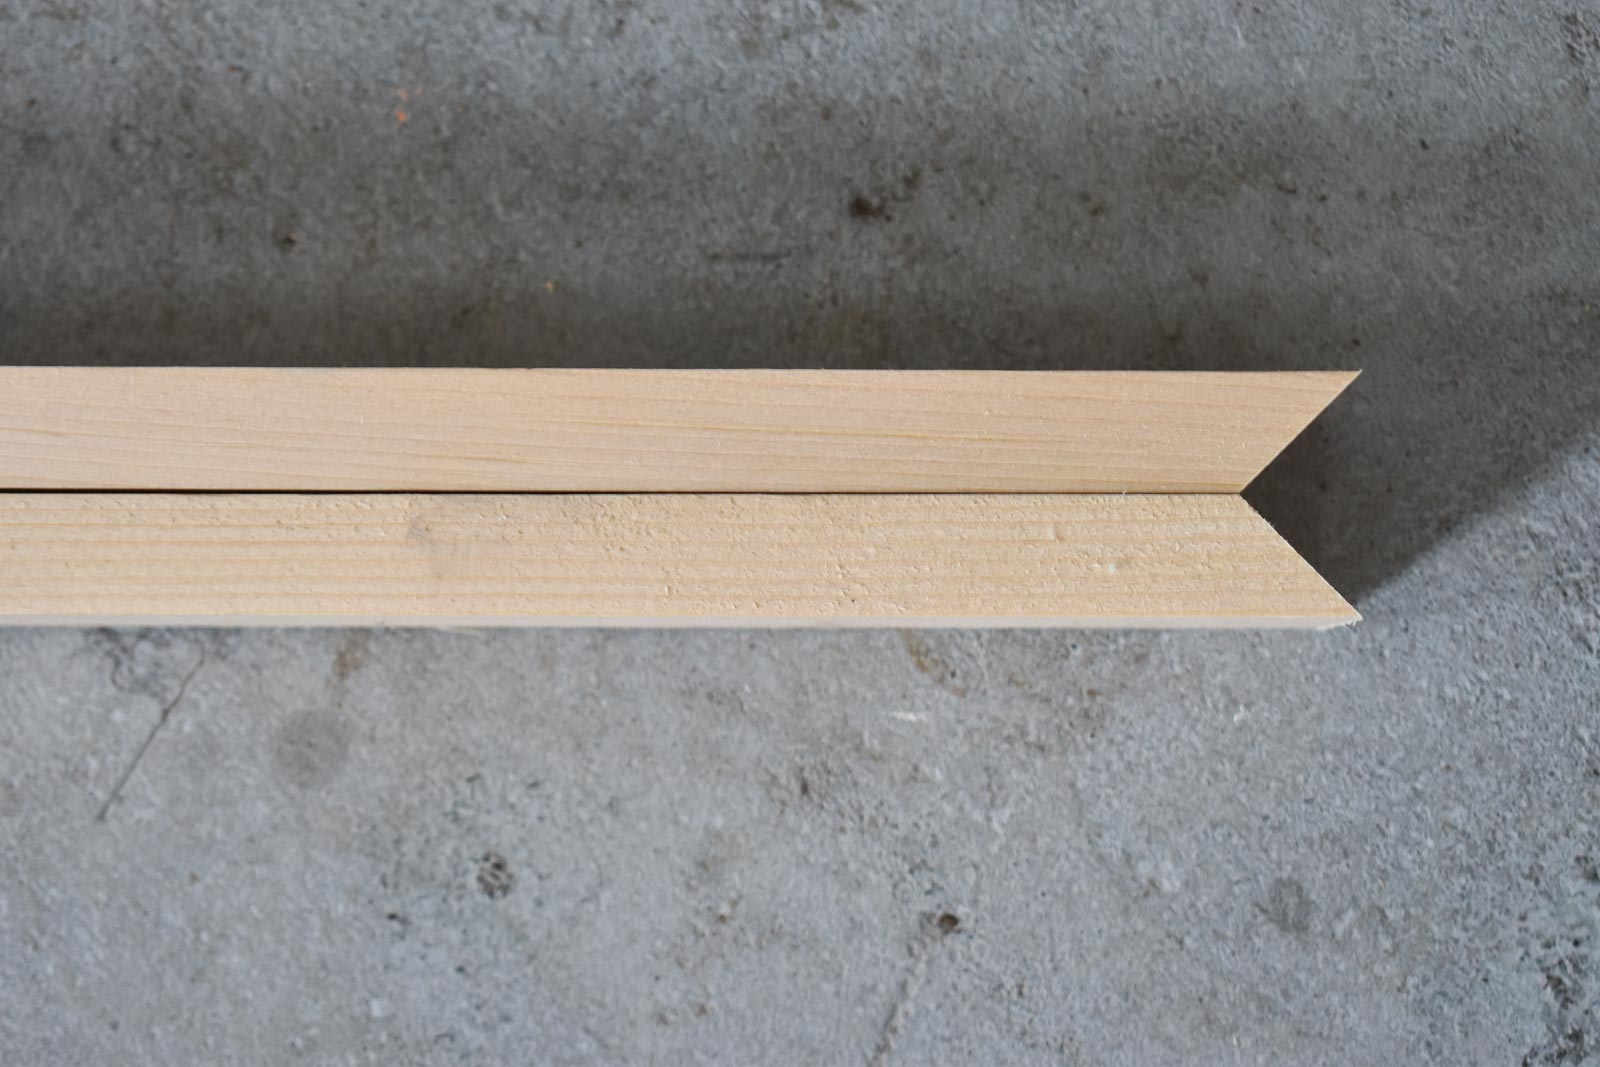
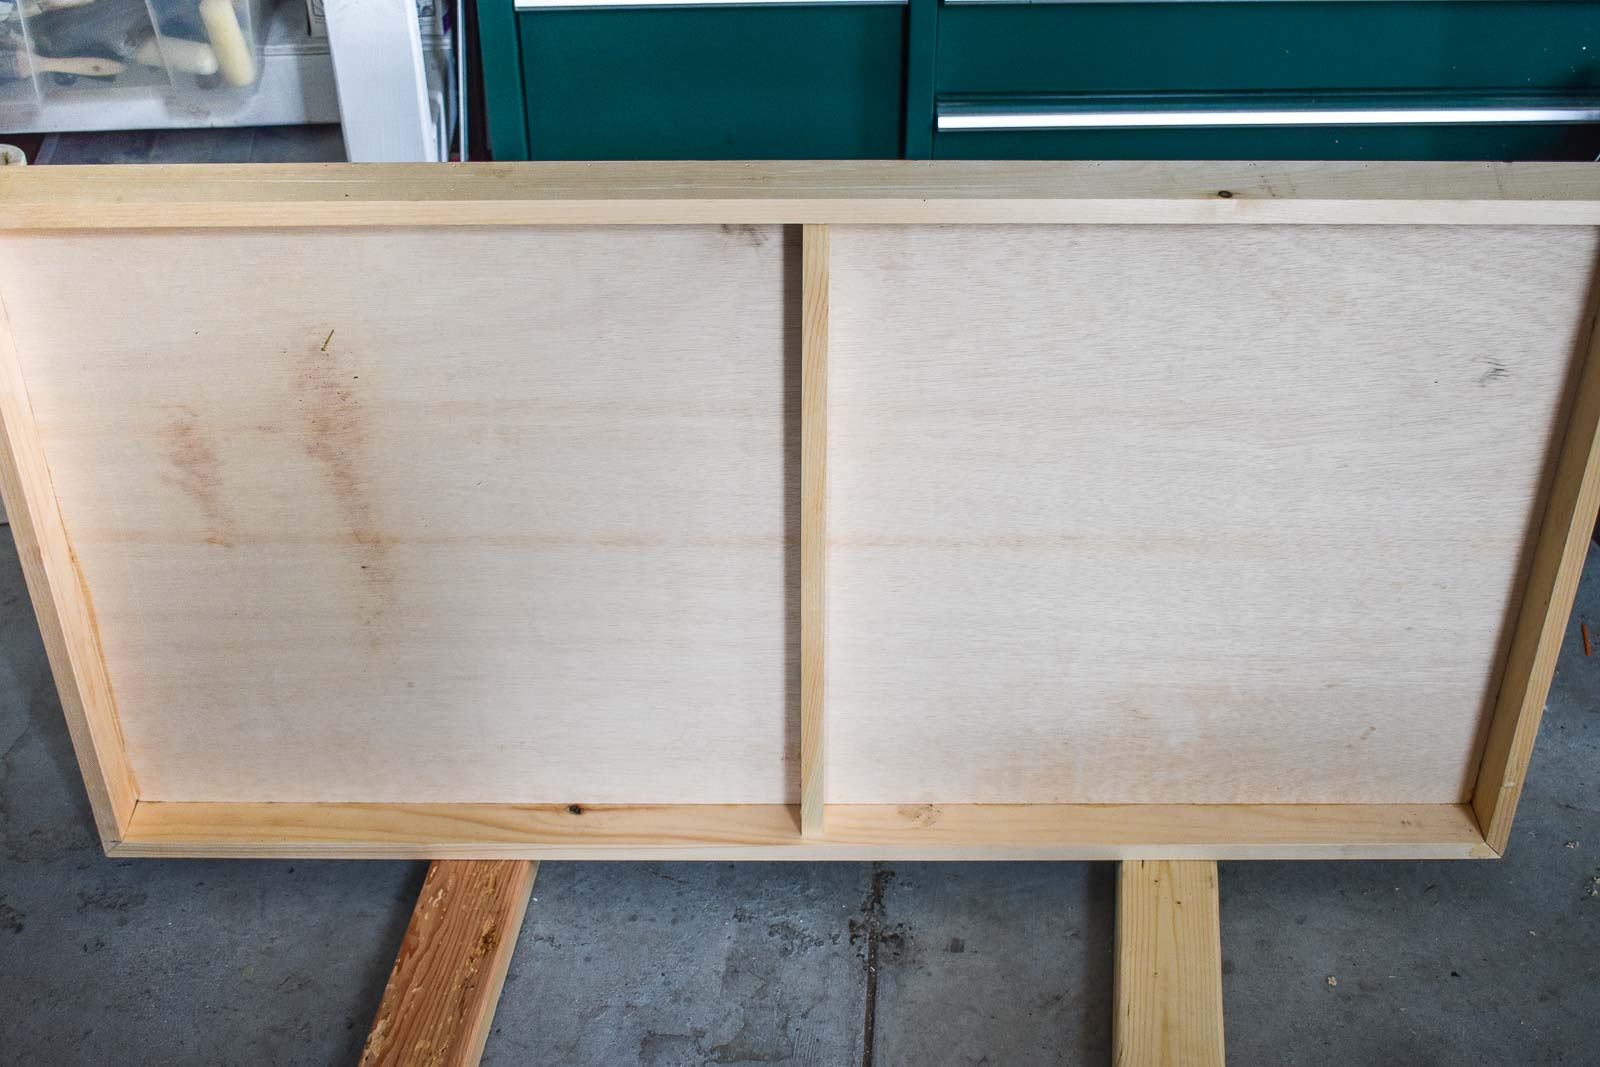
The tray itself is very simple. I used a 3/4″ 2×4 piece of sanded plywood and framed it out with some mitered 1x3s.

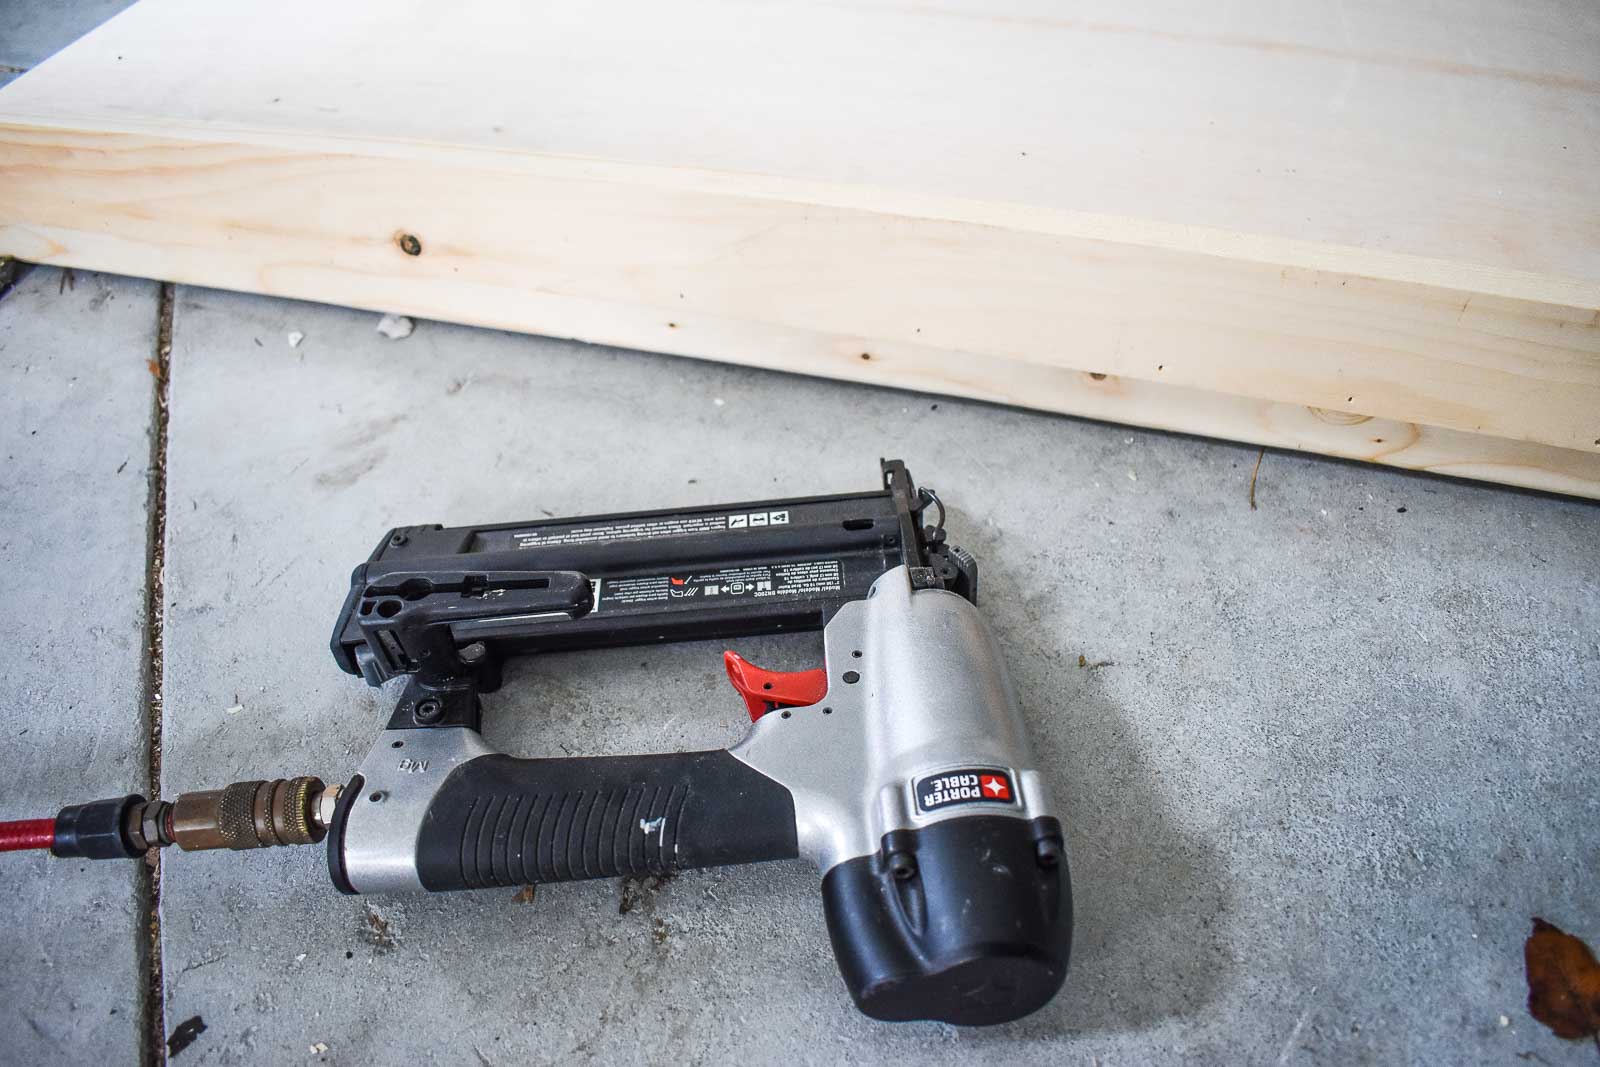
I mitered the corners of the 1x3s and lined them up to the edge of the plywood with wood glue and a brad nailer.
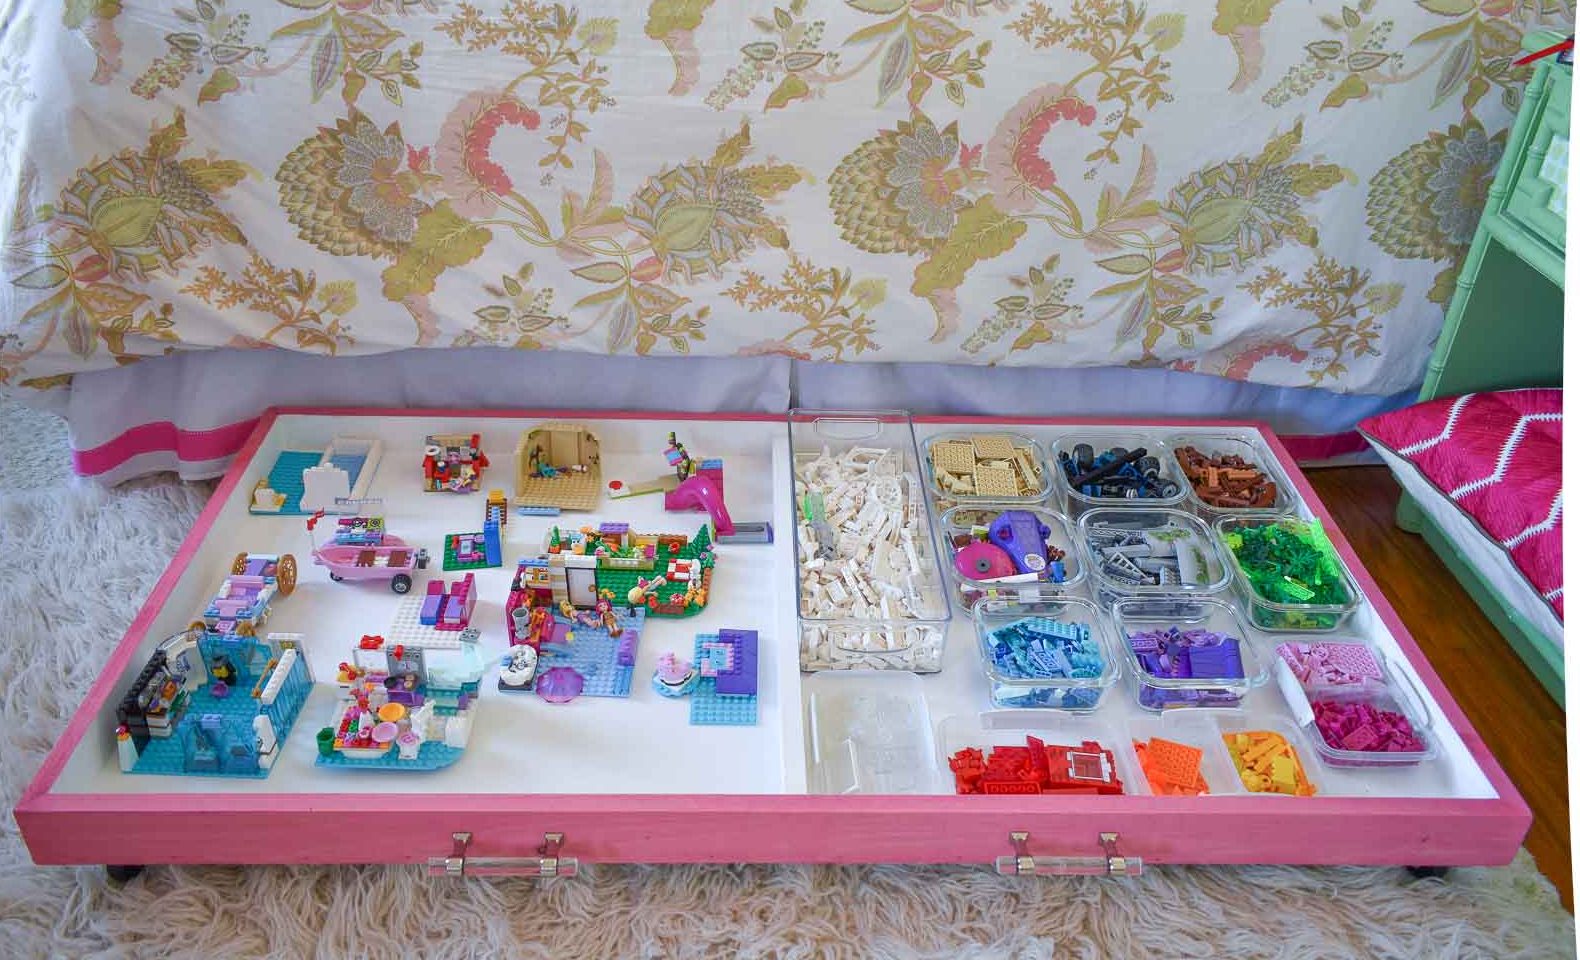
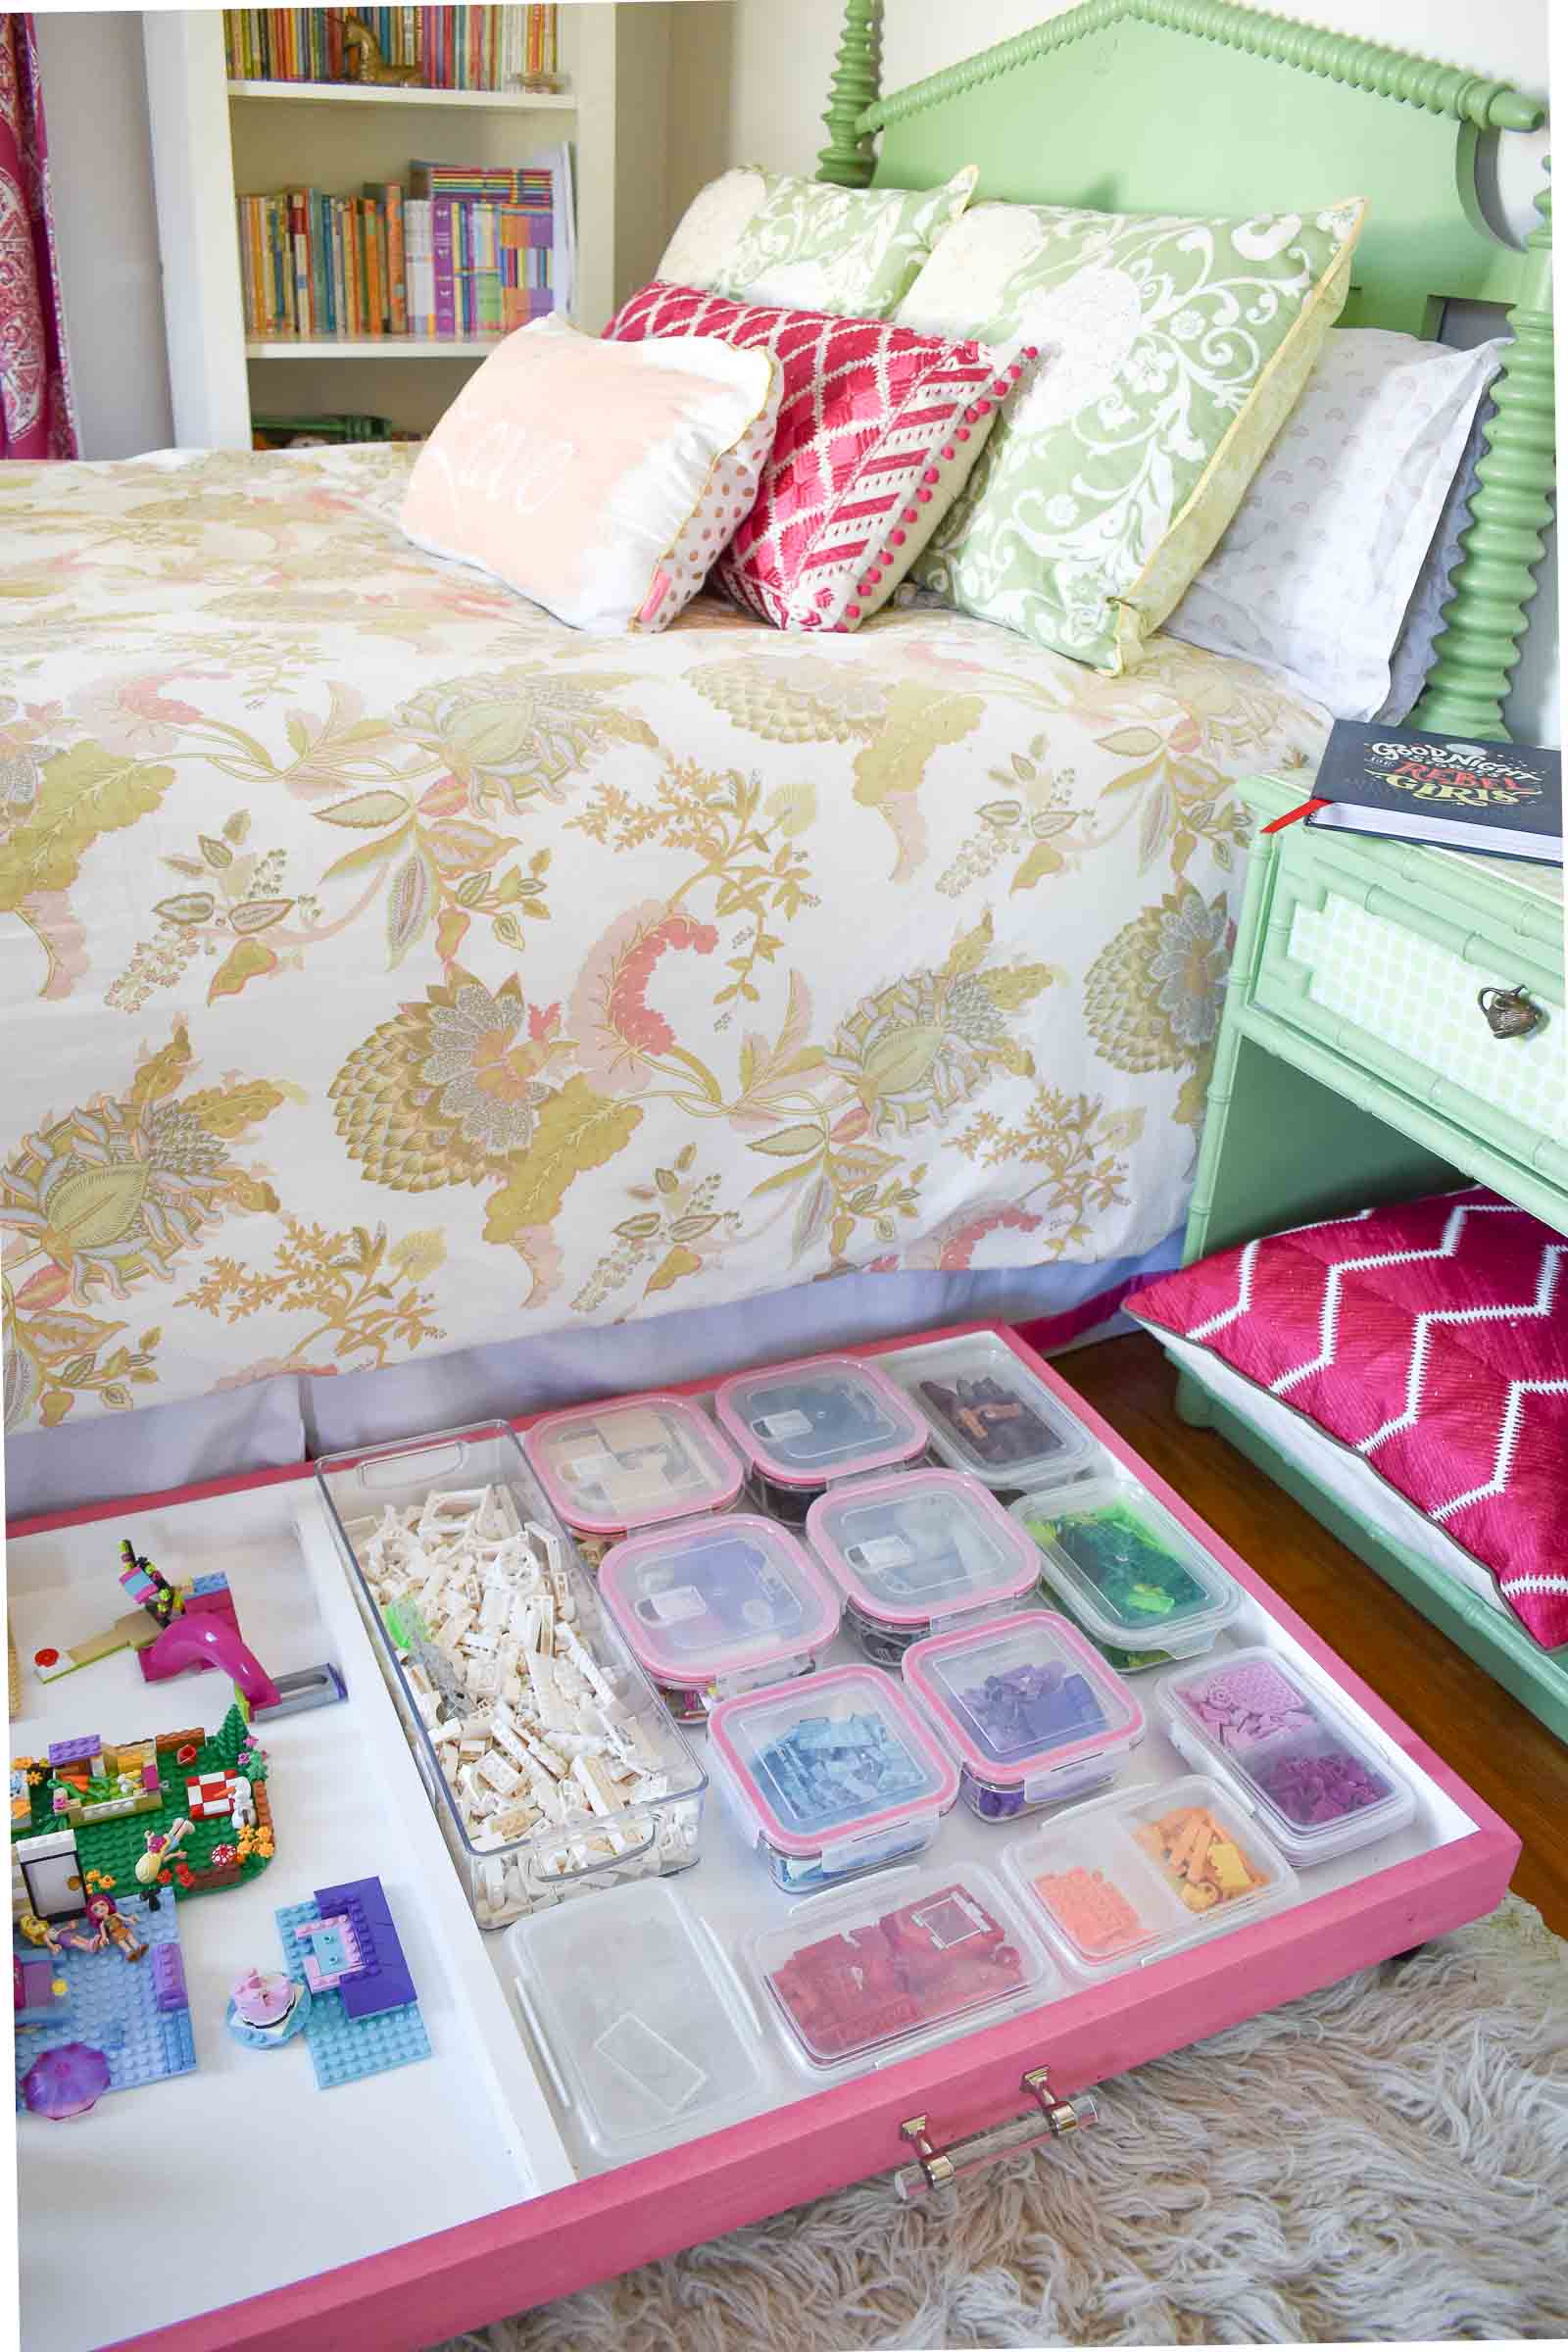
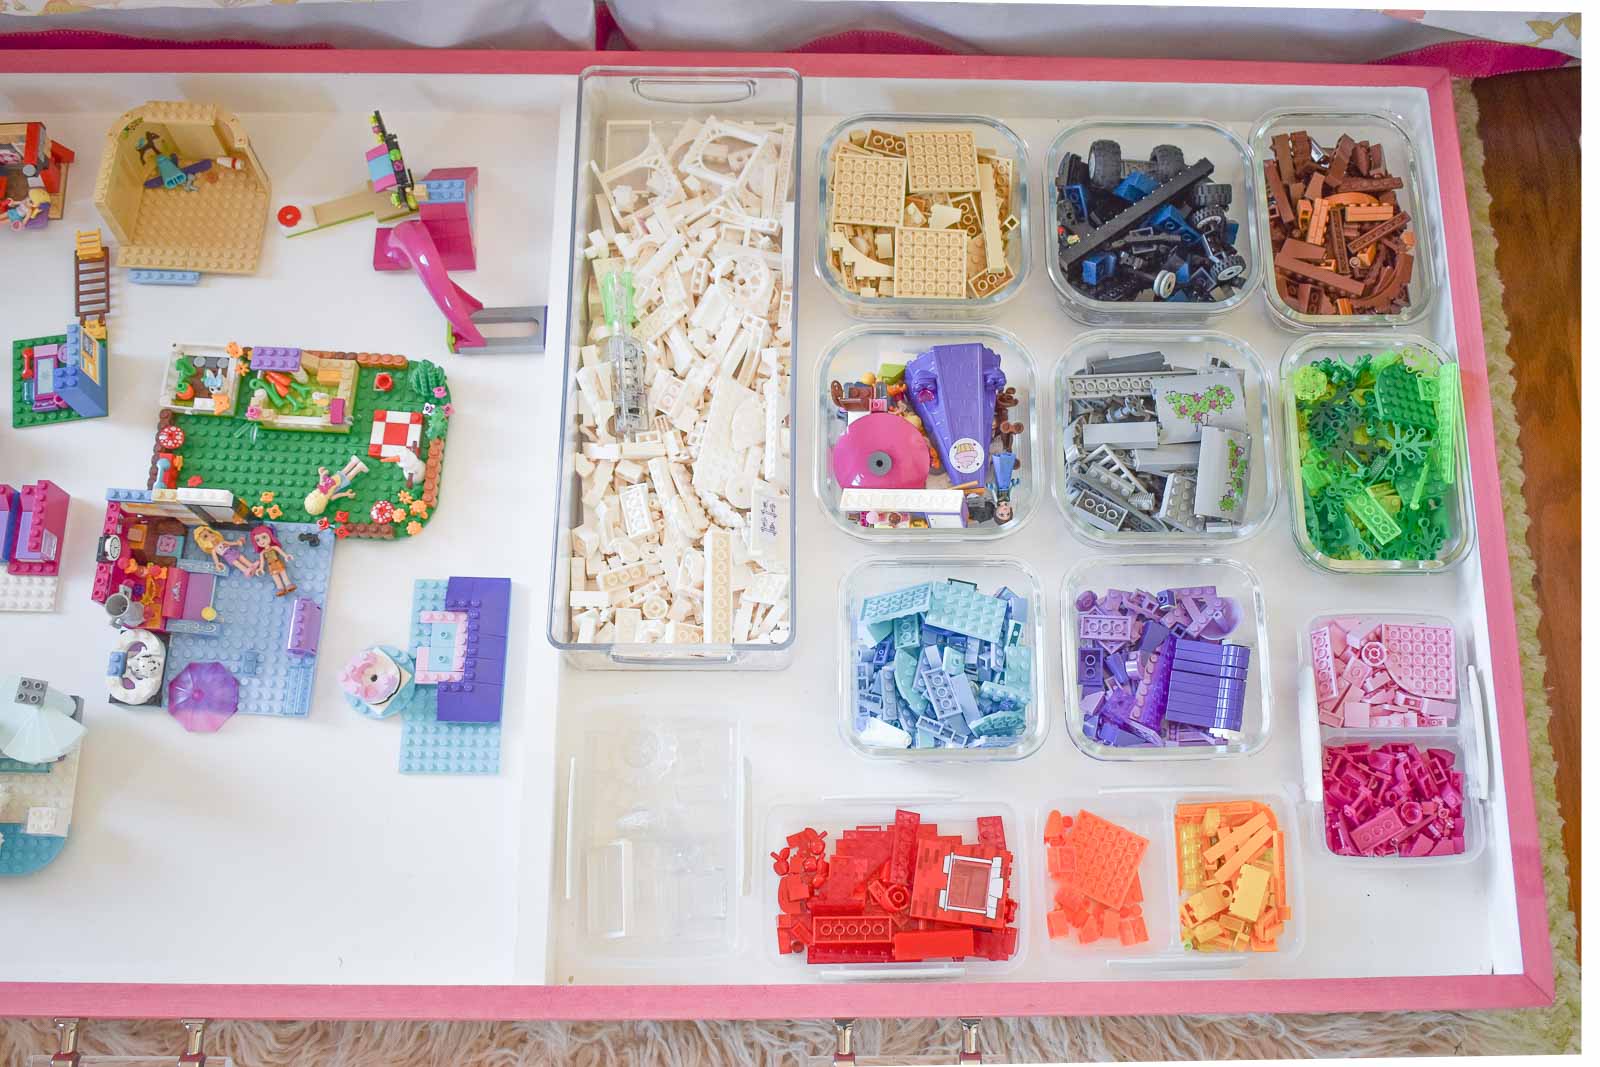
To split the tray into two halves, I glued/ nailed a 1×2 down the middle to act as a partition to help her divide her creations from all the different toy pieces.
I sanded and pretreated the wood to start. The pre stain wood conditioner helps prep the wood so that any stain applied will be a smooth even finish. Since the pink stain is a water based stain, I used Minwax® Water Based Pre-Stain Wood Conditioner.
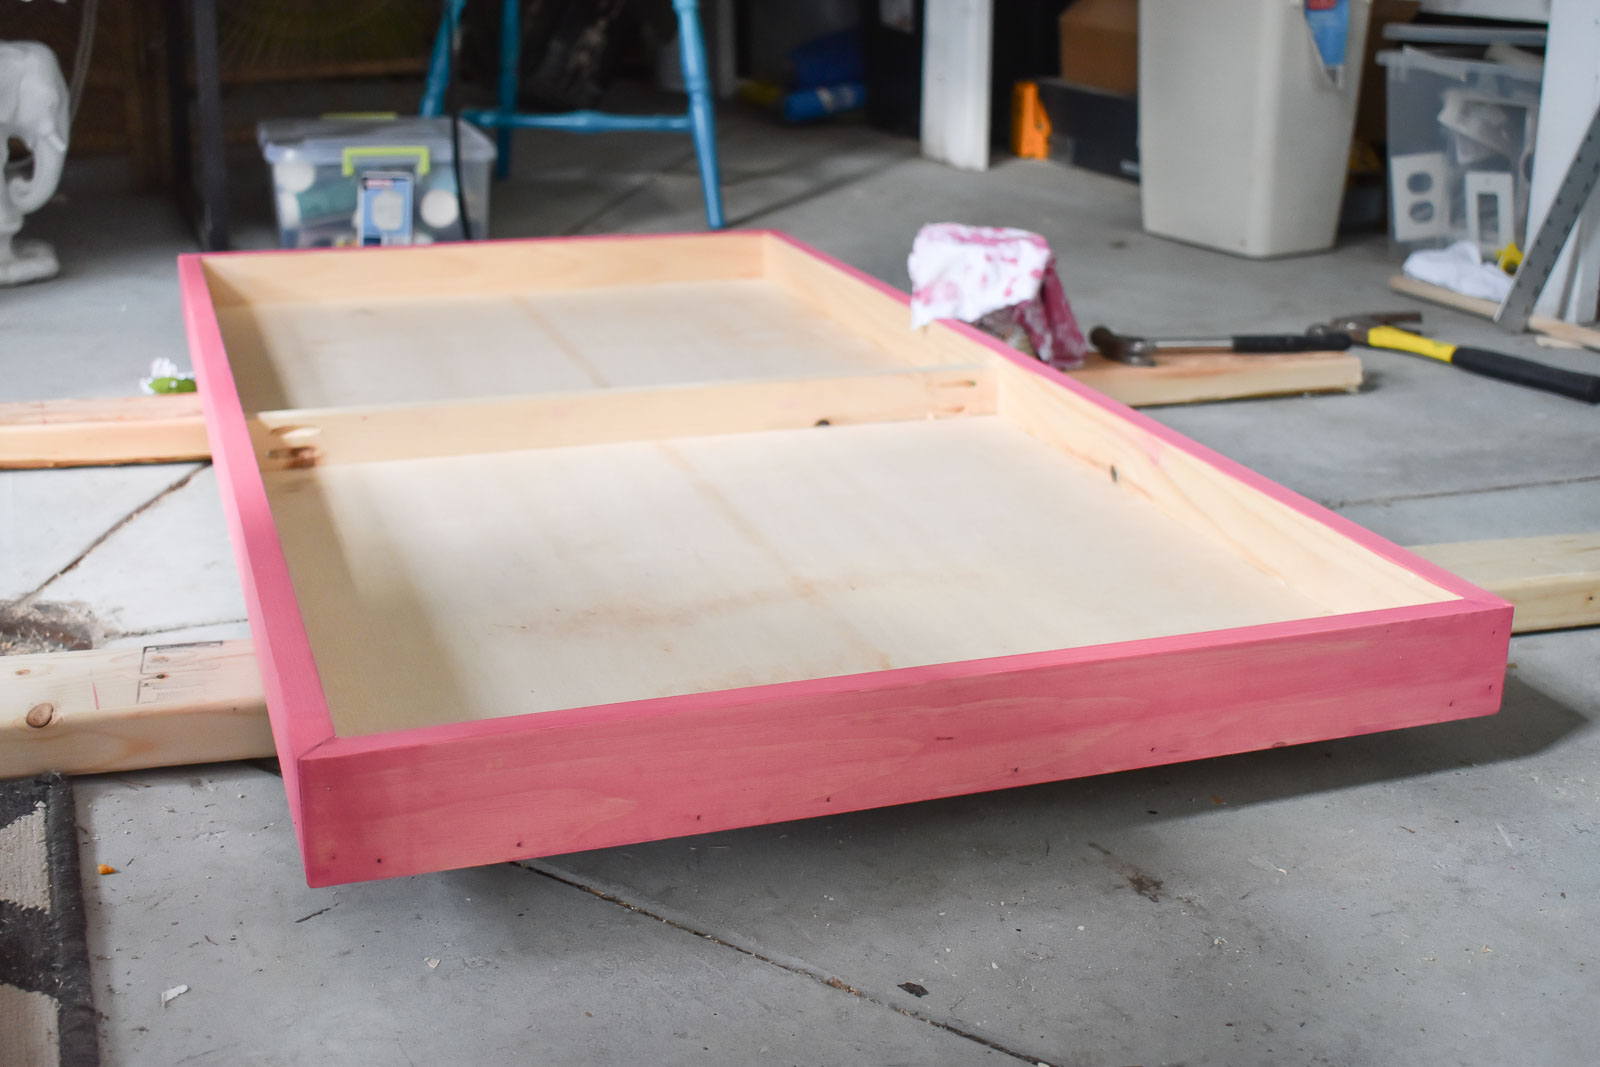
The wood frame of the tray is stained with the Minwax® Water Based Wood Stain in “Perfectly Pink.” I brushed on the stain with a synthetic brush, and then wiped off any excess with a cotton rag. To finish, I went over the stain a day later with a flat finish Minwax® Polycrylic® Protective Finish to help preserve the stain.
For the inside, I used some leftover white paint to keep the storage area crisp and clean. Casters and 2 lucite handles later… I’m in love.
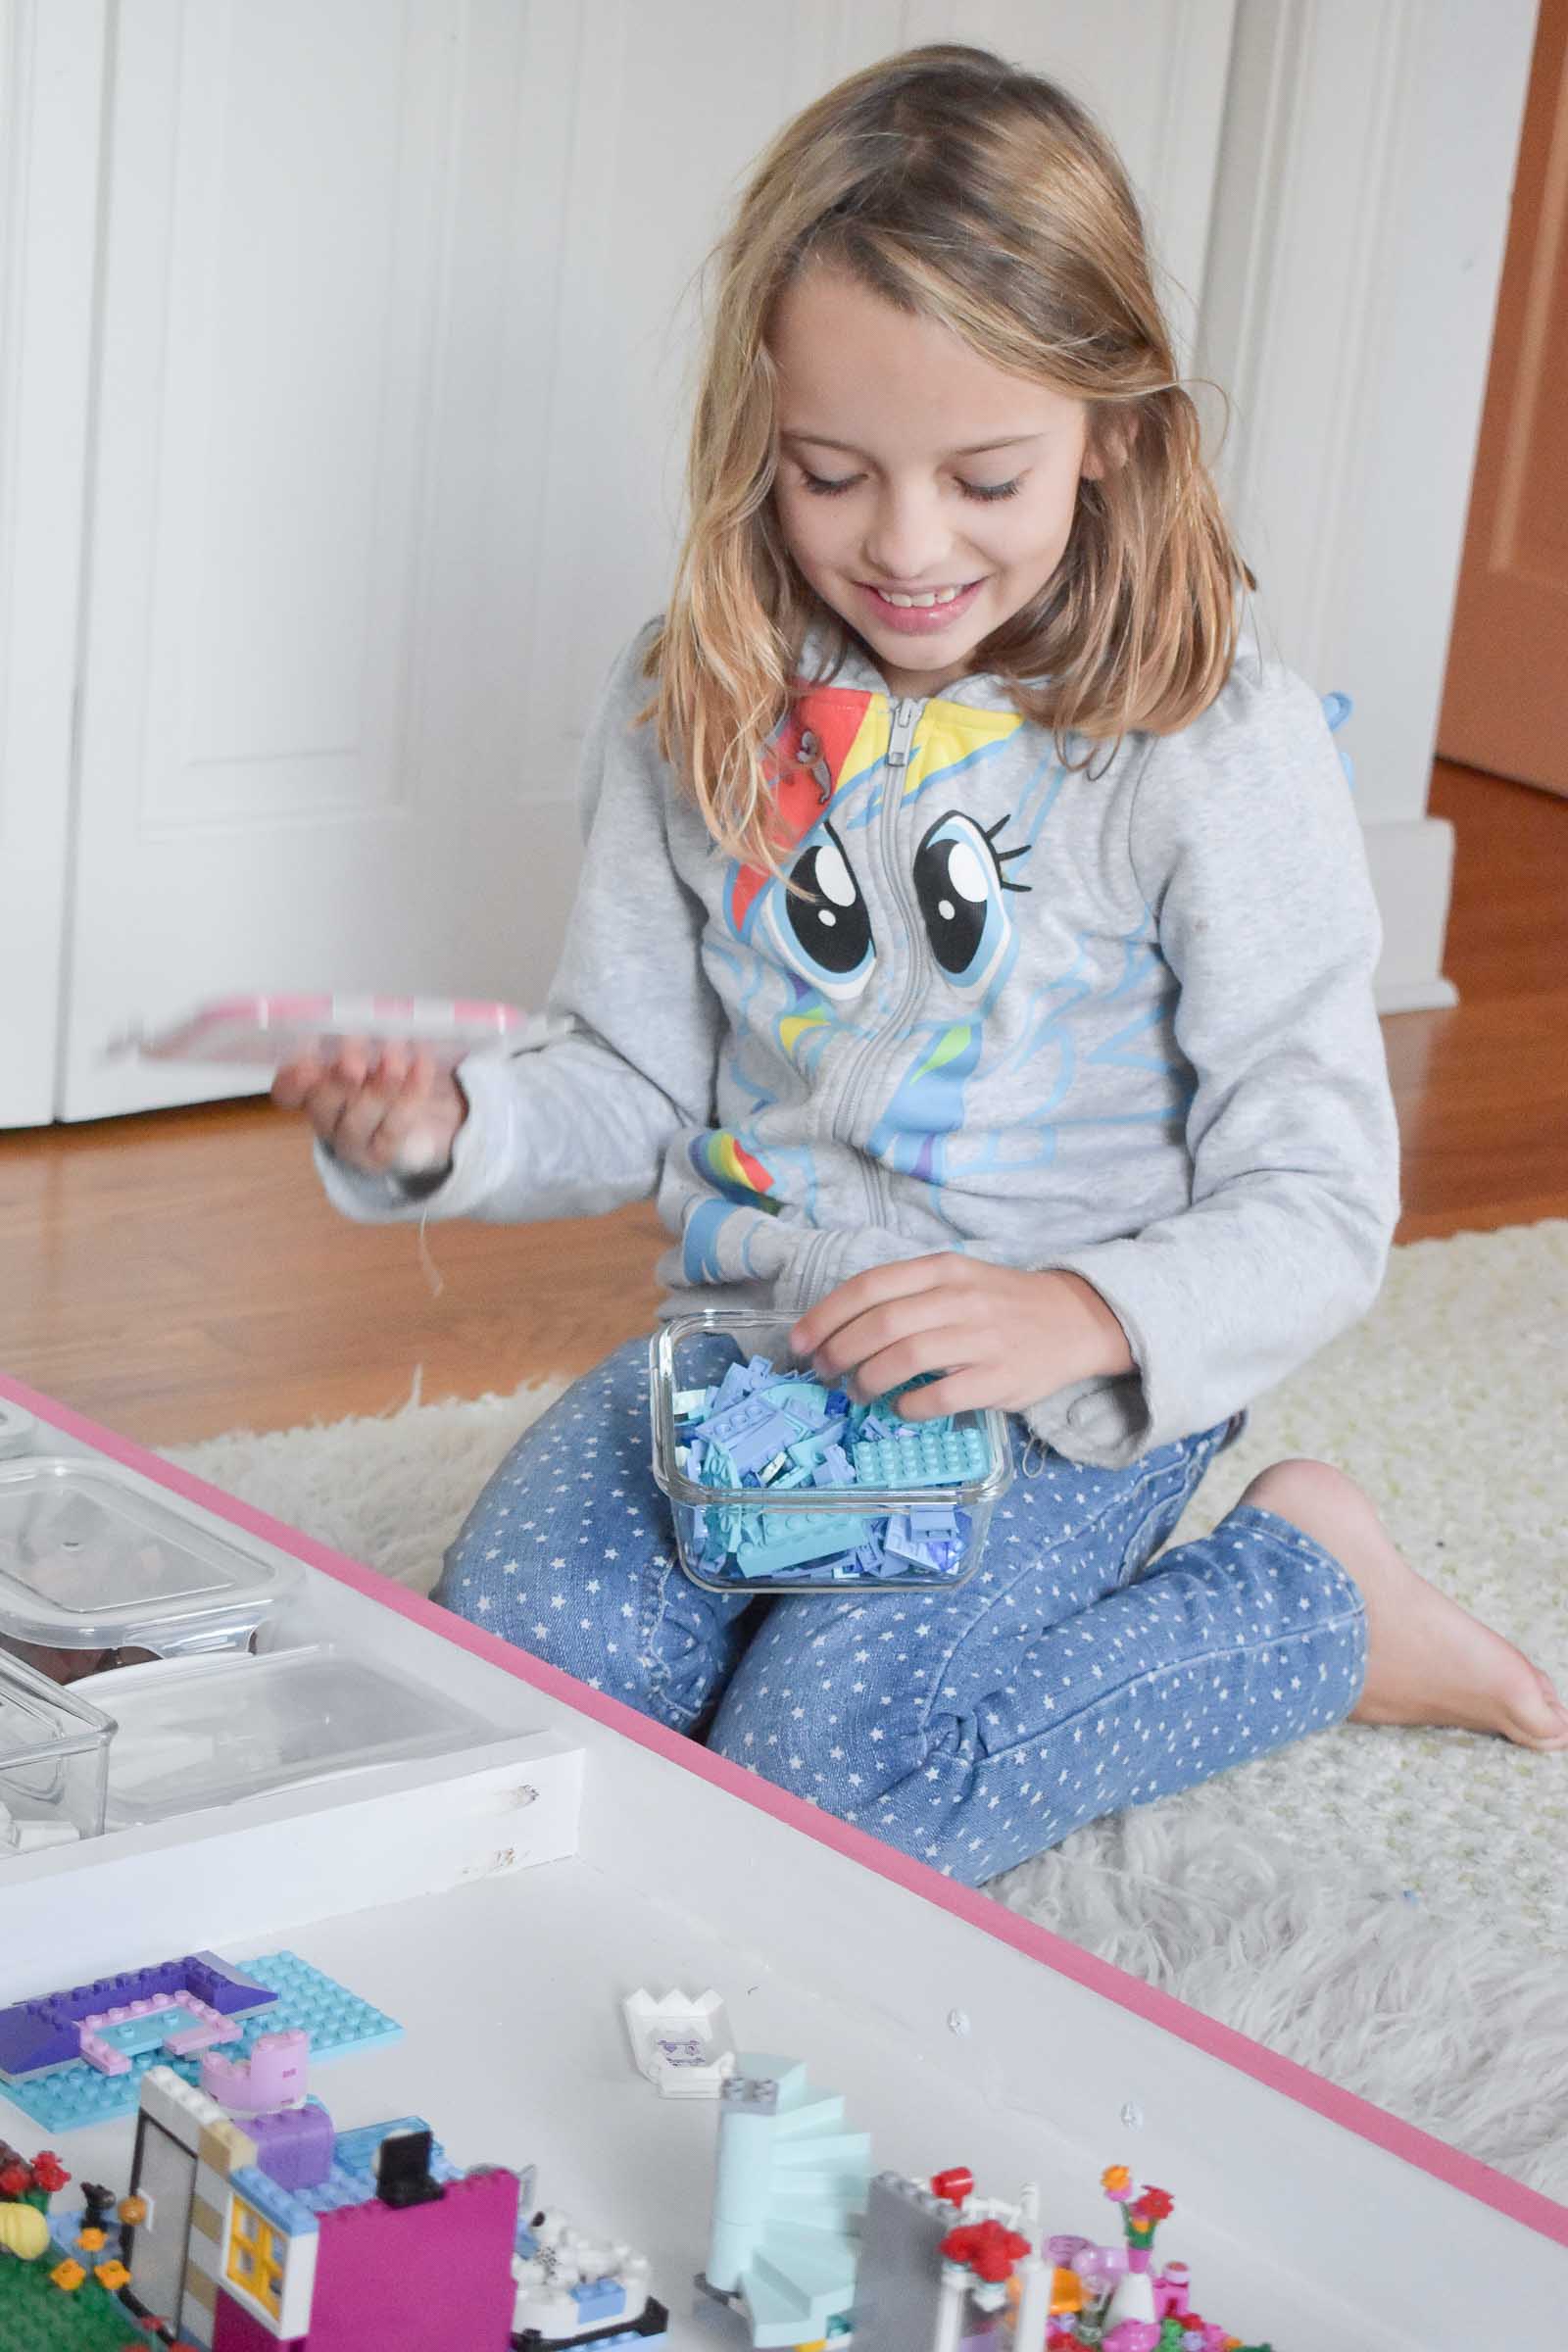
Eleanor is actually VERY organized so I figured I’d give her a head start, and bought her some small plastic containers in which she can sort the various toy pieces. One corner at a time, folks… keeping this house quasi-organized!
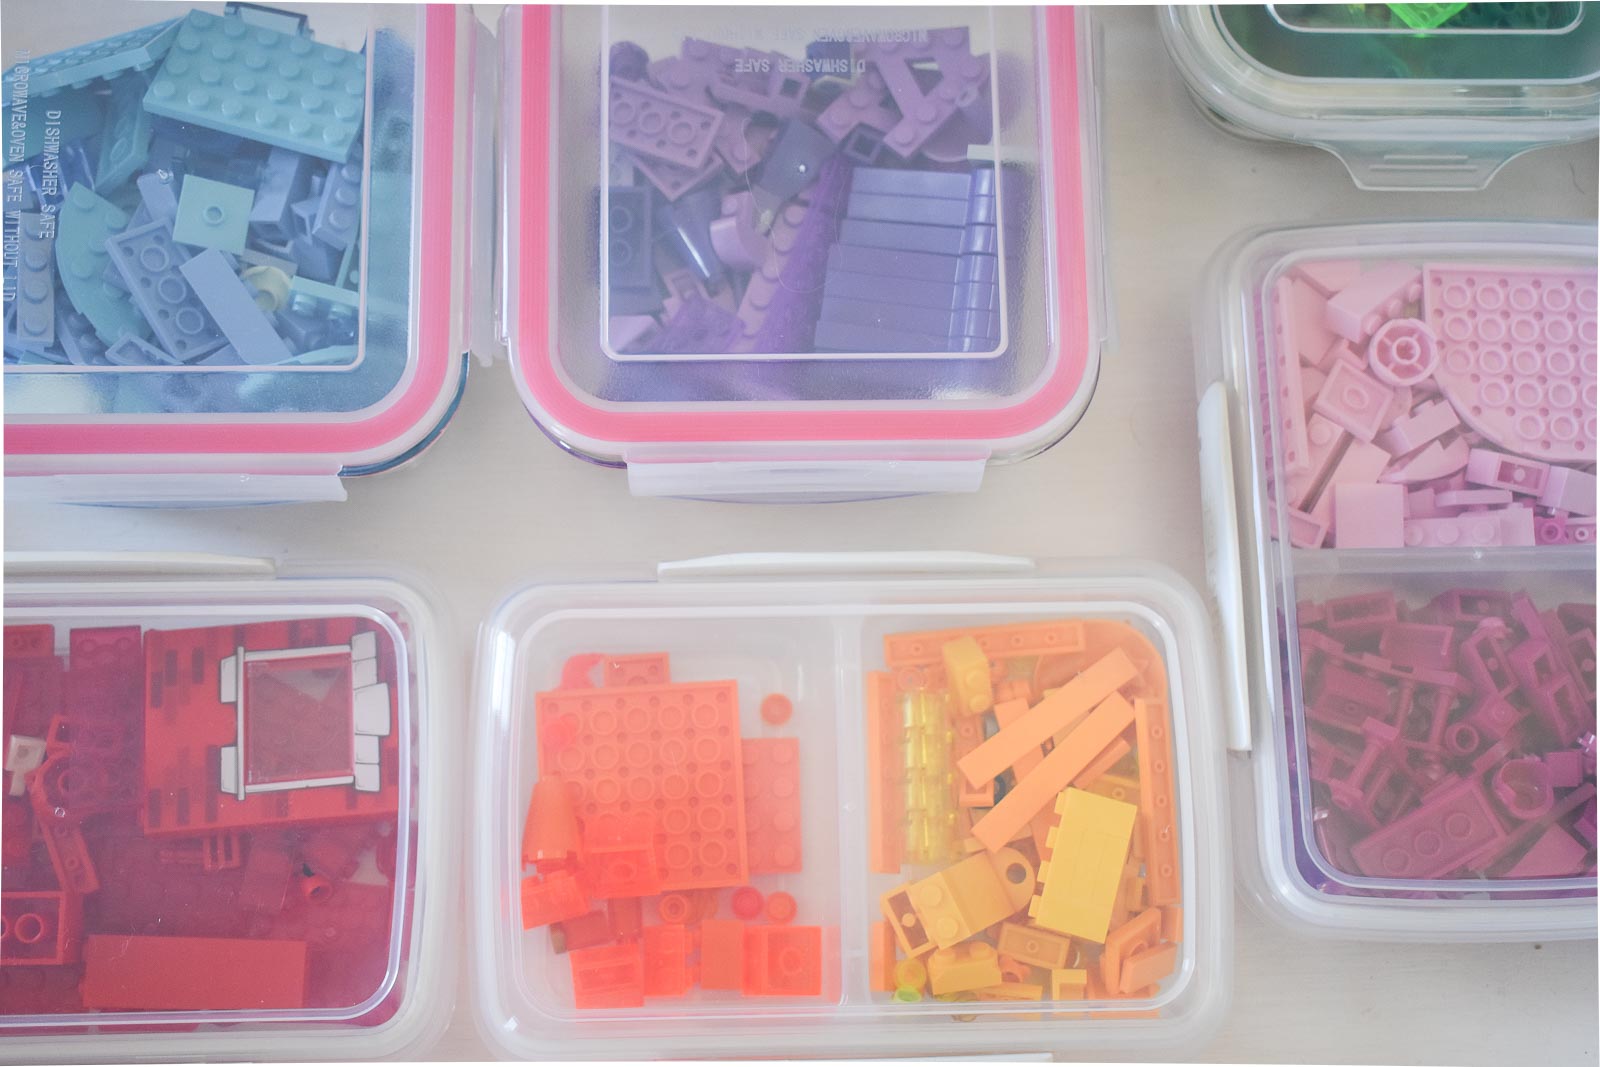
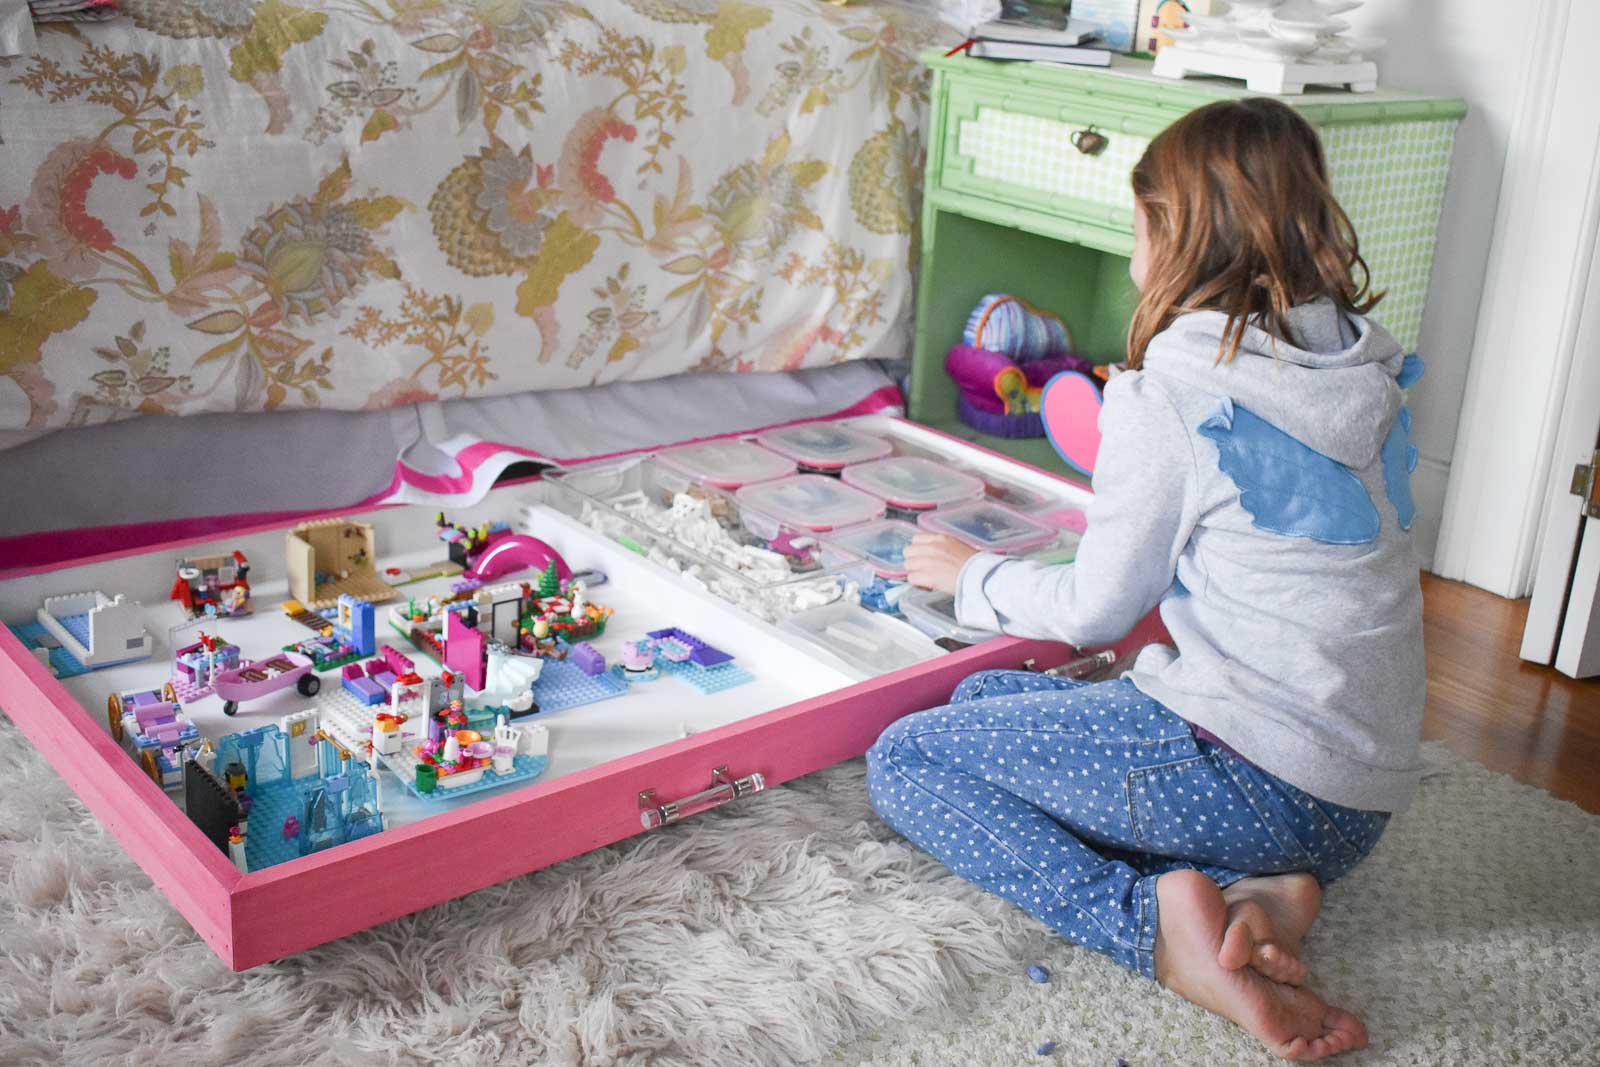
One side of the tray is for the things that she builds and the other is for her spare pieces. I’m not sure whether it will be easier for her with or without the lids, but I love how pretty all the containers look with their rainbow toy pieces!
I was able to use three 1x3s at $3 each. The plywood is about $10. A pack of four casters was maybe $3 and each handle was about $4. I could have used simple grocery store containers, but instead I got these ones that were all about $3 a piece. Doing the math… that brings the whole project to about $50. I know that’s not super cheap, but… the alternative is a dresser or a file cabinet and this is just too perfect not to love!
You can see more great DIY projects from Charlotte on her blog: At Charlotte’s House. Her design style is fun, frugal, repurposed eclectic and she like colors and whimsy and brass and rattan. You can also follow her onFacebook, Instagram, Twitter and Pinterest.